Accuro EMR Guide for Patient s Medical Home
|
|
|
- Ralf Cooper
- 5 years ago
- Views:
Transcription
1 Accuro EMR Guide for Patient s Medical Home Contents Introduction... 4 Patient s Medical Home... 4 Foundation for Success - Commitment to Standardization in the EMR... 5 Help Files... 6 PMH Resources... 6 TOP Accuro EMR Videos... 6 Panel Identification... 7 Patient Panel Definition... 7 Panel vs. Caseload... 7 Panel Resources... 7 Demographics... 8 Basic Demographic Information... 8 Confirmation... 8 Central Patient Attachment Registry (CPAR) Configuring Status Producing a Provider s Panel List Initial Panel Clean-Up Bulk/Batch Actions Panel Maintenance Panel Management Approaches to Panel Management Opportunistic Outreach Registries (Cohorts) Panel Management: How to Get Started Preventive Screening Care Disease Management Management of Patients with Complex Health Needs Tools for Panel Management Version December
2 Charting for Team-Based Patient-Centered Care Medical History View (Encounter Notes) Quick Patient Summary Scanned Documents Manual Entry of Lab Data Searches/Queries Getting Started Follow-up Clinical Decision Support: Population-wide point-of-care reminders Individual Patient Alerts Tracking Panel Management Processes Preventive Screening Documenting for ASaP CV Risk Calculation Lifestyle/Modifiable Risk Factors (ASaP+) ASaP Program Participation ASaP EMR Extraction Methodology for Schedule B Exclusions/Exemptions ASaP Searches - Examples Searches for ASaP Maneuvers Offers of Screening in the Patient Chart (Location) Examples of ASaP Queries (based on completed screens) Disease Management Beneficial Searches for Disease Management Chronic Disease Management Problem Lists Care of Patient with Complex Health Needs Patients Collaborating with Teams (PaCT) PaCT Resources PaCT Processes PaCT Pre-work Identify Phase Prepare Phase Plan Phase Manage Phase
3 Measurement Confirmation/Validation Rate Screening Rate Based on Completed Screens Calculating a Screening Rate Based on Offers of Screening Care Disease Management Rate Care Planning Appendix A: Care Planning Template(with prompts) Appendix B: Sample Common Problem Lists/ Diagnostic Codes Lists for Primary Care for standardized EMR data capture Appendix C: Lists of scanned document index words/keywords Appendix D: Calculating Panel and Clinic Confirmation Rates Worksheet Appendix E - Accuro Hot Keys List Appendix F - High Value Efficiency Tips Demographic Status Bar Customization Macros Query Builder (Alerts)-Example of Advance Logic Appendix G - ASaP 2017 Form Instruction for setup and use Appendix H - ASaP Maneuver Data Entry Tips

4 Introduction Patient s Medical Home When an EMR is used in a meaningful way within the Patient s Medical Home (PHM) model it supports effective patient panel identification, panel maintenance, panel management and will enable proactive panel-based care for patients in a practice. Meaningful use of the EMR for Panel & Continuity involves knowing which patients are actively attached to each provider and using this information for scheduling purposes and to monitor supply, demand and continuity with the provider. This work is foundational for success, and must be discussed with the entire practice, arriving at agreed upon policies and procedures on what, why and how data is to be captured and maintained with the EMR. Organized Evidence Based Care for preventive screening is a logical place to start to learn how to use the EMR for panel management, or in other words, proactive panel-based care. Once EMR processes have been successfully implemented for preventive screening, they can be adapted for disease management and care of patients with complex health needs. Finally, Care Coordination processes will leverage those developed for panel, continuity and organized evidence based care. 4
5 Foundation for Success - Commitment to Standardization in the EMR Successful standardization of data entry for improvement or change, apart from leveraging the inherent functionality of the EMR, relies heavily on three people and process principles in conjunction with the use EMR functionality. These are: 1. Team Includes having engaged leadership and inclusive team representation within each clinic or organization; a clinic champion for EMR standardization can be named EMR improvements or changes do not happen in isolation, and require commitment of time and resources for improvement to happen Combining EMR improvement with enhanced use of team, process improvement with a clinical goal in mind and practice facilitation is the ideal strategy in working toward adoption of the PMH Leverage PCN supports where they exist (i.e. Improvement Facilitators, Panel Managers/Coordinators, etc.) Team sets aside time to meet to agree on processes that enable proactive panel-based care and documents them to keep everyone on the same page (e.g., job aid and/or standard operating procedure manual) 2. Data Quality Data Standardization for the main areas of data input, the entire clinic team should discuss and agree upon: o use of fields in a standardized way, create structured exam forms or templates for the consistent capture of patient information; if the team wants to find it later or be able to search a population for the information, it helps to know where it was entered and if the EMR search/query tool can search it o utilizing standardized text or macros (common repeated text) whenever possible instead of free text o verification processes to ensure over time that data recording is reliable (e.g., BP is always in the BP field and not in a text box) o job aids for staff to assist with consistent patient data chart entry (e.g.,. scanning and attaching documents to patient charts) o processes to record patient problems with the appropriate ICD9 identifier (highly recommended) See Sample Problem List Roles and responsibilities for charting (e.g., does the person who rooms the patient always chart BP, height and weight). When making changes to information outside of chart notes (e.g.to patient demographics or when making bulk /batch changes) it is recommended that the individual making the change enter their initials in an appropriate area. It is advised that one person or a small group provide direction for patient data entry to ensure high quality in the clinic and minimize data inconsistency. Creating Good in, Good out processes at the practice Documentation of Standard Operating Procedures (Policies, Procedures and Processes) assists a clinic team in having a common understanding of workflow; these should be reviewed periodically 5
6 Communicate with the practice team the linkage between data entry and the ability for a pointof-care reminder (e.g. Notifications, Rules, Alerts, etc.) to function and inform reporting 3. Incremental Change A key recommendation is to take baby steps in EMR changes, especially when it concerns practice-wide point-of-care reminders. These can be managed to make the changes small and sustainable for the practice team Use the simple but effective Model for Improvement method including applying plan-do-studyact (PDSA) cycles to identify and test small incremental changes toward the desired and clearly identified improvement goal When a new point-of-care reminder is put in place an associated, documented people process needs to be developed and implemented; thus making the change effective and sustainable, by embedding it into the work process and clinic culture Help Files Along with this EMR Guide and Videos made available on the TOP website, the embedded EMR Help Files from the vendor can be a great untapped resource with detailed instructions on how to optimize EMR functionality. Additional opportunities exist with many EMRs through the vendor external (community) portals or websites to get technical support or provide ideas to promote future functionality. PMH Resources Patient s Medical Home Patient s Medical Home Implementation Field Kit Patient s Medical Home Assessments: Readiness Phase 1 Phase 2 TOP Accuro EMR Videos Searchable Data: 6
7 Panel Identification Patient Panel Definition A patient panel is a set of patients that have established relationships with a primary provider. There is an implicit agreement that the identified physician or nurse practitioner and team will provide comprehensive, longitudinal primary care. Relational continuity, or an ongoing relationship between a primary provider and a patient, is enabled by a patient identification process. Panel vs. Caseload A panel is the set of patients attached to a specific primary provider. A primary provider is a physician or nurse practitioner mainly responsible for providing comprehensive primary health care longitudinally over time to a panel of patients. A case load is a group of patients under the care of a provider for a limited scope of care. A specialist will have a case load as will some family physicians, general practitioners or nurse practitioners working in the areas of maternity care, women s health and other areas. For example, a PCN has a maternity clinic where family doctors who specialize in obstetrics offer care to low-risk patients during their pregnancy. In this case each family doctor will have a case load of patients not a panel of patients. In another example, a pediatrician is a member of a PCN. The pediatrician may have a handful of patients for whom she provides their comprehensive, primary care but for most of her patients she is a consultant and these patients have a family doctor to provide primary care. In this case the pediatrician has a small panel and a large case load of patients. Panel Resources Panel Guide Supportive Tools for Every Panel (STEP) Documents Developed and shared by the Calgary EQuIP (Elevating Quality Improvement in Practice) Team, these documents outline the activities and outputs for panel identification and panel management screening for use at both the practice and PCN levels. STEP Checklist: a summary of the activities and outputs for panel identification and panel management screening in a checklist format. STEP Toolkit: the activities and outputs of panel identification and panel management screening with suggested tools and related links STEP Workbook: for use at the practice level to guide clinic teams through the activities and provide a means to record outputs for future reference STEP Reference Page on the TOP website contains webinars that support the documents. 7
8 Demographics Basic Demographic Information In the demographic area of the patient chart the basic information that is needed for patient panel identification is: Full Name Date of Birth Gender Complete address Phone number(s) Primary provider Patient status (Active or Inactive) o Status Date Confirmation 1 date Alberta Patient Healthcare Number (PHN) Other demographic/attachment fields exist by individual EMR. These other fields may also support patient panel identification and maintenance processes. TOP Website Video: Basic Patient Demographics Confirmation Most EMRs have a designated field for patient demographic data confirmation (also commonly called verification or validation). Marking this field/box indicates that the primary provider attachment, address, phone, and patient status are confirmed and up to date. The field also applies a date stamp so that all team members know when it was last done. Confirmation is a crucial process for patient care. When a critical result arrives at a clinic, it is essential that the patient s contact information is up-to-date so that they may be contacted in a timely way. Calculating the confirmation rate which may also commonly be called verification rate is an important process check that indicates how often patient data and attachment is verified by the team. The confirmation rate calculated over a longer period of time, such as year, should be higher for clinics with established processes than a confirmation rate calculated over a shorter period of time such as three months. A team may choose to calculate a confirmation rate over an appropriate timeframe that will give them feedback on their process improvements. See Confirmation Rate Process to capture patient attachment and confirmation Patients are managed in the Patients area of the EMR. The Patient Status, Office Provider and Verified icon are the three key fields. A yellow X in the verified icon indicates that the patient has not been confirmed. 1 Team members mark a field in the EMR to indicate the basic demographic information and attachment to a primary provider is correct. The name of this field varies by EMR. 8
 To set the Office Provider 1. Click the Patients button on the side bar. 2.")

9 A clinic must have consistent practices with all these fields as it is an important field in the Query Builder (Alerts) in running reports for patient attachment and confirmation. Patient Demographics (attachment and confirmation) To set the Office Provider 1. Click the Patients button on the side bar. 2. Click the Ellipses button to the right of the Office Provider text box. 3. Providers that exist in your clinic are displayed in the search results by default. To select one, click the provider's name to select and click Select. 4. Click Update Patient. To set Patient Status 1. Click the Patients button on the Side bar. 2. Click and select the Patient Status from the list displayed. 9


10 To set Patient Verified Date (Confirmation) Once the button has be clicked this message with appear until check box is selected Once Yes is selected the patient has been verified, the green verified icon and date of last confirmation appear. Query to display/report for confirmed patient attachment Below is a sample query to produce a report for all of Dr. Jenny Jones active and attached patients that have been in the clinic in the last year. 10

11 Confirmation that the last verified date of this attached patients has also been in the clinic in the last year is a manual step than must be done to compare last appointment date with the verified date to ensure an effective confirmation process is being adhered to by the clinic support staff. Finally, click the Update Patient button at the bottom of the demographics page. Central Patient Attachment Registry (CPAR) CPAR is a centralized database that captures the attachment of Primary Care Physician or Nurse Practitioner and their patients. CPAR is a joint project between The Alberta Medical Association, Alberta Health (AH), and Alberta Health Services (AHS). The registry will enable improved relational and informational continuity in primary care across Alberta. Participating providers will have their panel lists submitted through a secure electronic portal to the registry that will look to see if other primary providers are paneling the same patients. Participating providers will receive conflict reports listing names of their patients who also appear on the confirmed panel lists of other providers. Another report will identify when a patient on a provider s confirmed panel has information that does not match the patient client registry, including if the patient is deceased. Teams will confirm at the practice that a patient is attached to a provider and record this in the EMR. What CPAR can do is verify that patients are not attached to other providers. When a patient appears on a provider s conflict report, it signifies that the patient has been attached to another provider s panel outside the practice and it will need to be addressed with the patient to confirm which provider (of those they are paneled to) they wish to consider their primary provider. Five Key Changes in Behaviors at the Practice 1. At every interaction ask who the patient identifies as their primary provider 2. Record it in the EMR & Date Stamp It 3. Maintain & Review the panel List 4. Utilize the panel list to plan care delivery 5. Submit the Panel List to CPAR TOP Website CPAR Link: 11


12 Configuring Status Many EMRs have the ability for a system administrator or user to customize patient statuses for the practice in addition to what is available in the EMR at Go Live. This will allow the practice to specify various types of active and inactive patients in patient lists, reports or for setting up population-wide point-of care reminders. Creating New Statuses Steps to Add a new Status 1. Select a Test Patient. 2. Press F8 to open the Patient Status History window. 3. Click on the pencil icon to open the Manage Patient Status window. 4. Click on the green plus icon, which will add a row to the end of the status list. 5. Double clicking in the Status column allows naming the status. 6. Clicking on the Color column allows selection of a colour unique to that status. 12
13 7. Use the Up and Down arrow icons to order the status list as desired. 8. Finally, click on the OK button to save changes. Accuro has a Patient Status dropdown to capture the patient s current status information (demographics page): this also includes validating which physician is responsible (Office Provider) for the patient s care. The chart is date stamped (Verified Last) and this date appears in reports when a patient list report is generated from a built-in report (not recommended) or a custom reporting (created with the Query Builder) and/or when opened in a spreadsheet, which can then be formatted as required and saved. Examples of Patient Status Used in Primary Care Status Status Name Additional Information Active Office Patient Active office patient attached to a provider in the practice Specialty Service This patient may be active in the practice but only for a given service (e.g., vasectomy, aesthetic, maternity care, aviation medical, circumcision, IUD). Some clinics give a status to each type of specialty service. Temporary Applied to a patient seeking walk-in care. These patients are not considered part of the provider s panel. New When a practice is still accepting new patients, a patient may not be confirmed as an office patient until after a first or second appointment. Orphaned/unassigned When a provider leaves a practice resulting in an unassigned panel, these patients may be identified. Emergency Department Mainly in rural centres, where a patient record exists for a visit that occurred in ER of a non-clinic patient. Long term care For a group of patients seen in a long term care site but not in the practice. Lapsed or Dormant Some clinics prefer to use this term for patients that are inactive, with no clinic visit in a period of time (e.g., 3 years). They will be given this term during panel clean up or maintenance, until confirmation of attachment can be ascertained. Inactive Inactive Includes formerly active patients with no clinic visits in a period of time defined by the practice, (e.g., 3 years.) Deceased Patient is deceased. Non-clinic patient / Not Our Patient Duplicate or Archive When a patient chart is created but the patient was never actually seen at the practice (e.g. may apply if a new patient made an appointment but never attended or a chart may have been created for lab work received for a non-clinic patient, etc.) When a patient has accidentally been registered more than once and the EMR does not have the ability to merge duplicate records the archived record has this unique status. TOP Accuro Video Accuro Use, Configuration and Verification of Patient Status 4swktsv- 13
14 Producing a Provider s Panel List During the panel identification process the first step is to produce a list of all active patients attached to a provider using the report/search functionality of the clinic EMR. It is useful if the panel list includes the following columns of information: Name (first, last) Gender Date of birth (or age) Last visit date Last verification date (last date the primary provider and attachment were confirmed) PHN or ULI (this will be useful for CPAR 2 purposes) Sorting by the column headers in the panel list in the EMR or a spreadsheet is a quick way to get an impression of: Older patients that may be deceased Patients with no visits to the clinic within the last 3 to 5 years Patients that have never had their attachment or primary provider confirmed ULIs that indicate out of province patient Last Visit Date may assist to identify active patients: o Patients with a visit in clinic during an agreed-upon, predetermined period (e.g., last 3 years) These lists usually create awareness for initial panel clean up. Confirmation of the data produced on the lists with the primary provider and team will help to determine validity of the information. Further panel clean-up is assisted by additional searches in the EMR. TIP: Many EMRs will produce the list with the EMR report/search functionality but also offer exporting the list for further sorting and analysis in Microsoft Excel or Open Office Calc. Basic spreadsheet training is recommended. TOP Website videos Active Patient Panel Active Patient Panel in Last 3 Years Accuro Patient Panel Not in Last 3 Years or Future Appt -4swktsv- 14
 Query Definitions Query Builder Example: Total Count of Patients Query Builder Example:")
 Age: Sorting the list of active patients by age is valuable.")
 producing a list of patients that are attached to a provider will identify")

15 Initial Panel Clean-Up Searches/reports that assist initial panel clean up include producing a list of active patients attached to a provider, with the additional search parameters of: Recommended Accuro Help files: Query Builder(Alerts) Query Definitions Query Builder Example: Total Count of Patients Query Builder Example: Diabetic Patients Not Had an Appointment in the Last 3 Months Using Query Builder Last visit date (e.g. last 10, 5 or 3 years and no future appointments) Age: Sorting the list of active patients by age is valuable. In viewing the list of active patients from oldest to youngest or over the age of 90 years, a provider is usually able to indicate if there are patients on the list who should be marked as deceased No visits to the practice (and no future appointments) producing a list of patients that are attached to a provider will identify patients that registered but may have never shown up to the practice. This search may identify patient charts created but the patient was never actually seen at the practice (e.g. may apply if a new patient made an appointment but never attended or a chart created for lab work received for a non-clinic patient, etc.) Sample Report: Dr. Jenny Jones active patients with appointment date for past 3 years (includes future appointments 6 weeks in future) 15


16 Appointment Type/Reason If the practice uses the appointment type or reason when scheduling visits, searching by this information my produce lists of patients that are not family practice panel patients such as aviation medical or Botox injection Billing code - If the clinic offers specialty services to patients that are not members of the physician s family practice, they may be identifiable by billing code from the Schedule of Medical Benefits o Ask the physicians if there are any billing codes that they routinely use for patients that are not members of their family practice panel Address or postal code - Sorting of active patients by the address/city or postal code searches can be valuable in identifying individuals that may not be part of the family practice panel due to their place of residence; temporary workers to an area may be identified this way Test Patients each clinic has test patients that were created for training or practice purposes, for reporting and analysis; they should not be included in the family practice panels. A common practice for test patients is to use the last name Test. Be sure there are no real patients with the last name Test. 16


17 Does match or Not in criteria in Accuro shows up in red in when building a query. IMPORTANT: The primary provider and/or the practice team need to review the data from reports to ensure that the correct information is being pulled into them. Due to unique protocol at a practice, fields may be used in a specific way and this may impact the accuracy of reports. Bulk/Batch Actions Once a list is produced and sorted, most EMRs are capable of applying a bulk change to the entire list or a group within the list. Making bulk changes makes the process of initial clean-up and ongoing panel maintenance faster and easier. For some EMRs the clinic needs to produce the list and then contact the vendor to support the bulk change. Sample: Patient selection for Bulk Change Depending on clinic workflow possible bulk actions from the Select Action dropdown list that could assist in panel work would be: Set Patient Status, Create Patient Cohort, Assign to Patient Cohort or Assign Flag. Example: Once a report is produced, hold down left mouse key and drag the mouse down or hold alt key and click on each patient row to select. From the Select Action dropdown list select Set Patient Status which opens a Select Status pop up window. Choose the appropriate status from the dropdown and then click OK to make the bulk change. TIP: Carefully verify data with the primary provider and/or care team before making a bulk change. 17

18 TOP Accuro Videos Accuro Bulk Changes n-4swktsv- Panel Maintenance Once an initial clean-up is complete there are several processes that support maintaining a clean confirmed patient panel list for each primary provider. Those processes include: 1. Ongoing phone/address data, primary provider attachment and status confirmation at patient checkin. Developing and monitoring a process for all front desk staff with expectations for data Tip: When checking patient demographics, even if no changes are made, front staff should click on the Update Patient button, as this will date stamp the demographic page with the last date the demographics were validated with the patient. confirmation is recommended. This process can be checked using the EMR reporting (Query Builder). Run a search to produce a list of Active patients with visits in a given period of time (i.e. last 7 days) and determine what percentage of patients was verified during that time frame Example: 3 appointments, 1 not verified, 2 verified 67 % verification rate for the week) 18
 o Patients scheduled for a meet and greet appointment 2.")
19 Standard operating procedures should be in place for front desk staff for: o Patients no longer part of the clinic o Patients not seen in the clinic (e.g., records created for patients where lab work was received or seen at another facility like the local ER) o Patients seen at your clinic but not your family practice patients (e.g., walk-in or temporary patients) o Patients scheduled for a meet and greet appointment 2. Conducting searches at regular intervals and applying bulk actions to patients that are no longer active at the practice. The regularity of the intervals varies by practice. It may be monthly for the first year and then every six months thereafter. Reports that assist identifying these patients include searches by: Last visit date (and no future appointments) Age No visits to the practice (and no future appointments) Appointment Type/Reason Billing code Address/city or postal code Last Name is Test (first be sure there are no actual practice patients with the surname Test) 3. Patient outreach. Some practices identify active patients with no visits in the past 3 years (and no future appointments), prioritizing those overdue for preventive screening care, then reaching out proactively to determine if they are still members of the practice. The outcomes of the outreach involve updating the patient demographics, physician attachment and offers of preventive screening care. See Using Query Builder TOP Accuro Videos Accuro Search Using Billing Code -4swktsv- 19
20 Panel Management Panel management, also known as population management is a proactive approach to health care. Population means the panel of patients associated with a provider or care team. Population-based care (or panel-based care) means that the practice team is concerned with the health of the entire active population of attached patients at the practice, not just those who come in for visits. 3 The Patient s Medical Home implementation element of Organized Evidence Based Care involves embedding evidence-based guidelines into daily clinical practice where each encounter is designed to meet the patient s preventive and chronic illness needs. Setting up population-wide point-of-care reminders supports these planned interactions and EMR functionality supports appropriate follow-up care. Approaches to Panel Management Opportunistic When approaching panel management opportunistically, it means catching a patient while they are in the practice or calling on the phone with a team member, to offer care. For example, a 52 year old female is in the practice for an appointment to inquire about the vaccine for shingles. While in the office her blood pressure is taken and she is offered requisitions for a FIT test, plasma lipid profile, fasting glucose and mammogram because they are all overdue. Methods to identify patients that are overdue for clinical services may involve: Setting up population wide point-of care reminders that alert a team member that a patient is due for a clinical service Setting follow-up or another type of alert at the individual patient chart to proactively set up for the next intervention A team member that combs through the charts of patients meeting certain criteria, who have an appointment, to identify clinical services that are due and marking the chart to indicate this Outreach An outreach method to panel management involves identifying active and confirmed paneled patients overdue for clinical services that do not have appointments and reaching out to offer care. This process involves using the search/reporting tool in the EMR to produce lists of patients. For example, a 58 year old male was last in the clinic 2.5 years ago for a knee injury. The panel care coordinator (PCC) at the practice has run a report that shows this patient is overdue for a plasma lipid profile, a FIT test and a fasting glucose. The PCC phones the patient and confirms that he is still a patient of the practice attached to his paneled physician. * As per clinic protocol, the PCC makes an offer that the patient can come by the clinic and just pick up the lab requisition to get the overdue screening done and the clinic will follow-up as necessary. The patient agrees. 3 Module 20. Facilitating Panel Management. May Agency for Healthcare Research and Quality, Rockville, MD. 20

21 *Note: such protocols vary from practice to practice. It is an important process that must have provider agreement before implementation. TIP: It is recommended that a practice initiating outreach complete panel identification and maintenance processes first then begin with patients that have been confirmed as attached, active patients. This will prevent the experience of contacting patients that are deceased or no longer active at the practice. Prioritizing Patients for Outreach For practices that are beginning outreach for the first time, identifying where to start can be a challenge. Consider using searchable criteria in your EMR that can guide you to reaching out to patients that may have the most to gain by offers of care. Consider the following criteria: Last visit date close to 3 (or more) years ago Age (older patients are at higher health risk than younger patients) Number of screening maneuvers due, e.g., consider starting with patients over 60 years of age with no colorectal cancer, diabetes or lipid panel screening due Patients with chronic conditions Registries (Cohorts) A disease registry identifying patients with a coded disease condition is the first step in preparing for panel management of patients of a given condition. The formation of coding of patients with a condition is called a patient registry. Ideally, all patients with a condition will have the condition noted in their Problem List in a consistent way. For example, Diabetes is always called Diabetes Mellitus and will likely have the 250 ICD-9 code attached to it. It is important that an entire practice agree on terms for the conditions to create registries. In this example Diabetes is not named with other inconsistent terms such as Diabetes, DMII, DM2, Diabet M, etc. 21


22 TIP: Free typing in the problem list is NOT recommended. Physicians should use the drop down list when coding problems. In some cases a clean-up of the list may be needed to enable consistent coding moving forward. While the Service Codes used in claims or billing is a very useful search to inform the practice when forming registries, it is not in itself accurate enough to be used when creating point of care reminders. An accurate problem list should be the trigger for the point of care reminders. See Problem Lists Sample of Diabetic Cohort built from Query Builder lists There are useful searches that will support creation of disease registries. By looking in other areas of the EMR patients without the problem in their Problem List can be identified. Feature of EMR Example 1 Data that would inform Diabetes Mellitus Registry Example 2 Data that would inform Hypertension registry Billing Diagnostic code 250 Diagnostic code 401 Medications Currently taking metformin or insulin Currently taking an antihypertensive Lab HbA1c over 7 % BP > value specified by clinic MDs The bulk action feature from reporting area of the EMR is a useful tool when producing a list of verified patients with a given condition to add it to the patient problem list in bulk. 22
23 Important Note: Once a patient cohort has be created, should new patients match a particular cohorts criteria they will not be automatically added to an existing cohort. This action must be manual to ensure all those matching are included. Recommended Accuro Help files: Cohorts (Tech Tuesday # 97) Manage Patient Cohorts Deceased patients If a clinic is going to engage in outreach screening, managing the status of deceased patients is critical to ensure that a deceased patient s name does not appear on a list for outreach. Screening processes apply to active patients of a provider. Clinics have the option to configure their system settings to add a default status when a patient is marked as deceased. It is sensible that deceased patients are all marked as inactive automatically when marked as deceased. Check your General Settings in System Settings. The default Status for Deceased Patients is None. This can be managed in General Settings. Ideally, set the status for deceased patients to Deceased or, some clinics may choose, Inactive. 1. Click Users in the Menu bar. 2. Click Manage Security. 3. Click the Systems Settings tab. 4. The General tab appears. 5. Choose your Status for Deceased Patients. 6. Save Settings. Auto-configuration of Deceased patients as Status of Inactive Recommended Accuro Help files: Patient Status History (Tech Tuesday # 14) Manage a Status 23

24 Panel Management: How to Get Started Once patient panel identification and maintenance processes are in place, it is recommended to begin proactive panel-based care with the following approach: Panel Identification & Maintenance Panel Lists Patient Confirmation Preventive Screening Care Foundational Learning Simple to Complex Point-of-Care Reminders Reporting Disease Management Disease Registries Proactive Panel-based Care More Complex Pointof-Care Reminders Patients with Complex Health Automated processes to support uncommon care requirements With ICD-9 codes in place identify complex patients for systematic care Preventive Screening Care Preventive screening care involves a small number of data elements compared to disease management There is benefit to starting with some clean sources of data like electronic lab feeds compared to information that maybe inconsistently charted in the clinic Clinic team will learn: o the importance of and begin standardization of naming protocols for scanned documents (e.g., mammograms and colonoscopy reports) o from this experience about patterns in their data entry and can make correction for future meaningful use of EMR o practice standard operating procedures that enable proactive panel-based care The searches and population-wide point of care reminders should start simple and can build to the more complex Practices can build on: o the number of screening maneuvers they are addressing and/or o the population of patients at the practice that point-of-care reminders are set for (e.g., gender and age) Provides a foundational experience for process improvement 24

 of patients with a given condition (e.g., Diabetes or hypertension) and is enabled by key EMR features: Problem list Flags (Pop-up notifications in various")
25 Disease Management Clinic team take lessons learned from less complex preventive screening care processes that can then be applied to disease management Involves more complex searches with more data elements than screening A dependency exists on reliable registries of patients with a given disease o Providers will learn the importance of consistent coding in the Problem List of the EMR Clinic team will build on the benefits of standardized data entry Building of more complex point-of-care reminders with increased reliability of planned, prioritized care Proactive panel-based care of a registries or cohort (see registry/cohorts) of patients with a given condition (e.g., Diabetes or hypertension) and is enabled by key EMR features: Problem list Flags (Pop-up notifications in various areas of the EMR) Patient Tasks (Follow-ups, worklists) Billing information (can be less reliable) Alerts (created in the Query Builder for specified problems) Recommended Accuro Help files: Patient Flags (Tech Tuesday #74) Customized Patient Flags Patient Tasks (F7) 25
26 Management of Patients with Complex Health Needs With a solid foundation in preventive screening care and disease management, patients with complexities and multiple co-existing conditions will have visits that address many predictable health issues by using available EMR resources to more efficiently and reliably meet patient s important needs Use of Care Planning Template Each clinical team should put some thought around creating, updating and saving the care planning template (See Appendix A). Consideration around conventions for saving and using keywords to identify Care Planning Template if the clinic is using the methodology of scanning and attaching this document to a patient s chart (See Appendix C). The consistent use of Type, Sub-Type and Description (if use precisely everytime) can all be searched in the Accuro Query Builder for reporting and measurement. However if using the Care Planning Template as a custom Form in Accuro, the PMH team should plan for what and how the various sections within the Care Plan template could be auto-populated. Some of the important areas for auto-population could include field like: patient demographics, primary provider, allergies, medications etc. Other information may be less important to auto-populate such as the problem list as it can change over time. The Care Planning Template should also consider tracking any new additions to the plan in some way that is apparent; what is the addition, when identified and who entered the information (e.g. new allergy identified in recent hospitalization and entered by the nurse at the patient's request). Tools for Panel Management For the following areas it is recommended that when a team agrees on the processes that they are documented as standard operating procedures so that when a staff member leaves and a new staff member starts there is documentation. Charting for Team-Based Patient-Centered Care For a team to provide care that is patient-centric and takes care of the whole patient, a single provider in the practice can no longer document in an ad hoc manner. The team needs to know where to find pertinent information and know that the information can inform proactive, panel-based processes (such as searches or reminders) that can act as a safety-net around the individual patient care. EMR users need to be aware of the search capabilities of their EMR. Where information is entered matters! In general, fields that can inform a search or report include: Drop down lists Radio buttons Boxes only designed to record specific information like blood pressure or weight Templated fields in an exam template 26
 is used, it may be uniquely searched.")
27 Even in an area where free text can be entered, if certain information is entered with a consistent term, it may be searched. Where common repeated text (macros or auto-replace) is used, it may be uniquely searched. Chart in a way that the team can help care for the patient: Care team members know where to find information The patient s data may be included in population-wide reminders that helps to prevent patients falling through the cracks Monitoring and management can be done systematically Medical History View (Encounter Notes) The medical history view in the EMR section (Encounter Notes Tab) is a great summary of clinical information that is prominent in the patient record. For example once configured by the clinic it can be utilized to capture some or all of the ASaP Maneuvers in the existing or custom created Medical History bands. Note: Depending on how much information is in the medical history band and the size of the computer monitor, it is possible the user needs to scroll down to see all content. Medical History Bands Medical history bands (MHB) can be enabled, reordered or disabled (hide) to suit office requirements. Bands that can be enabled or disabled are: History of Problems Active Medications External Medications Surgical history Allergies Immunization Schedule 27


28 Immunization Summary Lifestyle Family History Risk Factors Note: Customized bands may be added to suit the needs of a practice. Steps to Adjust Medical History Display (Alt key) 1. Click on the File menu item, then User Preferences 2. Click the Display section button 3. Click the EMR Workflow Tab 4. Click on the Configure Medical History Bands gear icon button 5. Drag the bands using left mouse button held down to the order you want them in Click Save Steps to Add Custom Medical History Bands 1. Press and release the Alt button on the keyboard click Users and select Manage Security from the list displayed. 2. Click the System Settings on the left-hand side of the window. 3. Click the Configure Histories button at the bottom right of the General Tab. The Edit Custom History Types window is displayed. 28


29 4. Click the Add button. The Edit Custom History Types window is displayed. 5. Type in the name of the custom history type. (Careful, this cannot be edited later!) 6. Select the history type from Regular, Free Text, URL or Tracking. Regular is recommended. Note: If you select Tracking you can also select the requires date checkbox. 7. Click OK to save changes Important Note: Go to a different screen and back to Encounter Notes to see the change. Take care in initial naming of a custom Medical History Band. There is no ability to rename or change after the initial creation. The custom Medical History Band cannot be deleted but it can be hidden if the users do not want it to appear. Recommended Accuro Help files: Configure Medical History View in Encounter Notes Important Note: In order refresh the Encounter Notes screen by going to a different tab and back to the Encounter Notes Options in setting up the Medical History Bands for preventive screening: 1. Simple Approach record all 12 maneuvers in one Preventive Screening band. (Option 1) 2. Use existing Lifestyle and Immunization bands and record all others in a Preventive Screening Band and combined with CDM worksheets mapped to patient collected information, procedures and lab results (Includes addition of all 5 ASaP+ maneuvers). (Option 2) 29
30 Option 1: Set up/capture all 12 maneuvers in a custom Preventive Screening MHB. This table will assist in building the MHB Maneuver Maneuver Label Details List (Managed) Notes (field) Suggested Text Blood Pressure Blood Pressure 18+ Annual BP Recorded Standardized N/A Reason Patient Declined Patient Deferred Not Applicable Weight Weight 18+, 3 Yr Weight Recorded Standardized N/A Reason Patient Declined Patient Deferred Not Applicable Height Height 18+ Annual Height Recorded Patient Declined Patient Deferred Not Applicable Standardized N/A Reason Exercise Assessment Exercise Level 18+ Annual (>150 min/wk) Tobacco Assessment Tobacco Use Status 18+ Annual Influenza Vaccination/Screen Flu Immunization 18+ Annual Pap Test PAP Test Female 25-69, 3 Yr Plasma Lipid Profile Plasma Lipid Profile Male Female 50-74, 5 Yr CV Risk Calculation CV Risk Male Female 50-74, 5 Yr Sedentary Low Moderate High Never Current Past Patient Declined Patient Deferred Counsel Provided Counsel Deferred PAP Completed Patient Declined Patient Deferred Patient Exempt Plasma Lipid Completed Requisition Given Patient Declined Patient Deferred Patient Exempt Framingham Score Recorded Patient Declined Patient Deferred Patient Exempt Diabetes Screen Diabetes Screen 40+, 5 Yr Fasting Glucose-Last 5 Yrs HgbA1c-Last 5Yrs Requisition Given Patient Declined Patient Deferred Patient Exempt Colorectal Cancer Screen Mammography Colorectal Cancer Screen Mammogram Female 50-74, 2 Yr FIT Result-Last 2Yrs Requisition Given Flex Sig-Last 5Yrs Colonoscopy-Last 10Yrs Referral Initiated Patient Declined Patient Deferred Patient Exempt Mammogram Completed Requisition Completed Patient Declined Patient Deferred Patient Exempt Capture Min/Week Value Capture No. of Packs/Week (if applicable) Notes as required Standardized Exempt Reason Standardized Exempt Reason Standardized Exempt Reason Standardized Exempt Reason Standardized Exempt Reason Standardized Exempt Reason 30
. This field is searchable in the Query Builder if standardized text is used.")
31 Example: Medical History Band with ASaP screening maneuvers (single MHB - simple) Pap Note appears in MHB The Notes field for each of the specific ASaP or other Modifiable/Lifestyle Maneuvers can be used to add additional information as applicable to individual patient. It will display in the MHB (i.e. PAP entry-above). This field is searchable in the Query Builder if standardized text is used. Note: The MHB information collected for each patient will grow over time, this may require scroll of the MHB to review all historical information. The most recently captured maneuvers appear at the top of each band. 31

32 Option 2: Setup up the Lifestyle MHB to capture screening for exercise, tobacco use, alcohol, fruit and vegetable consumption (ASaP+) Record flu vaccinations in the immunization band. The remaining ASaP and ASaP+ maneuvers can be recorded in the custom Preventive Screening MHB. Three (3) maneuvers (Blood Pressure, Height and Weight) are captured directly in the Physical History (Optimed) test in the Lab area of Encounter Notes for each patient. Lifestyle MHB - Default (Exercise, Tobacco Use, Alcohol, Fruit and Vegetable Consumption) Maneuver Maneuver Label Details List (Managed) Notes (field) Suggested Text Exercise Assessment Exercise Level 18+ Annual Sedentary <150 Min/ week >150 min/wk, w/ minimum bouts of 10 min vigorous act Tobacco Assessment Tobacco Use Status 18+ Annual Never Tobacco Smoker Ex Tobacco User Current Tobacco User Over 30, Lifetime Non Tobacco Patient Declined Patient Deferred Alcohol Consumption Alcohol Use Non-drinker 1-5 drinks per week 6-9 drinks per week drinks per week >15 drinks per week Patient declined Fruits and Vegetable Consumption Fruits and Vegetables No Consumption Below Recommended Amounts Recommended Amounts Above Recommended Amounts Notes as required Capture No. of Packs/Week (if applicable) Notes as required Notes as required Immunization Schedule MHB Default The Medical History Band is used to setup and capture the Vaccine and Lot information to facilitate capture of the administration of various vaccines given to the patient. This must be set up prior to being able to capture a date of inoculation for the flu vaccinations. 32
33 Immunization Summary MHB Default (Influenza Vaccination/Screen) This Medical History Band captures the patient immunization summary (flu vaccination) displaying a date stamp of when last completed when captured in the Immunization Schedule MHB. Preventive Screening MHB Custom (Influenza Vaccination Counsel, Pap Test, Plasma Lipid Profile, CV Risk Calculation, Diabetes Screen, Colorectal Cancer Screen and Mammography) Maneuver Maneuver Label Details List (Managed) Notes (field) Suggested Text Influenza Vaccination/Screen Flu Immunization 18+ Annual Counsel Provided Counsel Deferred Pap Test PAP Test Female PAP in last year 25-69, 3 Yr PAP Completed- 5 Yr Patient Declined Patient Deferred Patient Exempt Plasma Lipid Profile Plasma Lipid Profile Plasma Lipid Profile in last 5 Yr Male Requisition Given Female 50-74, 5 Yr Patient Declined Patient Deferred Patient Exempt CV Risk Calculation CV Risk Male Framingham Score-last 5 Yr Female 50-74, 5 Yr Patient Declined Patient Deferred Patient Exempt Diabetes Screen Diabetes Screen 40+, 5 Yr Fasting Glucose-last 5 Yr HgbA1c-Last 5 Yr Requisition Given Patient Declined Patient Deferred Patient Exempt Colorectal Cancer Screen Colorectal Cancer Screen Mammography Mammogram Female 50-74, 2 Yr FIT Result-Last 2Yrs Requisition Given Flex Sig-Last 5Yrs Colonoscopy-Last 10Yrs Referral Initiated Patient Declined Patient Deferred Patient Exempt Mammogram Screen-Last 2Yr Screening Complete >74 Yr Requisition Given Patient Declined Patient Deferred Patient Exempt Notes as required Standardized Exempt Reason Standardized Exempt Reason Standardized Exempt Reason Standardized Exempt Reason Standardized Exempt Reason Standardized Exempt Reason 33
 for the ASaP Maneuver to record and click OK, then CLOSE 4.")
34 Steps to Add Screening Maneuvers to Medical History Bands (MHB) 1. Click on the Green Plus sign in the custom MHB This will open the Preventive Screening configuration window 2. Select the Pencil icon to open and then the icon in the Edit Preventive Screening window 3. Add a meaningful Name (E.g., Blood Pressure 18+) for the ASaP Maneuver to record and click OK, then CLOSE 4. Continue to add Maneuvers until your list is complete 5. The next step from the Preventive Screening window, is to select each maneuver and add the Details, select the down arrow and click on Manage 6. Using the, begin adding your menu response for the maneuver and order using the blue up and down arrows, then select OK 7. Finally select Cancel in the Preventive Screening Window, after adding the appropriate list of maneuvers to this Medical History Band 34
 2.")
35 Steps to Capture Screening Maneuvers to Medical History Bands (MHB) Once the ASaP maneuvers are configured in the MHB, patient responses to the screening offers may be recorded. 1. Click on the Green Plus sign in the custom MHB (i.e. Preventive Screening) 2. Select the desired maneuver to be captured, and from the Details dropdown list select the appropriate selection based on information collected or response provided by patient 3. Any additional information can be added to the Note and will be displayed (i.e. Wheel Chair Patient for Height) 4. Next add or select a date using the Calendar icon, by default the Life Stage of Adult: 18 years or older is pre-populated. Note: the most recent entry for this item will appear at the top of the MHB window Note will appear in MHB for easy viewing 5. Select Save and Close to add to the information to the MHB Note: ASaP Maneuvers Capture Options - The Notes field is a searchable field in the Query Builder if the text is standardized (it is written the same way every time). Option 3: Setup up Screening Maneuvers in Labs (manual) Depending on how the clinic s agreed upon workflow some screening maneuvers can be capture in the Labs area on the patient s EMR-Encounter Notes tab in manual labs. See Manual Entry of Lab Data These manual labs can be created new or edit existing lab entry tests. See Appendix G Set up and Use 35

36 Quick Patient Summary To access the Quick Patient Summary for the currently selected patient select F3.This provides access to three tabs: Virtual Chart, Patient and Encounter Summary. Virtual Chart Patient Summary 36

37 Encounter Summary In Accuro, if the Encounter Summary tab is not displayed in the clinic, it can be enabled. This is a tab that settles in between the Virtual Chart and the Medications tab. It is designed to take all of the clinical notes/letters, expand them, and stack them on top of each other in one big scrollable view. The notes are in reverse chronological order so the most recent one is at the top. This is useful view to get an idea of the content of previous visits easily. It is also in the F3 (Quick Patient Summary) window. Steps to turn on Encounter Summary 1. Click on File, User Preferences 2. Click on the Display category 3. Click on the EMR Workflow tab 4. Enable the third checkbox called "Show Encounter Summary Tab" 5. Press Apply, then OK Note: There is a link on each note in the Encounter Summary tab that opens the full note in edit mode. This is also useful for seeing what medical history items were added on the day of the note, like blood pressure, height and weight. Recommended Accuro Help files: Quick Patient Summary Virtual Chart Patient Summary Encounter Summary Encounter Summary (Tech Tuesday # 62) 37
38 Scanned Documents Every clinic receives electronic faxed documents which get linked to individual patient records. The naming or indexing of these documents as they are attached must enable two processes: 1) When a provider is viewing the patient chart they should easily identify the information and be able to find it quickly. Some EMRs have the ability to search for a document name at the individual patient level. 2) In the EMR search /query tool it is possible to produce a list of patients that have a type of linked document within a period of time. These same document names can be used to create a population-wide point-of-care reminder or a flowsheet. Recommended Accuro Help files: Document Scanning (Tech Tuesday #10) Document Sub Types (Tech Tuesday #108) TOP Accuro Video Data Quality Document Labelling in Accuro: Key principles for linking scanned documents Create a list of acceptable document words that can be used at the practice that is agreed upon by the clinic team (clinicians and team members). See Appendix C for examples Use the drop down list in the EMR; avoid free typing Certain clinical reports need to be distinguished to enable panel management o o Distinguish mammogram results from all diagnostic imaging Some consult reports need consistent naming: Colonoscopy reports Flex sigmoidoscopy report Colposcopy report Provide training to staff and place a printed list of acceptable keywords with indexing tips at every workstation where documents get linked to patient charts Name based on type of consultation rather than the name of the consultant o E.g., If a referral is for gastroenterologist consult, name the letter Gastroenterology consult not Dr. Black consult Only central clinic EMR administrator(s) should be allowed to add, delete or modify the main list 38
39 : Tip: Two sample lists of keywords are available in the appendix of this document See Appendix C Manual Entry of Lab Data Most EMRs have the ability to manually enter lab data that may be received by fax or completed within the clinic. Data may be received this way due to the lab originating from a source outside the region. If this lab data is entered as a Manual Result rather than a scanned document it can usually be trended and searched. Manual labs completed in clinic such as a random glucose test should be entered in manual labs. Some clinics use Manual Labs to enter singular results that are from Alberta NetCare that the provider wants to see in the lab results sections and so that the results can be graphed with other investigations received electronically. Example 1: A provider is opening a new practice. After the first appointment and the patient is accepted into the practice, on the visit for the first comprehensive medical, the provider wants the last three pap results entered in the patient s chart. A team member looks up the results and dates from NetCare in the chart with the manual labs feature careful to note the dates, results and that the source is Alberta NetCare. Example 2: A patient with diabetes is also under the care of an internal medicine specialist at a diabetes clinic outside of the area where the primary care practice is. The clinic gets copied on the patient s lab results ordered by the other clinic and they are received as a fax. So that the lab values can be trended with the lab results ordered at the primary care office, the faxed results are entered as manual lab results and appear in the patient s lab investigation section of the EMR not just as a document stored in their chart. Useful Applications of Manual Lab Entry The manual lab result feature of EMRs offers a clinic flexibility to store results or information in a way that they can be trended and searched. Some ways in which clinics are using this feature: Preventive screening care offers are all documented as manual lab results they are searchable and assist the clinic team in monitoring offers and measuring screening care. This requires some set-up and is very effective where it is the team that does preventive screening care work 39


40 Pain Disability Index is a score that is tabulated at the clinic that documents the level of pain a patient has. For practices that have a chronic pain clinic, manual lab entry allows them to record the score and trend against medications over time. It can also assist in quality improvement measurement. A clinic is tabulating frailty scores of their older patients. Recoding the scores in manual labs allows them to trend these scores over time, determine which patients in the practice have or have not had a frailty assessment and allows population based measures. Create a manual lab 1. Press CTRL-ATL-L to open the Lab Tests window inside the Encounter Notes Tab of a patient s record. 2. Click the green plus sign to create a new manual lab or select from an pre-existing created Manual lab. 3. Enter the values in the appropriate field and click OK to save the manual lab. Recommended Accuro Help files: Lab results (Create a Manual Lab Result Form) Enter a Lab Result, Anywhere (Tech Tuesday #57) TOP Accuro Videos Custom Lab Data Entry Creation in Accuro: 40

41 Manual Lab Entry in Accuro: Searches/Queries Getting Started When learning to create searches the following tips will assist in obtaining accurate data: Be informed on how data is recorded at the clinic; this will provide direction on which fields to search Build the search one parameter at a time Validate, as each line of the search is created, that the results are correct before adding another parameter to the search Search for the positive first then search for the negative o E.g., if you are searching for female patients y that have not had a mammogram in the past 2 years first identify all patients that have HAD a mammogram in the past 2 years. Once you have validated that your search criteria are correct it is easy to search for patients that have NOT had a mammogram. Verify that your results are correct Beneficial Searches for Care Planning When patients have been documented as having complex health needs (e.g., Problem List includes Complex Health as an active problem, monitoring frequency of care planning as well as follow-up is key. Useful searches are: Sample Queries Patients with complex health needs with no care plan in the last year Note: Diagnosis =1000 in this case is a custom code create for Complex Health Needs Patients with complex health needs with a care plan but no specific appointment type designating a care plan follow-up in the last 6 months Office Provider = Jones, Jenny Status Starts with Active 41
 and then looks for specific types of appointments since then to identify patients that may need follow-up Setting up Appointment Types 1.")

42 Diagnosis = 1000 Document Type = Care Plan Template Appointment Date in the Last 6 Months AND Appointment Type = Care Planning Follow up (Doesn t Match) o o This search depends on the practice having a unique appointment type designated as a care plan follow-up. Alternatively, a panel manager could create a search that identifies the patients with a care plan completed within a given time (e.g., 1 year) and then looks for specific types of appointments since then to identify patients that may need follow-up Setting up Appointment Types 1. Click on the Accuro Icon to access the menu choices and click on scheduler which presents the user with a dropdown menu. 2. Click on the Scheduler Management to open this window, then selecting the Types tab. 3. Using the green plus sign icon you can then add, modify or delete any appointment type (e.g. Care Planning or Care Planning Follow up, etc.) Recommended Accuro Help files: Scheduler Preferences Types and Reasons Follow-up EMRs have features for individual patient follow-up where a task is created to remind a team member to follow-up with a patient at a specific time for a specific reason. This feature is indispensable for chronic disease management and care of patients with complex health needs. Importantly, this task can be future dated so that the person who needs to action the follow-up need only see it when it is timely. It is also important to document when a follow-up is closed. Follow-ups remain documented in a patient s chart for record. In comparison, messaging is more immediate and is usually acted on in a short time frame, often while the patient is in the clinic. Messaging is often used for many non-patient purposes. 42
43 Clinical Decision Support: Population-wide point-ofcare reminders Most EMRs have a tool that will search the database for specific criteria to identify patients due for clinical service. Population-wide point-of-care reminders may be called rules, triggers, alert, notification etc., and these are really just searches that run in the background of the EMR and provide notifications when a patient meets the criteria. These can be created based on internal clinic information such as charting, scanned documents, billing or external information such as incoming lab or imaging data. These point-of-care reminders will automatically go away when the search criteria are met. Population-wide reminders are key enablers of proactive panel-based care. The higher the data quality in a practice, the more reminders a practice team are able to create and use reliably. Recognizing that individual patient care will be tailored and that there are exceptions to the rules, reminders generally have the ability to be individualized for patients and modes of documenting exemptions may exist. Important Note: Accuro currently requires that Alerts built in the Query Builder are run when required. Currently Accuro doesn t have a Live Alert mining in the background. Example: A diabetic cohort was created 6 months ago, since then 5 new diabetic patients were identified at the clinic. Rerunning the original query would include the new patients that would need to be added to the diabetic cohort group. Individual Patient Alerts At the individual patient level, EMRs have the ability to create a note or alert for an individual patient. Individual patient alerts can vary from critical pop-ups to notes that appear in certain areas of the EMR such as scheduling, appointments or in charting. Recommended Accuro Help files: Patient Flags (Tech Tuesday #74) Tracking Patient Tasks Rerun an Alert Tracking is a newer feature of Accuro EMR (EMR, Encounter notes) that displays the count of outstanding tasks, un-reviewed labs and outstanding orders. With Tracking, a physician or preventive care outreach coordinator can be aware of any preventive investigations, such as a fasting glucose or a fecal immunochemical test (FIT), that have not been reconciled to the order. 43


 o Preventative Care (Ontario only) 5.")
44 Each user has to turn tracking on. To enable Tracking: 1. Go to the EMR > Encounter notes 2. In the lower left corner, click the gear icon next to the word Tracking 3. Turn on the Enable Tracking checkbox. 4. Click the green plus to add the items you want to show in tracking. Choices are: o Tasks show outstanding tasks o Unreviewed Labs shows any labs sitting in a physician inbox not reviewed yet o Outstanding Orders show any requisitions done without results linked back (requires the use of requisition forms set up for lab orders). o CDM shows conditions the patient has CDM form on (requires CDM to be turned on and worksheets used) o Preventative Care (Ontario only) 5. Highlight the desired choices, click Add and then click OK. Recommended Accuro Help files: Tracking in Encounter Notes Enable Tracking in Encounter Notes Tasks Patient Tasks Add attachments to Existing Tasks Search for Incomplete Tasks 44
 Program:")
45 Panel Management Processes Preventive Screening As per the Alberta Screening and Prevention (ASaP) Program: 45
46 Documenting for ASaP It is important that all ASaP maneuvers are documented in a consistent manner, ideally in a searchable field in the EMR. BP, Height and Weight are recorded as vitals Lifestyle/modifiable risk factors are often recorded in an exam template or designated area see more about this in the Lifestyle/Modifiable Risk Factors section Influenza screening includes: o Administering a vaccine o Recording of vaccination administered elsewhere o Record of offer to vaccinate or counsel The following are documented as investigations/lab results: o Mammography o Colorectal cancer screening FIT o Pap test o Plasma Lipid Profile o Diabetes screening (HbA1c or fasting glucose) Colonoscopy and sigmoidoscopy are usually documented as a report. When received it is important that these are named/indexed appropriately and in a standardized way, (e.g., Colonoscopy Report ) CV Risk Calculation This is a highly valuable tool to assess risk in patients with no previous cardiovascular disease (e.g., NOT taking a statin class of medication) Conduct on average risk patients age every 5 years Requires other data held in the EMR: gender, tobacco use, BP, non-fasting lipid data and diabetes diagnosis (for some CV Risk calculators) May use an internal EMR CV Risk Calculator or an external calculator such as: o Dependency on where the provider records the result or if it is auto created from the internal calculator in the EMR The preventive care screening search is to identify patients y, not taking a statin, that have not had a CV Risk calculation in the past 5 years o Patients already at risk, such as those taking a statin, do not need to be assessed The 2012 Canadian Cardiovascular Society standard Framingham Risk Calculator has been adopted as the new default in Accuro. This calculator is called "CVD Risk". This is an "Estimation of 10 year Cardiovascular Disease Risk". Reference: Anderson et al. CCS Dyslipidemia Guidelines Update 2012 To access the CVD Risk Calculator: - Click Tools on the Menu bar and select Framingham Risk Calculator. - Enter the patient information - Click OK and Close. The results are saved to the patient s Encounter Notes section. 46

47 Note: Two alternate Framingham Calculator available 1. HCHD Risk Framingham Calculator: Estimation of10 year risk nonfatal myocardial infarction or coronary death 2. CHD Risk Framingham Calculator: Estimation of 10 year Coronary Heart Disease Risk Warning: If you switch the profile for the Framingham Risk Calculator all users are switched to the new profile. Lifestyle/Modifiable Risk Factors (ASaP+) Modifiable risk factors should be recorded in a consistent fashion to enable preventive screening care as well as to monitor and manage patients who screen positive. All members of the clinic team should know where modifiable risk factors are recorded in the EMR and who is responsible for entering them. It is recommended to enter modifiable risk factors in an area of the EMR that is searchable and can enable a population-wide reminder. Height and weight (to calculate BMI and weight changes) See ASaP Height & Weight Queries Physical Activity (Exercise Assessment) Tobacco Use Assessment Alcohol Use Potential data capture methodology for above (4) Lifestyle/Modifiable Risk Factors See ASaP Maneuvers Data Entry Tips Diet Fruit and Vegetable Consumption ASaP+ - Videos demonstrating patient/provider engaged using motivational interviewing:

 or custom MHB.")
 lab entry.")

48 Capturing Fruit and Vegetable Consumption Two different methods could potential used in order to capture patient s fruit and vegetable consumption. The first would be creating a custom capture within the pre-existing (See Lifestyle MHB) or custom MHB. See Medical History Bands Alternatively one could also capture this information in Lab (manual) lab entry. The process to add this would be similar to adding exercise, tobacco use and alcohol consumption described in the ASaP Forms template instructions. See Setup and Use Example of ASaP+ Query Status = Active Bill Date In the last 1 years Lab Type = Height AND Only Check Latest Result AND Include Reviewed Labs Age Older than 18 years 48
49 ASaP Program Participation Providers registered in the ASaP Program with TOP will use chart review methodology to look for results of completed screens as well as offers, declines or exemptions. Consistency of recording assists in the chart review. ASaP EMR Extraction Methodology for Schedule B Practices and PCNs measuring ASaP results for Schedule B purposes using EMR extraction methodology need only focus on the record of results (have a screen completed) which, in general, is easier to search in the EMRs than offers, declines and exemptions. Exclusions/Exemptions Some patients are excluded from general adult preventive screening for clinical reasons. Developing consistent processes to document the exclusions assists the team in collaborating on preventive screening care. Some exclusions/exemptions are: Females with a complete bilateral mastectomy are excluded from mammograms Females with a total hysterectomy (no longer have a cervix) are excluded from pap smears Patients with documented cardiovascular risk and treatment no longer are screened for CV risk and may have different intervals for lipid profiles Patients diagnosed with diabetes are not screened for diabetes When diagnosed and undergoing interventions for colorectal, breast or cervical cancers, the routine screening intervals no longer apply and patients will follow their recommended care A team should consider how documentation of the exemption criteria impacts team-based screening care. Example: A female patient is offered a pap but remarks that she has had a total hysterectomy 10 years ago and asks if she needs one. The clinic team member indicates no. The team notes that the reason they didn t know was because the evidence of the hysterectomy was in a document called surgical report. The team wants to ensure this doesn t happen again and agrees that possible actions they can take are that: The total hysterectomy needs to be added to the Past Surgeries area of the chart ( In Accuro this can be captured in the Medical History Band Surgical/Medical History 49


50 The surgical report is coded with the additional term Total Hysterectomy The patient is exempted from the population-wide reminder for pap smears in the clinic (E.g. One possible solution could be to create a custom patient flag for staff to know this patient is except from further PAP screening ) See Disease Management 50
51 ASaP Searches - Examples There are 2 general approaches for completing the ASaP specific searches: 1. Searching for patients due for an ASaP maneuver. We use this approach to build lists for opportunistic and outreach screening processes. 2. Searching for patients who have had the maneuver completed. We generally use this approach for quality improvement purposes to track how we are doing. Searches for ASaP Maneuvers Age and/or Gender Criteria Maneuver/Timeframe Patients in a specific age range and gender have not been screened (seen) in the appropriate interval (e.g. 3 years) Identify patients 18 + with no Height recorded on the chart Weight recorded on the chart in the past 3 years Blood Pressure recorded in the last year Tobacco assessment in the last year Exercise assessed in the last year Influenza vaccination nor counsel in the last year Identify females have not had a Pap test in the past 3 years Identify females y have not had a mammogram in the past 2 years (a mammogram may be a scanned document and/or an electronic result depending on the region) Identify patients 40 + have not had a fasting glucose OR a HbA1c test in the last 5 years Identify patients have not had a plasma lipid profile test in the past 5 year Identify patients have not had a fecal immunochemical test in the past 2 years OR a flex sigmoidoscopy in the past 5 years OR a colonoscopy in the last 10 years (where a FIT test is a lab result and a flex sig or colonoscopy can usually be identified by a scanned report) In this section we will show an approach for each of the ASaP screening maneuvers. There may be more than one way to search and it will also depend on your clinic s documentation. Other approaches will work but we suggest you validate your search results, whatever approach you take. 51
52 One of: [all patients 50 74) One of: [all patients 40 +_) Interval Offers of Screening in the Patient Chart (Location) Screening Maneuver Potential Location in EMR (noting that clinicians may have unique patterns of use) Blood Pressure (18 +) Height (18 +) Weight (18 +) Tobacco Use Assessment (18 +) Exercise Assessment (18+) Annual At Least Once 3 years Annual Annual Clinical Notes or Physical History or custom Medical History Band (MHB*) Clinical Notes or Physical History or custom MHB Clinical Notes or Physical History or custom MHB Encounter Notes > Lifestyle or Risk Factors MHB Encounter Notes > Lifestyle or Risk Factors MHB Flu Vaccination Screen (18+) Annual Immunization Summary MHB PAP Test (women 25-69) Mammography (women 50-74) CV Risk Calculation ( 40 74) Plasma Lipid Profile (40 74) Non-Fasting Fasting Glucose 3 years 2 years 5 years 5 years Encounter Notes > Labs Encounter Notes > Letters (Consult Report) or Documents CVD Risk (Framingham 10 Year CVD Risk) Calculator Encounter Note, Manual CVS lab result Encounter Notes > Labs Encounter Notes > Labs Hgb A1c 5 years Encounter Notes > Labs Diabetes Risk Calculator FIT 2 years Encounter Notes> Manual or Custom MHB Encounter Notes > Labs Sigmoidoscopy 5 years Encounter Notes > Letters or Documents Colonoscopy 10 years Encounter Notes > Letters or Documents * Medical History Band 52

53 Examples of ASaP Queries (based on completed screens) Height screen Status = Active Bill Date In the last 3 years Lab Type = Height AND Only Check Latest Result AND Include Reviewed Labs Age Older than 18 years The above screen shot is done in the negative meaning it is looking for those who have NEVER had a height recorded. Minus this count from your denominator to get the numerator. Weight Screen Status = Active Bill Date In The Last 3 Years Lab Type = Weight and Observation Date in the last 3 years AND only check latest within observation date Age = Older than 18 Years 53


54 Blood Pressure Status = Active Bill Date In the last 3 years Lab Type = BP-Systolic AND Observation date in the last 1 year AND Only check latest Result within observation date. Lab Type = BP-Systolic AND Observation date in the last 1 year AND Only check latest Result within observation date. Age = Older than 18 years This uses advanced logic for this one, (see screen shot). It specifies needing both Systolic and Diastolic values (Line 3 and 4) to meet the criteria. Any Blood pressures captured in the encounter notes will not be reported using this query. Pap Screen Status = Active Bill Date In the last 3 years Age Between 25 years and 69 years 11 months Lab Type Contains Gyn Cytology Report AND Observation Date in the last 3 years AND only check latest result. 54
.")

55 Sex (Gender) = Female This is how you would choose lab type if it comes from Calgary Lab Services. If your labs comes from multiple labs you may need to build the query so that it looks for all the variations in which it comes in. Some clinics try to account for the scanned paps (i.e. NetCare paps). This is especially useful for new patients when you are building on your history for patients. If your clinic is doing this, build your query to reflect how you are capturing this, (i.e. Medical History Band) and account for both the lab pap and scanned pap. It can make a difference to your screening rates. Diabetes Screen Status = Active Age Older than 40 year Bill Date In the last 3 years Lab Type Contains HEMOGLOCBIN A1C OR Contains Fasting Glucose AND Observation Date IN the last 5 years AND Only check latest result. To add OR statements: Under Rule Category Labs, select Lab Result. Add the first lab then click the green plus sign and add another Lab Type. Lipids Screening Status = Active Age Between 40 years and 74 years 11 months 55

. So you may need to look closely at how your lab report and choose your lab types appropriately.")
56 Lab Type Contains Cholesterol AND Observation Date IN the last 5 years AND Only check latest result. Bill Date In the last 3 years Special Note on Lipid Screening I have found that trying to account for all four elements of the lipid panel does not work well in most Accuro EMR s. There can be times where LDL do not calculate because of a very high Triglyceride level. In speaking with a physician, the Cholesterol is ALWAYS reported by the lab. Some labs report a LIPID PANEL, some report out as individual labs (CHOL, HDL, LDL, TRIG). So you may need to look closely at how your lab report and choose your lab types appropriately. Mammogram Screening Status = Active Sex (Gender) = Female Age Between 50 years and 74 Years 11 months Document Type Contains Mammogram AND Document Received date in the last 2 years. Bill Date In the last 3 years. Important Note: This query assumes that all staff is scanning Mammograms under this Document Type. In this case this query uses the Received Date field that reflects the date the Mammogram was performed. Colorectal Screening 56
. See next screen shot.")
57 Status = Active Age Between 50 and 74 Years 11 months Bill Date In the Last 3 years Lab Type contains Fecal Immunochemical Test OR Contains Fit test AND Oberservation Date In the Last 2 years AND Only check latest result. Document Type Contains Document AND Document Sub Type Contains Colonoscopy AND Documents received In the Last 10 years. Advanced Logic: (4 OR 5). See next screen shot. Notes This clinic has two ways (names) the lab populates the FIT test into the EMR so we need to account for both. This assumes that the clinic names their Colonoscopies in a standardized way with this specific name. If there are variations you may need to account for all. This clinic does not have even one Sigmoidoscopy in the EMR, but if there were, you need to account for this document as well. Add a third line of Document Type/ Document Sub Type/ Enter Sigmoidoscopy, received in the last 5 years. TOP Accuro Videos Accuro Preventative Screening Search for Missing Vitals Yu0mU&index=26&list=PLf486cdx9WgKkIcmlCToVMIn-4swktsv- Identify All Tobacco Users (Part1) in Accuro Identify All Patients not Assessed for Tobacco Use (Part 2) in Accuro Accuro ASaP Cardiovascular Risk Screening Accuro Preventative Screening PAP for ASaP -4swktsv- 57
58 Disease Management Beneficial Searches for Disease Management Patients with a given diagnosis with: o o o No clinic visits in a period of time A monitoring test not completed in a period of time Monitoring tests that have values above a threshold Chronic Disease Management Proactive panel-based care of a cohort of patients with a given condition (e.g., diabetes or hypertension) is enabled by certain EMR features: Problem list See Appendix B Sample Lists Flags, Tasks - Point-of-care reminders set for a population of patients Pop-up notifications in various areas of the EMR Tracking Follow-ups, worklists While patients with chronic conditions are treated and managed as individuals, processes for proactive panel-based care act as an extra safety-net to identify patients that may be due for care. Example: Peter is a chronic disease nurse that works for a PCN and a clinic. Peter has collaborated with the panel manager, who is very savvy at EMR searches, to build a number of saved searches that he runs weekly that support his work for chronic disease management. Peter has access to the clinic EMR remotely so he can run these searches and contact patients on days when he is not embedded in the clinic. The diabetes searches that the panel manager built for Peter are: List of patients with a diagnosis of diabetes and no clinic visit in the last 6 months and no future visits booked in the next month List of patients with a diagnosis of diabetes that have not had an HbA1c result in the last 6 months List of patients with a diagnosis of diabetes, whose last HbA1c result was over 7.0 Peter reviews the lists as part of his regular work as a chronic disease management nurse and calls the patients appropriately for follow-up or he may task another team member to call the patient to book an appointment. Example 1: A panel manager at a clinic does a search that produces a list on a monthly basis for patients with chronic conditions such as diabetes or chronic kidney disease that have had NO VISITS (and no future visits booked) in a period of time (e.g., 6 months or a year, depending on the condition). This allows the panel manager to reach out to these patients, confirm that they are still patients of their primary provider at the clinic, and offer a management appointment. Example 2: A panel manager uses lab data to run a monthly search in the EMR to identify patients that have lapsed in getting lab tests done that support management of their condition. For example, a 58


59 monthly search identifies any patient with a diagnosis of diabetes with no HbA1c result on file in a period of time, such as 6 or 7 months. The clinic may set protocol for the panel manager to act on this list or the list may be provided to the CDM nurse for action. Example 3: A panel manager has created a search in the EMR for the CDM nurse that produces a list of all patients with a diagnosis of diabetes that displays the patient s last lab values for HbA1c, fasting glucose, blood pressure and last visit date. The CDM nurse runs the search on a weekly basis and can sort columns in the report to identify patients that may need follow-up. By running the search live in the EMR the CDM nurse can easily click on the patient s name to be directed to their chart to get more information for next steps. These examples identify ways that clinics can set up processes that act as a safety-net and be proactive in identifying patients early for interventions. Chronic Disease Management Searches Examples List of patients with a diagnosis of diabetes and no clinic visit in the last 6 months and no future visits booked in the next month (31 days by provider) Office Provider = Jones, Jenny Status Starts With Active Diagnosis = (this includes all codes associated with ICD code 250 assuming they are being used) Appointment Date in the Last 6 Months OR in the Next 31 Days List of patients with a diagnosis of diabetes that have not had an HbA1c result in the last 6 months (by provider) Office Provider = Jones, Jenny Status Starts With Active Diagnosis = Observation Date in the last 6 Months and Lab Test Contains A1C AND Only Check Lastest Result AND Include Reviewed Labs 59
60 List of patients with a diagnosis of diabetes, whose last HbA1c result was over 7.0 (entire clinic s active patients) Status Starts With Active Diagnosis = Lab Type Contains A1C AND Value >= 7.1 AND Only Check Latest Result AND Include Reviewed Labs Problem Lists EMRs have at least one designated area to enter confirmed diagnoses in the problem list. Agreeing as a team to have consistent entry into one area in a consistent way is critical to enable team-based care of patients with chronic conditions. There are useful searches that will support creation of disease registries. By looking in other areas of the EMR, patients without the problem in their Problem List can be identified. See Appendix B Sample Lists Feature of EMR Example 1 Data that would inform Diabetes Mellitus Registry Example 2 Data that would inform Hypertension registry Billing Diagnostic code 250 Diagnostic code 401 Medications Currently taking metformin or insulin Currently taking an antihypertensive Lab HbA1c over 7 % BP > value specified by clinic MDs The bulk action feature from reporting area of the EMR is a useful tool when producing a list of verified patients with a given condition to add it to the patient problem list in bulk. In Accuro there are two possible places to add a patient s problem to their chart. The recommended method is to add a problem in the History of Problems in the Accuro Medical History Band on the Encounters Notes tab. 60
 for problem or conditions that")

 List of Patients with a Diagnosis (Tech Tuesday #118)")
61 Example in History of Problems (Medical History Band) As a secondary identifier in a patient s chart one can create unique customizable Patient Flags (icon) for problem or conditions that displays in the patients Demographic Bar. The description of the icon appears when you hover over it. Example of a Customized Patient Problem Flag Recommended Accuro Help files: Encounter Notes (Add a History of Problem in Encounter Notes) List of Patients with a Diagnosis (Tech Tuesday #118) Re-order the History of Problems (Tech Tuesday #72) Customized Patient Flags Patient Flags (Tech Tuesday #74) 61


62 Care of Patient with Complex Health Needs Patients Collaborating with Teams (PaCT) PaCT is a next step in the Patients Medical Home journey. The next opportunity to positively impact care for those with the most complex health needs, including those at risk for or having multiple chronic diseases. Care Planning The process by which healthcare professionals and patients discuss, agree upon, and review an action plan to achieve the goals or behavior change of most relevance and concern to the patient. PaCT Care Planning Process PaCT Resources PaCT Processes Clinics participating in PaCT will need to have well-established processes for panel identification and maintenance to ensure that they are offering care planning to their confirmed patients. Once the Central Patient Attachment Registry (CPAR) is available, it is recommended that clinics participate to ensure that they are offering care planning to their CPAR verified patients. 62
63 This section of the EMR guide focusing on PaCT is intended to be used by teams alongside the PaCT How- To Guide. The sections below follow the Potentially Better Practices as they relate to the Optimize EMR focus of each phase. PaCT Prework Uploading the Care Planning Template into your EMR See Appendix A- Care Planning Template Discuss and agree upon standard charting procedures for team-based care PaCT Identify Phase: Identifying patients with complex health needs Marking the patient s chart with Complex Health See Problem Lists PaCT Prepare Phase: Appending relevant patient assessment information to the record. Pre-populating the care planning template Generating requisitions PaCT Plan Phase: Care Planning Template Use: o Standardizing documentation to enhance pre-population o Optimizing documentation during the appointment Creating reminders for follow up appointments PaCT Manage Phase: Maintaining the care planning document over time Creating reminders for planned care interventions Standardizing processes for referral tracking PaCT Pre-work Uploading the Care Planning Template into your EMR A new care planning template has been created for the PaCT initiative that is patient-centered and relies on evidence-based care planning principles. For processes on how to make the template available in your clinic EMR, use the template at the care planning visit, save and use for follow-up visits, see your EMR specific tip sheet. Discuss and agree upon standard charting procedures for team based care Care planning is a team activity. For this to occur there should be general protocol on where information is stored in the chart so that all team members can both contribute to the chart, find information in the chart and contribute to the care plan appropriately. This would impact team members of diverse roles across the practice: scanners, medical office assistants, nurses, pharmacists, physicians, etc. In summary, chart in a way that team members can help care for the patient. Some benefits include: 63
64 Care team members know where to find the information. The patient s data can inform population-wide reminders to alert when care services are due Monitoring and management can be done systematically Important Note: It cannot be overstated how important this people process step is to the successful adoption of any information collection and capture in the clinic s EMR. Changes in workflow or process need to be discussed as a group. Identify Phase Identify patients with Complex Health Needs The first step in the care planning process is to identify patients for care planning. Your PaCT team will have reviewed the suggested menu for selecting a patient population (see menu below). In the EMRspecific Guides you will see suggested approaches to searching each of the menu items. Part of the improvement process for you team may be improving how your selected population is identified by your EMR. For instance, if you select frail patient s as your focus, you may have to work on how frailty is documented to make it reliably searchable. Menu Clinical Criteria Risk Factors Utilization Parameters People with advanced illness Complex Conditions: (Multiple Sclerosis, Parkinson s Disease or Lupus) Dementia Multiple Chronic Conditions (e.g., 3 or more) Patient eligible for a Complex Care Plan Multiple medications Functional impairment Adults under 65 with disabilities Age (e.g., > 85, or > 75) Frailty LifeStyle/Modifiable risk factors Social risk factors High risk (using predictive risk assessment tool) Many visits (e.g., > 10) in the last year Hospitalizations (2 or more within the past year) ER visits (3 or more) in the past year Had a care plan in the past but not in the last year Receiving home health services No visits to the clinic in the last year (with risk factors or a chronic condition) *Note these are some main considerations not an exhaustive list 64

65 Examples of Complex Health Needs Queries Clinical Criteria Patients with Multiple Chronic Conditions (3 or More) Office Provider = Jones, Jenny Status Starts With Active Diagnosis = 250 OR = 340 OR = 401 OR = 290 Important Note: This query is only an example of potential combination that could be created. A clinical discussion should precede building and auctioning of the results based on the needs of the clinic patient population. Patients Eligible for Complex Care Plan Given the complexity of the Complex Care Plan eligibility it will require building and thoroughly testing all queries to capture all patients that are eligible. The rules for claiming the 03.04J are the patient must have two or more qualifying conditions, one from Group A and one from Group B, or two from Group A. Group A Hypertensive Disease (401) Diabetes Mellitus (250) Chronic Obstructive Pulmonary Disease (496) Asthma (493) Heart Failure (428) Ischemic Heart Disease (413 or 414) Chronic Renal Failure (585) Group B Mental Health Issues (290 thru 319) Obesity (278) Adult = BMI 40 or greater Child = 97 percentile Addictions ( ) Tobacco (305.1) 65
 Bill Fee Code = 03.")


66 CCP Eligible (2 Conditions Group A) Office Provider = Jones, Jenny Status Starts With Active Diagnosis Code Starts With 401 OR Starts With 250 OR Starts With 496 OR Starts With 493 etc. ( Doesn t Match ) Bill Fee Code = 03.04J AND Submit Date in the Last 345 Days ( Doesn t Match ) Task contains CCP Important Note: If Diagnostic codes are not in problem list, this query will fail. Patients may come up multiple times if more than 2 conditions and/or all the variations of 2 conditions. This applies to the query above and below CCP Eligible (1 Condition from Group A and 1 Condition from Group B) Office Provider = Jones, Jenny Status Starts With Active Diagnosis Code Starts With 401 OR Starts With 250 OR Starts With 496 OR Starts With 493 etc. Diagnosis Code Starts With 29 OR Starts With 30 OR Starts 31 OR Starts With 278 etc. ( Doesn t Match ) Bill Fee Code = 03.04J AND Submit Date in the Last 345 Days ( Doesn t Match ) Task contains CCP CCP Eligible Annual Review/Renewals Office Provider = Jones, Jenny Status Starts With Active Bill fee code = 03.04J ( Doesn t Match ) Bill Fee Code = 03.04J AND Submit Date in the Last 345 Days 66


67 Patients with Multiple Medications In order to target specific treatment condition the query example following could be further refined to specify which medications are of clinical focus. Office Provider = Jones, Jenny Status Starts With Active Prescription Status = Active Reporting output will show multiple line entries for active medication for each patient. By exporting to a.csv (Excel, Calc) file further grouping and refining can be accomplished to produce a list of patient on multiple medication of interest. Should a clinic desire to put an indicator (e.g. Flag) on these patients, this can be accomplished individually by patient or selecting those with the Alert Matches. See Bulk/Batch Actions Adult Patients under 65 with Disabilities Any combination of disabilities could be built into a Query. In the example below advance logic is used to look for adult patients (18 64) that have either multiple sclerosis or hearing impaired. Office Provider = Jones, Jenny Status Starts With Active Age Older Than 17 Years 11 Months OR Younger Than 65 Years Diagnosis = 340 OR Flag = Hearing Impaired With the query builder, the use of any combination or permutations from the patient s documented problem list, flag or both can be constructed. 67
 Lab Type = BMI AND Value >= 30 AND Collection Date in the Last 3 years AND Only Check Latest Result AND Include Reviewed Labs OR (")
 Lifestyle History = Alcohol Status AND Lifestyle Date in the Last 1 year AND Lifestyle Details =")
68 Risk Factors Age > 85 or 90 Office Provider = Jones, Jenny Status Starts With Active Age Older Than 84 Years 11 Months Lifestyle/Modifiable Risk Factors Office Provider = Jones, Jenny Status Starts With Active Age Older Than 17 Years 11 Months ( Doesn t Match ) Lab Type = BMI AND Value >= 30 AND Collection Date in the Last 3 years AND Only Check Latest Result AND Include Reviewed Labs OR ( Doesn t Match ) Lifestyle History = Exercise AND Lifestyle Date in the Last 1 year AND Lifestyle Details Starts With >150 min OR ( Doesn t Match ) Lifestyle History = Tobacco AND Lifestyle Date in the Last 1 year AND Lifestyle Details = Never Tobacco Smoker OR = Ex Tobacco User OR ( Doesn t Match ) Lifestyle History = Alcohol Status AND Lifestyle Date in the Last 1 year AND Lifestyle Details = Non-Drinker OR ( Doesn t Match ) Lifestyle History = Fruits & Vegetables AND Lifestyle Date in the Last 1 year AND Lifestyle Details = Recommended Amounts OR = Above Recommended Amounts Important Note: Query uses Advanced Logic while assuming the use of custom Labs and standard Lifestyle History Band as previously explained. See MHB Option 2 Social Risk Factors A query to capture a patient s Social Risk Factors would depend on the method of information capture (E.g. homeless, no transportation, etc.). A scanned consistently named document, a custom History of Problem (see Recording Complex Health Need) similar to Complex Health Needs could potentially be captured (see Medical History Bands) or alternatively it could be captured in a custom Flag (see Disease Management). 68
 a custom Problem in a Medical History Band or Flag can be created and managed to indicate frailty.")

69 High Risk (using predictive risk assessment tool) The presence of an assessment document (Type and Sub-Type) associated to the patient s medical record would be a good place to start looking for patient that might meet the high risk criteria so they can be proactively identified and tracked effectively. Based on a patient s assessment using a predictive risk assessment tool (e.g. frailty assessment) a custom Problem in a Medical History Band or Flag can be created and managed to indicate frailty. Utilization Parameters Other patient data will be used to inform a team if a patient is appropriate for or due for care planning. Data that a team may use for this purpose includes: Visits: o Date since last visit. Searching for patients with chronic conditions or risk factors that have had a lapse since their last visit (e.g., one year) may represent patients due for care planning No Visits to the Clinic in the Last Year Office Provider = Jones, Jenny Status Starts With Active ( Doesn t Match ) Appointment Date in the Last 1 Year 69
 may assist the clinic in identifying patients with complex health needs Many Visits (e.g. >10) in the Last Year Accuro doesn t have a direct method to query count number of appointments that a patient has had in a year.")

70 Had a Care Plan in Past but Not in the Last Year See query in previous section CCP Eligible o Number of patient visits to the clinic. This is searched from the number of appointments or visits. Some patients with many visits to the clinic (e.g., > 10/year) may assist the clinic in identifying patients with complex health needs Many Visits (e.g. >10) in the Last Year Accuro doesn t have a direct method to query count number of appointments that a patient has had in a year. However an exported file of each clinician s active patient with appointment dates can be exported to a CSV file and then utilizing functionality patient number of visits can be tabulated. Office Provider = Jones, Jenny Status Starts With Active Appointment Date in the Last 1 Year Hospitalization and/or ER reports. These are external documents received at the clinic, usually as a fax/e-fax. In this case how these are indexed/named and attached to the chart matters. With consistent naming protocol, the number of hospital and/or ER reports can be found for a patient. Hospitalization/ER visits (within the past year) A similar approach as Social Risk Factors could be developed to capture this information. Another option could be if this information is captured by the clinic consistently and in a standardized manner as a document this can be queried to identify these patients. Scanned documents: (See Scanned Documents) o Past care plans. If care plans are consistently named and linked in the patient s chart, past care plans can be found and as the date they are indexed can be determined, these can inform follow-up visits or follow-up care plans. The billing of the care plan can also be used to inform follow-up o Reports and referrals 70

 A critical step to monitor and follow-up with patients with complex health needs is to have one place in the EMR where the term complex")
71 Home health services. Documenting in a consistent way which patients receive home health services would assist in identifying all these patients; some of which will represent patients with complex health needs. Receiving Home Health Services A similar approach as Social Risk Factors could be developed to capture this information. Recording Complex Health Needs in the EMR (Critical Step) A critical step to monitor and follow-up with patients with complex health needs is to have one place in the EMR where the term complex health needs is recorded and is searchable; it is also beneficial if it is searchable for your quality improvement measures. As a clinic, determine and agree on one place it will be recorded. It is recommended that this be in the: Problem List (The term Complex Health may need to be added to the Problem List master list of terms by the clinic s EMR administrator.) See Sample Problem Lists Profile/Medical History How to create a custom Problem for Complex Health Needs 1. Click on the Green Plus sign on the ribbon of the History of Problems Medical History Band in the Encounter Note tab of a patient record. 2. A Diagnotic Search window opens clicking on the second green plus icon (bottom left) Configuation Icon 3. This opens a Add Custom Diagnosis Window. Type in the desired Custom Code and Custom Description and click OK 4. Finally back on the Diagnostic Search Window click on the gears configuration icon (see step two above). 71

72 5. This opens the Diagnostic Search Option window. Ensure the Search Custom Codes checkbox is checked and click OK. The Complex Health Needs patient problem is now available to add to patient History of Problems search by the custom code or description. Similarly a custom patient Flag could be created for display in the patient s demographic bar. This addition might be helpful for staff to see that do not have the EMR access rights to look at the Encounter Note in the patient s chart. See Problem Lists Prepare Phase Append patient assessment information to the record Some patients identified for care planning may have seen other providers and had various diagnostic, lab or other tests completed that may be relevant to the care planning process. Some of this information might be available on NetCare. This potentially better practice suggests that someone from the care team looks at NetCare for relevant information and adds it to the EMR in a standardized way. See Foundation for Success - Commitment to Standardization in the EMR Populate care plan template with known information in advance of the encounter Some EMR data can be entered once in the patient s chart and then flow to the care plan (mapped). By charting this way team members will save time when looking for information and it will take less time to create the care plan and there will be less chance of data discrepancies and errors. Data that can be mapped in most EMR s includes: Emergency Contact Info Current Problems Medications Current (OTC & Rx) & Failed Allergies Family Medical History Significant Historical Medical Events Test & Treatments Labs Diagnostic Imaging Modifiable Risk Factors including Tobacco, Alcohol, Exercise, Obesity (BMI), Diet of Fruit & Vegetables 72
73 Other data that is less likely to be mapped in most EMRs should be charted in a consistent way so that the team knows where to enter it and where to find it in the record when working on the care plan with the patient. Such data includes: Care Team Members Medical Team Members Social History (Risk Factors) Frailty Identifier Medical and Assistive device Personal Care Directives Goals of Care Follow ups NOTE: How and where you capture information in the EMR will determine the amount of information that can be mapped/linked to the Care Planning Template (see appendices). Please refer to individual EMR Guide for details on pre-populating the template Generate lab and/or diagnostic imaging requisitions in advance of the encounter EMRs have requisitions for laboratory and diagnostic imaging that are generated from the system. If your team is not using this feature, this is an opportunity to begin using this feature to proactively generate and provide requisitions to patients in advance of appointments. Some EMRs have built in capabilities to e-fax directly from the system to the lab or imaging centre of the patient s choice. There are also a number of third party software options that allow for secure electronic transmission of requisitions. Plan Phase Documenting in the care planning template In the prepare phase, the care plan template activities focused on populating the template before the patient arrives for their appointment. In this section, the change is the population of the template during the appointment. These sections include: Medical goals and targets Patient goals (health and life) Medical action plan Patient self-management action plan 73
74 Potential barriers and coping plan Follow-up plan (who, when what, next visit) other identified care team members outside of the clinic or PCN involved in the patient s care See Appendix A Some teams will already be used to charting during the appointment. The goal is to have the information in the template by the end of the appointment with the patient so that you can print a copy for the patient. It is suggested that you check settings on your EMR to see if/how you can print in a font size appropriate for the patient. Set a reminder in your EMR for follow up appointments Most EMRs have a function to set a reminder to the appropriate staff member to call a patient in for follow up. The patient should be aware of the follow up date based on their care planning follow up plan but many will still want or need a follow up call. Many clinics already use this function in some capacity but there may be additional considerations for care planning that could be discussed. Manage Phase Maintaining the care planning document over time As patients come in for follow up appointments there will be a need to add, delete and change information in the care planning template. Each EMR will handle this task in a slightly different way and you will need to become familiar with how your EMR handles this and what is optimal for you and your team. Over time, you may wish to start a new template which may be based on time or the volume of change over time for each patient. Creating reminders for planned care interventions Most EMRs have a reminder system where you can be reminded during the appointment that a care intervention is due or where you can create searches for certain interventions overdue/coming due. Standardizing processes for referral tracking Most clinics have processes for tracking referrals to specialists, programs and services. Participation in PaCT may be an opportunity to review processes and examine some of the features in your EMR for more effective referral tracking. 74
75 Measurement While implementing the Patient s Medical Home, a practice or team will not know how they are doing unless they measure for improvement. Process measures reflect the things that are done in the practice and how the systems are operating. Example measures are: Confirmation/Validation Rate 4 It is useful is to measure how often the team is confirming the patient demographic information (address and phone) and physician attachment. When a clinic is new to the process of patient confirmation it can be measured in the search tool. Process Measure(s) For example a team that wants to measure how they did in a week: # patients confirmed this week x 100 = confirmation rate (%) # patient visits this week A clinic may also have an expectation over a period of time and can determine if the validation goals are being met. For example if a practice has an expectation that their validation rate over a 3 month period should be 95% the formula would be: # patients confirmed in the last 3 months x 100 = confirmed rate (%) # patient visits in the last 3 months Outcomes Measure (3 years) Overtime a clinic can use an agreed upon timeframe (e.g. 3 yrs.) to determine that the confirmation of attachment percentage to their most responsible primary provider and team has been sustained. # patients confirmed in the 3 years x 100 = confirmed rate (%) # patient visits in the 3 months For all the above calculation by adding all the individual primary provider percentages a comprehensive clinic s percentage for confirmation can also be determined. Appendix D: Calculating Panel and Clinic Confirmation Rates Worksheet 4 When patient demographics and primary provider relationship are checked at the clinic that is called confirmation even though the box in the EMR may be called verified or validated. A confirmed patient panel is produced at the clinic through this process. The Central Patient Attachment Registry will verify the patients on the confirmed panel to identify only those patients attached uniquely to that primary provider. 75
76 Screening Rate Based on Completed Screens A practice will also find that they are able to measure rates for preventive screening care. Measuring completed screens looks for completed results. The generic equation is: # patients in eligible population with a result during the screening interval + x 100 = screening rate (%) # patients in the eligible population* + The screening interval is the time frame during which the screening maneuver should be done * The eligible population would include all the active, paneled patients for a provider whether they came into the clinic or not as all rates are calculated over the paneled population. Example 1: Dr. Brown wishes to calculate the completed blood pressure screening rate for her active paneled adult patients. Blood pressure should be measured annually (ASaP) # active adult patients* (18 +) with a BP result in the last year x 100 = BP screening rate (%) # active adult patients* (18 +) * Attached to Dr. Brown in the EMR Example 2: Dr. Brown wishes to calculate the completed diabetes screening rate for her active adult paneled patients. Diabetes screening is: appropriate for adults 40 + recommended once every 5 years completed with a fasting glucose, hemoglobin A1c result or a diabetes risk calculator score # active adult* patients (40 +) with a fasting glucose OR HbA1c OR diabetes risk score in the last 5 years x 100 = Diabetes Screening Rate (%) # active adult patients* (40+) * Attached to Dr. Brown in the EMR Calculating a Screening Rate Based on Offers of Screening Care Practitioners participating in the Alberta Screening and Prevention improvement project will include both completed screens and offers of the screen. In this case, to measure with the EMR there must be a place that declined, deferred and exemptions for screening are reliably recorded. In this case the generic equation is: # active adult patients with an offer of screen or completed screen during screening interval x 100 = screening rate (%) # active adult patients Appendix D: Calculating Panel and Clinic Confirmation Rates Worksheet 76

77 It is recommended to use the chart audit methodology 5 instead of EMR measures if the offers of screening care are unable to be searched in the EMR. Disease Management Rate EMRs are capable of measuring around disease management parameters provided the information is entered in a place where it can be searched. Example: Dr. Brown wishes to measure how many of her active paneled patients with diabetes have an HbA1c result below 7% in the last year. Generic equation: # active patients* with diabetes + with an HbA1c result below 7% in the last year x 100 = rate (%) # active patients* with diabetes + + Patients identified as having diabetes when Diabetes is listed as an active problem in their Problem List Care Planning For clinics participating in PaCT, progress on identification and care plans completed may wish to collect supporting measures. In this case the clinic may wish to measure how many patients have been identified as having a complex health needs and, of those patients, how many were offered care plans with the new process on a monthly basis. To do this the two monthly searches would be: 1. number of patients with complex health needs Office Provider = Jones, Jenny Status Starts With Active Diagnosis Diagnosis Code = number of patients with complex health needs with a care planning template 5 See ASaP EMR Chart Review Instructions: 77

78 Office Provider = Jones, Jenny Status Starts With Active Diagnosis Diagnosis Code = 1000 Document Created Date in the Last 1 Month AND Document Type = Care Plan Template An improvement graph may look like this: Complex Health Patients Care Plans Complete
79 Appendix A: Care Planning Template(with prompts) Download the most up to date template at: 79
80 80
81 81
82 82
83 Appendix B: Sample Common Problem Lists/ Diagnostic Codes Lists for Primary Care for standardized EMR data capture These examples were from real clinics or PCNs Example 1: TOP 32 CODES SYSTEM CODE DIAGNOSIS Endocrine 250 Diabetes 244 Thyroid (hypo) 279 Obesity 272 Lipids Neurological 340 M.S 345 Epilepsy 346 Migraines 434 Stroke Sleep Disturbance MSK 723 Cervical Disorder 715 OsteoArthritis 714 Other Inflammatory Polyarthropathy (Rheumatoid Arthritis) 729 Fibromyalgia 724 Back 781 Chronic Pain Psycho 311 Depression Anxiety 290 Dementia Respiratory 496 COPD 493 Asthma CVS 428 Health Failure 427 Arrythmia 414 Coronary Artery 401 Hypertension 443 Peripheral Vascular Disease GI 564 Functional GI Disorders Renal 585 Chronic Renal Failure OB/GYN 628 Infertility 626 Menstrual Disorders 627 Menopausal Disorders ADDICTIONS Smoking Dependency Syndrome 303 Alcohol Dependency Syndrome Created by the Red Deer PCN 83
84 Example 2: Sample Standardized Problem List (simplified without using ICD9 codes) Addiction Depression Obesity ADHD Diabetes Obstructive Sleep Apnea Alcoholism Down's Syndrome OCD Alzheimer s Disease Eating Disorder ODD Amputation Epilepsy Other Anemia Erectile Dysfunction Panic Disorder Aneurysm GERD Paralyzed Angina Glucose Intolerance Paraplegia Anxiety Gluten Intolerance Parkinson's Disease Asthma Grave's Disease Personality Disorder Autism Hemophilia Phobia Bell's Palsy Hepatitis PMDD Bipolar Disorder Hepatitis B PMS Blindness Hepatitis C Psychosis Borderline Personality Disorder High Blood Pressure PTSD Cancer High Cholesterol Reactive Attachment Disorder Celiac Disease HIV Schizoaffective Cerebral Palsy HPV Schizophrenia Chronic Pain Insomnia Seasonal Affective Disorder Cluster B Personality Disorder Learning Difficulties Seizure Disorder COPD Learning Disability Sensory Processing Disorder Crohn's Disease Major Depressive Disorder Tourette Syndrome Dementia Mood Disorder Created by Edmonton Oliver PCN 84
85 Appendix C: Lists of scanned document index words/keywords These examples are from real clinics. Example 1: ALLERGIST Appointment Appt Confirmation CARDIOLOGY Care Plan Care Plan - Signed Chart Colonoscopy Report Colposcopy Report Consult Letter CT Scan DERMATOLOGY Discharge Summary Driver s Medical ECG Graph ECG Report ENDOCRINOLOGY ENT Forms GASTRO GEN SURGERY Total Hysterectomy INTERNAL MED Lab Lab Provincial Mammogram MRI Neurology Neurosurgery Notice of Admission Notice of Discharge OBGYN OPD Sheet Ophthalmology OR Report ORTHO Pap Report Parking Placard PEDIATRICS PLASTICS Pre-op Medical Referral Report Requisition RHEUMATOLOGY Rx Adaptation Rx Refill Ultrasound UROLOGY Vascular WCB Xray 85
86 Example 2: Admit Air Contrast ALT Anti-HIV Anti-Nuclear (ANA) Appointment Notice Attending physical statement Audiology Report Beta HCG Biopsy Blood Culture Blood Type Blue Cross Authorization Breast Ultrasound Body Fluid Culture Bone Density Bonnyville Cancer Centre Bubble Pack Authorization C-reactive Protein Care Plan Care Plan - Signed Cat Scan CEA Cervical Culture Chart Notes Chart Request Acknowledgement Chemistry Child Welfare Medical Chlamydia Claims Management Program Colonoscopy Report Colposcopy Report Consult Creatinine Critical Care Line Cross Cancer Cytology Report Diabetic Consult Discharge Instructions Discharge Summary Double Contrast Driver s Medical ECG Echocardiogram EA screen Endoscopy Ferritin Free testosterone Gastroscopy GC Probe Gynecological Cytology Report HBA1C Hematology Hepatitis Home Care Total Hysterectomy Imaging Influenza INR Iron and TIBC Lipid Testing Mammogram Medical release and report Medications Mental Health Microbiology Millard Health WCB MRI MRSA Newborn Metabolic Screen NIHB Drug Exception No Show Occult Blood Oncology Imaging OPD Operative Report Ova & Parasite Pap Pathologist Comment Patient Photo Perinatal Phenytoin Physician Admit Advice Pre-op medical Prenatal PSA Psychogeriatric Consult RAAPID North Patient Summary RAH Rapid Plasma Reagin Test Release of information Rx adaptation Rx request Serum Protein Elect. Slick Sputum Culture Stool Culture Superficial Culture Surgical Pathology Report Syphilis TB Update Throat culture Tom Baker Cancer Centre Troponin TSH UAH Ultra Sound Urethral Culture Urine Microalbumin Vaginosis Screen Vital Aire VRE WCB Wound Culture X-ray 86
87 Appendix D: Calculating Panel and Clinic Confirmation Rates Worksheet Created by Highlands PCN
88 Appendix E - Accuro Hot Keys List Keyboard Key Function F1 Patient Search F2 Provider Management F3 Quick Patient Summary (can also use Ctrl+F3) F4 Quick Patient Appointments View F5 Documents Previewer F6 New Patient F7 Patient Tasks F8 Patient Status History F9 Chart Sheet F10 N/A F11 Referral Letter F12 Generate date/time stamp in EMR Letters/Clinical Notes ALT+F2 Address Book ALT+F4 Close/Exit ALT+F12 Hide Screen ALT+Home icon Opens Home in separate window ALT+Scheduler icon Opens Scheduler in a separate window ALT+Traffic icon Open Traffic in a separate window ALT+Documents icon Opens Documents in a separate window ALT+Claims icon Opens Claims in a separate window ALT+EMR icon Opens EMR in a separate window CTRL+F1 Open User Guide CTRL+F3 New Patient Summary CTRL+F10 Quick Patient Action Window CTRL+F11 Adv. Letter CTRL+A Select All CTRL+B New Bill CTRL+D Cancel Appointment CTRL+I Find Invoice CTRL+K Find Claim ID CTRL+L Book on Waitlist CTRL+P New Procedure CTRL+Q Quit CTRL+R Reporting CTRL+S Create Appointment CTRL+1 Home CTRL+2 Scheduler CTRL+3 Patient CTRL+4 Documents CTRL+5 Claims CTRL+6 EMR CTRL+7 Letters CTRL+8 Waitlist CTRL+9 - CTRL+ALT+C Calculator CSV Export of the Day Sheet CTRL+ (in Scheduler)
89 Appendix F - High Value Efficiency Tips 1. Clinic engaged conversation on Workflow (agreed upon and documented) 2. Non-electronic Documents Develop Keyword List clinic discussion and agreement standardization agreed upon but can be managed for ease by user ID 3. Customized Demographics Bar Add additional information Add colours Add Flags (staff versus physician) 4. Clickable Words (template editor) Recommended Accuro Help files: Clickable Words Clickable Words in EMR Notes (Tech Tuesday #25) 5. Effective use of Quick Action Buttons (bottom of desktop)-customize to user needs Frequently used items Examples: i.e Framingham calc, e-forms/templates, Template Editor Recommended Accuro Help files: Set up the Action Bar 6. Use of Macros (don t work everywhere i.e. MHB or Lab Order #) Booking Appointments, Templates, Tasks, Notes, Messages, etc. Macros available for Office or Individuals Recommended Accuro Help files: Macros 7. Use of Footnotes as non-urgent alerts 8. Explore User preferences/settings (customize based on individual needs) Demographic Status Bar Customization Patient demographics are critical baseline pieces of data required for billing, identifying patients, filling out forms, and contacting patients. This information is used every day. It is advisable for front staff performing patient check-in to customize the Demographic Status Bar to include the date the patient information was last updated. Steps: 1. Click File, User Preferences 2. Go to the Display Area (tile on left).
 the user does not want displayed. 5.")

90 3. Click on the tab labeled Display. In the middle of the screen is a Demographic Status Bar with tags like <OFFPHYSFIRSTNAME> listed. Each of these tags represents a field that will show in your patient bar. Labels can also be added. 4. In the 2 long text fields, delete any tags (the < > words) the user does not want displayed. 5. Any available tags can be added in by Right Clicking the text field, revealing a selection list of all of the patient demographic fields. Click on the desired field, and it inserts the tag in to the line where the cursor is currently active. 6. Next change the font size and font to your preference Change the Type to Status Bar (this does not allow font size adjustment in the rest of the application, just the font in the patient bar). 7. To ensure new additions are saved: click Apply and OK to save your changes. Example: Demographic Status Bar User created titles in the status bar

91 Macros Use the Macros feature in Accuro to create shortcuts for repetitive text. Macros enable the user to save text and phrases they use regularly under a name. When you select macros and then the name all the text is automatically inserted into your note or letter. This is an excellent time saving device for all those phrases and notes that you use regularly and would rather not have to type out time after time. In order to add, modify or delete Macros, they are accessed through the Tools menu. Recommended Accuro Help files: Macros Macros within Macros (Tech Tuesday #26) Save Typing with Macros (Tech Tuesday #91) Using Macros in Forms Query Builder (Alerts)-Example of Advance Logic The Query Builder (Alerts) reporting tool in Accuro is capable of creating queries that are as complex as required. This requires a clear understanding of and, or and not (in Accuro Doesn t Match ) logic. In order to access this advanced logic functionality when inside the Query Builder, click on the Options button, which opens the Alerts Definition Options window.


92 In this window make sure the Use Advanced Logic box is checked and click on the OK button. In the Alert Definitions window a pencil icon appears at the top of the page. Clicking on this icon opens the Advanced Logic window show the current query as build. Instruction on how to format and use the and, or logic is shown in order to combine rules. The example below shows the logic for: All Active Patients with Office Provider = None for Males over 40 and Females over 50 years of age. This report would be a good process check to indicate those patients eligible for the Diabetes Screen that do not have an Office Provider attached. Notice the use of Ands, Ors and brackets ( ) to join and separate the conditions correctly.


93 Tip: Although there is no negative logic in this statement, any Current Rule could be checked Doesn t Match for the opposite condition for validation that the query is working correctly. Custom Reports: New to the Alert/Query Builder? The following are recommended Accuro help files: Query Definitions Create an Alert Definition Add Rules to an Alert Definition Run a Report on an Alert Definition Query Builder Example: Total Count of Patients Export Alert Matches Save Appointment List to csv File to be Used for a Mail Merge To produce a list of active patients attached to each provider, use the Query Builder (Alerts) to identify the patients with a Patient Status as Active for each Office Provider participating in ASaP.
94 Overview: The workflow for creating an Alert (query/ report) is as follows: 1. A Definition is created (this is the name of the query/report) 2. Add the Rules (criteria/filter/constraint). 3. Run the report on the query (all the rules in the definition run concurrently). 4. The results of the query are displayed as Alert Matches Optional next steps 1. Actions may be selected for the patient listed such as: Create task Set Patient Status Assign Flag Create Forms (these can be outreach letters) 2. The list/report may be Exported note: save the list as a csv file to open in Open Office Calculator or a Microsoft Excel spreadsheet. Note: An exported list would be required for: Panel list Chart review process Creating a list for patient outreach 1. Create the Alert Definition a) Click Reports in the Accuro Menu. b) Select Query Builder (Alerts) from the list displayed. The Alert Definitions window is now displayed. c) Click the Add button (green plus) in the top-left corner under Definitions. d) Type in the name of the definition (title of your report) and click OK. The next set of steps involves selecting the criteria or New Rule for your Alert Definition (Report). 2. Adding the New Rule to the Alert Definition a) Select a Category to add into the New Rule by clicking on the downward pointing triangle. b) Select the appropriate item from the list. c) Complete the fields in the Manage Rule area d) Click the New button to add more criteria e) Click Add Rule to add the criteria to the Alert Definition. 3. Select Run Report 4. The Check for Alert Matches window opens: a) By default Apply Against: All Patients appears or you choose Selected Providers Patients
 or double clicking on X/Check mark as required. 6. Select Run to displayed Alert Matches. 7.")
 as csv file.")
95 b) Also by default: Match Types to View is set to Unassigned with options for Assigned or Completed. This relates to assigned Tasks related to individual clinic workflow. 5. Select Fields to Display by clicking plus (+) or double clicking on X/Check mark as required. 6. Select Run to displayed Alert Matches. 7. Using the Select Action dropdown a selection of patient can have a specific action assigned (i.e. Create Task, Apply Vaccine, Create Note, etc.). 8. The report can then be printed or exported (Select Export) as csv file. Sample Query Builder (Alerts) Report The Clinical Notes area of the EMR provides an overview of the notes for a patient and should be reviewed for screening offers.
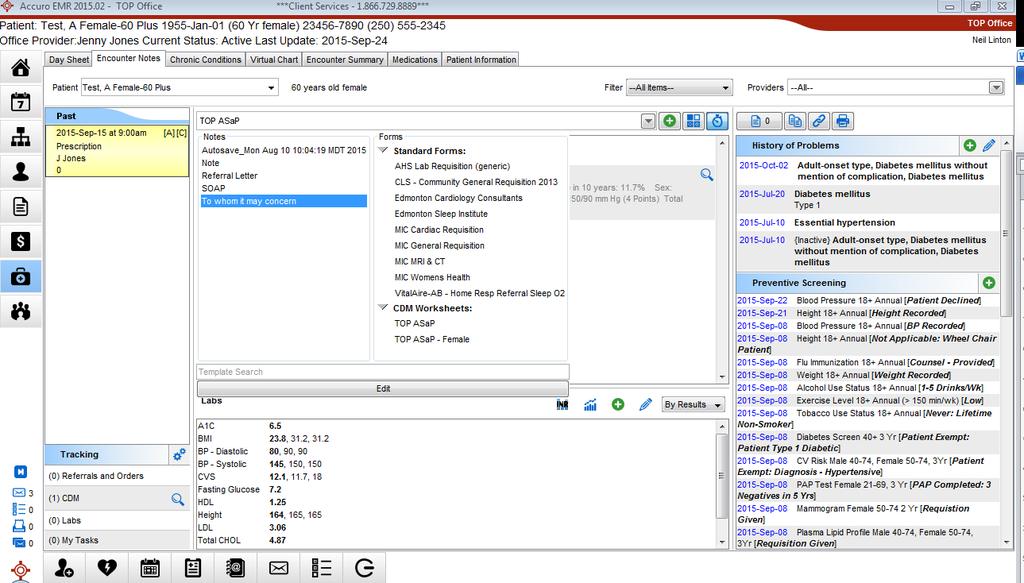
96

97 Appendix G - ASaP 2017 Form Note: Some screen shots have NOT been updated from the 2016 form. Please refer to the 2017 intervals. Instruction for setup and use Please set up EMR prior to downloading ASaP Screening Maneuvers Form this will avoid preset linking disconnection. It is safe to Preview the form in Form Editor before set up. 1. Create a Custom Medical History Band entitled Screening. 2. Entering Information into the Screening Band a. The following needs to be added to the screening band: i. Mammogram ii. Colonoscopy iii. Influenza Vaccination/Screening iv. Framingham Risk Score b. Mammogram and Colonoscopy Results i. Docufiler: As Staff sort documents within the Docufiler they should be instructed to add the date of both Mammograms and Colonoscopy within this Screening Band. 1. NOTE: The date of the test MUST be placed in the Note field Currently, using the calendar to record the date does not transfer onto the ASap Maneuvers Form c. Influenza Vaccination i. Staff should be instructed to ask patients whenever they are performing vitals when the patient last received Influenza vaccination and add the date to the Screening Band

98 1. NOTE: The date of the test MUST be placed in the Note field Currently, using the calendar to record the date does not transfer onto the ASap Maneuvers Form d. Framingham Risk Score i. When performed, both the date and the result should be added to the Screening Band by the physician. 1. NOTE: The date of the test MUST be placed in the Note field Currently, using the calendar to record the date does not transfer onto the ASap Maneuvers Form 3. Vitals a. Create a custom manual lab within the current Physical History that contains the following Exercise Weekly, Tobacco Daily, Alcohol Weekly i. Click on the green + as if to add a manual lab. ii. Choose Physical History and then Edit Pencil. An Input Screen will pop up and ask you to Enter the name of the new Test. Enter Exercise Weekly iii. An Edit Lab Test Screen will pop up. Select the green +.

99 iv. A Lab Result Search Screen will pop up. Select the New button on the lower right.

100 v. An Enter the name of the new result screen will pop up. Enter Exercise Weekly then OK. vi. An Edit Result Screen will pop up, enter Minutes into Units. Click on the green +, then click on the drop down arrow by Laboratory and then click on manage.


101 vii. A new screen will pop open, click on the green + and add Exercise Minutes Weekly, and add a reference range of 0 to Then click on OK. viii. Back to the Lab Result Search Screen. Search for Exercise Weekly. Select. Click OK. ix. Exercise Weekly will now show up in the Vitals Menu.

102 x. Follow the same process for Tobacco Daily and Alcohol Weekly but use Equivalents as the Units b. Each time a patient has vitals recorded they should also be asked about there Exercise Weekly in minutes, Tobacco Equivalents consumption Daily, and Alcohol Equivalents 4. Download ASaP Maneuvers Form in Form Editor via the Tools Tab Left upper Corner and choose Publish/Download. Search for ASaP and Download. Back in Form Editor Unclick Under Construction and Save. 5. The following is a Preview Shot prior to Downloading the form.

103 6. After Downloading the form, verify linkages between the form and the EMR in Form Editor. a. In Form Editor, Right Click on each Element starting with BP Click thru each elements components in the left hand part of the screen and verify that it is correctly linked by reviewing information on Right hand of screen. If not correctly linked, use the drop downs on the Right to find the correct link and save. b. Continue to verify each element s mapping, especially those items that you have created. Those clinics utilizing this form who are not in the Calgary Health Region will need to map to the correct labs within their health region. 7. Finally, when saved, and then selected within a patient s chart, the form will autofill. The Entire Screening Band will insert. Items not done in the patient chart will not load into the Form.

104 TOP Accuro Videos Accuro ASAP Form Download for Use ASaP Screening Form for Use in Accuro Accuro ASAP Recording Screening &index=20

105 Appendix H - ASaP Maneuver Data Entry Tips Acknowledgement: The content for this Appendix was created by the team at Kalyna Country PCN. Blood Pressure 1. After logging into Accuro, locate the Patient button on the left side of the screen and double Click it. 2. Fill in the First Name and Last Name of the patient at the top of the page. (While typing, the EMR will automatically narrow down to the right patient you are looking for. To make sure make sure to check the patients DOB to the one in the EMR.) Double Click the patient name 3. Click EMR button. 4. Go to Encounter Notes. 5. Scroll down to Labs, near right corner of the section there is a green plus button. Double Click. 6. A new window will open called; Lab Tests. 7. Highlight the Test Name called ***Vitals (Manual), and Click OK. 8. A new window will open called Lab Results Entry. 9. If needed Scroll to find BP Systolic and BP Diastolic.

106 10. Enter the results of BP Systolic and BP Diastolic under the Value column. Make sure you enter the proper value for each test. a. If you want to add a note regarding the lab test result, this is where you would be able to add. The note can be added under the Note column on the proper test row. 11. Check the bottom of the page is the proper provider is selected below the notes section of the Lab Results Entry page. 12. Click Apply and then Click OK to save the entry. The window will close itself once you Click OK Note: The same process can be carried over for Height and Weight screening. Only steps 7 and 8 will differ during the data entry phase. Tobacco Use, Exercise & Alcohol Assessments 1. After logging into Accuro, locate the Patient button on the left side of the screen and double Click it. 2. Fill in the First Name and Last Name of the patient at the top of the page. (While typing, the EMR will automatically narrow down to the right patient you are looking for. To make sure make sure to check the patients DOB to the one in the EMR.) Double Click the patient name 3. Click EMR button. 4. Go to Encounter Notes 5. Refer to the right side of the page, and look at appropriate Medical History Band (e.g. Lifestyle)


107 6. Once there look for the Lifestyle category. Click the green plus button. 7. A new window will open called Lifestyle. 8. Here you can now add the data. 9. Steps to add data are as follows: 1. Select the type of screening you are about to enter. 2. Add the date when the data was collected. (Must be done for entry to be valid) a. If you want to add a note regarding screening, this is where it is possible to do so. The note can be added under the Note row. 3. Once finished, Click Save and Close button. To enter more data about a different type of screening, Click Save and New.

108 Cardiovascular Risk Assessment 1. After logging into Accuro, locate the Patient button on the left side of the screen and double Click it. 2. Fill in the First Name and Last Name of the patient at the top of the page. (While typing, the EMR will automatically narrow down to the right patient you are looking for. Be sure to check the patients DOB to the one in the EMR.) Double Click the patient name 3. Once the patient has been selected, look for the EMR button and Click. 4. Find the Accuro button and Click. 5. In the Accuro search bar type in Framingham. The Framingham Risk Calculator will show up on the results page. Double Click. ** Alternatively you can use the Framingham calculator available on your bottom dashboard of your screen 6. A new window will open called Framingham Risk Calculator. 7. Enter the necessary data elements (Sex, Age, Diabetic, Blood Pressure, Total Cholesterol, HDL Cholesterol) needed for the EMR to compute the patients risk score. Note, some of the data elements will auto populate, please make sure that these are correct. Once you have entered the correct information, Click OK.
109 8. The result will automatically be saved into the Notes section of the main page. Double Click on the result to view the whole page for review. 9. Once the value of Heart Disease Risk in 10 Years is known, enter the value into the labs area immediately after calculating the score. 10. At the bottom of the page you will see a section called Labs. 11. In the Labs look for the green button, and Click. 12. A new screen called Lab Tests will pop up. 13. To find the lab tests: a. Use the search tab to begin typing the name of the tests (Cardiac Risk). b. Highlight the name of the test. Click OK. 14. A new screen called Lab Test Entry Patient Name will pop up. Here, make sure you are entering the right information for the right patient. a. If you want to add a note regarding the lab test result, this is where it is possible to do so. The note can be added under the Note column on the proper test row. 15. Check the bottom of the page that the proper provider is selected below the notes section of the Lab Results Entry page. 16. Add the value to the correct field. Click Apply to save the entry, then Click OK to close the window. Diabetes (Screen) 1. After logging into Accuro, locate the Patient button on the left side of the screen and double Click it. 2. Fill in the First Name and Last Name of the patient at the top of the page. (While typing, the EMR will automatically narrow down to the right patient you are looking for. To make sure make sure to check the patients DOB to the one in the EMR.) Double Click the patient name. 3. Once the patient has been selected, look for the EMR button and Click. 4. Go to Encounter Notes. 5. At the bottom of the page you will see a section called Labs. 6. In the Labs look for the green button, and Click.
110 7. A new screen called Lab Tests will pop up. 8. To find the lab tests: a. Use the search tab to begin typing the name of the tests (Glucose Fasting or Hemoglobin A1C). b. Highlight the name of the test. Click OK. 9. A new screen called Lab Test Entry Patient Name will pop up. Here make sure you are entering the right information for the right patient. 10. Check the bottom of the page is the proper provider is selected below the notes section of the Lab Results Entry page. a. If you want to add a note regarding the lab test result, this is where it is possible to do so. The note can be added under the Note column on the proper test row. 11. Add the value to the correct field. Click Apply to save the entry, then Click OK to close the window 12. Repeat steps 8-10 until you have captured all the necessary lab test results. Plasma Lipid Profile 1. After logging into Accuro, locate the Patient button on the left side of the screen and double Click it. 2. Fill in the First Name and Last Name of the patient at the top of the page. (While typing, the EMR will automatically narrow down to the right patient you are looking for. To make sure make sure to check the patients DOB to the one in the EMR.) Double Click the patient name. 3. Once the patient has been selected, look for the EMR button and Click. 4. Go to Encounter Notes. 5. At the bottom of the page you will see a section called Labs. 6. In the Labs look for the green button, and Click. 7. A new screen called Lab Tests will pop up. 8. To find the lab tests: a. Use the search tab to begin typing the name of the tests (HDL, LDL, Cholesterol, and Triglycerides) b. Highlight the name of the test. Click OK. 9. A new screen called Lab Test Entry Patient Name will pop up. Here make sure you are entering the right information for the right patient.

111 10. Check the bottom of the page is the proper provider is selected below the notes section of the Lab Results Entry page. 11. Add the value to the correct field. a. If you want to add a note regarding the lab test result, this is where it is possible to do so. The note can be added under the Note column on the proper test row. 12. Check the bottom of the page is the proper provider is selected below the notes section of the Lab Results Entry page. 13. Click Apply to save the entry, then Click OK to close the window 14. Repeat steps 6-10 until you have captured all the necessary lab test results. Influenza Vaccination 1. After logging into Accuro, locate the Patient button on the left side of the screen and double Click it. 2. Fill in the First Name and Last Name of the patient at the top of the page. (While typing, the EMR will automatically narrow down to the right patient you are looking for. To make sure make sure to check the patients DOB to the one in the EMR.) Double Click the patient name 3. Once the patient has been selected, look for the EMR button and Click. 4. Click EMR. 5. Go to Encounter Notes. 6. Refer to the right side of the page, and look for the blue banners. 7. Once there look for the Immunization Summary category. Click the green plus button.


112 8. A new window will open called Vaccines. 9. Here you will be able to pick the type of vaccine to be administered. To administer the Flu Shot Click on Influenza and press OK. 10. A select vaccine pop up window will appear; Click OK 11. Click on the ellipsis to the right of the vaccine column and select the specific type of vaccine being administered. Make sure that the Vaccine Lot and Lot Expiry Date columns are filled in with the appropriate and the administered complete box is checked off. For lot number you can input a standard number of Once you have checked off and filled in the appropriate fields Click OK.
113 12. Once you complete these steps the Immunization section of the banner should update and the influenza vaccine along with the date should appear. Pap Test 1. After logging into Accuro, locate the Patient button on the left side of the screen and double Click it. 2. Fill in the First Name and Last Name of the patient at the top of the page. (While typing, the EMR will automatically narrow down to the right patient you are looking for. To make sure make sure to check the patients DOB to the one in the EMR.) Double Click the patient name 3. Once the patient has been selected, look for the EMR button and Click. 4. Go to Encounter Notes. 5. Scroll down to Labs, near right corner of the section there is a green plus button. Double Click. 6. A new window will open called Lab Tests. 7. To find the lab tests: 1. Use the search tab to begin typing the name of the tests (Pap Smear) 2. Highlight the name of the test. Click OK. 8. A new screen called Lab Test Entry Patient Name will pop up. Here make sure you are entering the right information for the right patient.

114 9. Add the value to the correct field. 1. If you want to add a note regarding the lab test result, this is where it is possible to do so. The note can be added under the Note column on the proper test row. Click Apply to save the entry, then Click OK to close the window Mammography 1. After logging into Accuro, locate the Patient button on the left side of the screen and double Click it. 2. Fill in the First Name and Last Name of the patient at the top of the page. (While typing, the EMR will automatically narrow down to the right patient you are looking for. To make sure make sure to check the patients DOB to the one in the EMR.) Double Click the patient name 3. Once the patient has been selected, look for the EMR button and Click. 4. Click EMR. 5. Go to Encounter Notes. 6. Refer to the right side of the page, and look for the blue banners. 7. Once there look for the ASaP category. Click the green plus button.

115 8. Select the appropriate test Mammogram Female 50-74, 2 yr 9. Enter a Detail about whether the Mammogram was completed, deferred, declined, exempt or the requisition was given. Also add a Note if the patient wasn t in the age 10. It is important to add a Note if the patient is not within the age range. You can also add notes about any other concerns you have. Colorectal Cancer Screen 1. After logging into Accuro, locate the Patient button on the left side of the screen and double Click it. 2. Fill in the First Name and Last Name of the patient at the top of the page. (While typing, the EMR will automatically narrow down to the right patient you are looking for. To make sure make sure to check the patients DOB to the one in the EMR.) Double Click the patient name 3. Once the patient has been selected, look for the EMR button and Click. 4. Click EMR. 5. Go to Encounter Notes. 6. Refer to the right side of the page, and look for the blue banners. 7. Once there look for the ASaP category. Click the green plus button.

116 8. Select the appropriate test Colonoscopy 50-74, 5 yr Fecal Immunochemical Test FIT) 50-74, Annual or Flex Sigmoidoscopy" 9. Enter a Detail about whether the Test was completed, deferred, declined, exempt or the referral was initiated. Also add a Note if the patient wasn t in the age 10. It is important to add a Note if the patient is not within the age range. You can also add notes about any other concerns you have. Confirming Mammogram and Colon Cancer Received Results 1. Once you are logged onto Accuro, click the Home button 2. At the top of the page there is a section for the physicians incoming received documents and labs. Mammograms will come in as documents and Colon reports will come in as labs. 3. Use this information to update the Lifestyle banner for the patients. The How to documents for Mammograms and Colon Cancer will assist you on how to enter this information in. Created by Kalyna Country PCN
Med-Access EMR Guide for Patient s Medical Home
 Med-Access EMR Guide for Patient s Medical Home Contents Introduction... 4 Patient s Medical Home... 4 Foundation for Success - Commitment to Standardization in the EMR... 5 Help Files and Support... 6
TELUS Wolf EMR Guide for Patient s Medical Home
 TELUS Wolf EMR Guide for Patient s Medical Home Contents Introduction... 4 Patient s Medical Home... 4 Foundation for Success - Commitment to Standardization in the EMR... 5 Help Files... 6 TOP EMR Videos...
Using TELUS Wolf to Support Patient s Medical Home
 Using TELUS Wolf to Support Patient s Medical Home Contents Introduction... 3 Patient s Medical Home... 3 Foundation for Success - Commitment to Standardization in the EMR... 4 Help Files... 5 References...
Understanding Your Meaningful Use Report
 Understanding Your Meaningful Use Report Distributed by Kowa Optimed EMRlogic activehr Understanding Your Meaningful Use Report, version 2.1 Publication Date: May 8, 2012 OD Professional and activehr OD
A complete step by step guide on how to achieve Meaningful Use Core Set Measures in Medgen EHR.
 Medgen EHR A complete step by step guide on how to achieve Meaningful Use Core Set Measures in Medgen EHR. Contents Important information regarding Meaningful Use... 2 How to generate your measure report
Meaningful Use Hello Health v7 Guide for Eligible Professionals. Stage 1
 Meaningful Use Hello Health v7 Guide for Eligible Professionals Stage 1 Table of Contents Introduction 3 Meaningful Use 3 Terminology 5 Computerized Provider Order Entry (CPOE) for Medication Orders [Core]
Meaningful Use Hello Health v7 Guide for Eligible Professionals. Stage 2
 Meaningful Use Hello Health v7 Guide for Eligible Professionals Stage 2 Table of Contents Introduction 3 Meaningful Use 3 Terminology 4 Computerized Provider Order Entry (CPOE) for Medication, Laboratory
Using Centricity Electronic Medical Record Meaningful Use Reports Version 9.5 January 2013
 GE Healthcare Using Centricity Electronic Medical Record Meaningful Use Reports Version 9.5 January 2013 Centricity Electronic Medical Record DOC0886165 Rev 13 2013 General Electric Company - All rights
Preventative Care (Patient Reminders) Stage 2 Core Measure - 12 of 17
 Stage 2 Core Measure - 12 of 17") Preventative Care (Patient Reminders) Stage 2 Core Measure - 12 of 17 Objective: Use clinically relevant information to identify patients who should receive reminders for preventive/followup care and send
Preventative Care (Patient Reminders) Stage 2 Core Measure - 12 of 17 Objective: Use clinically relevant information to identify patients who should receive reminders for preventive/followup care and send
MEDICAL SPECIALISTS OF THE PALM BEACHES, INC. Chronic Care Management (CCM) Program Training Manual
 Program Training Manual") MEDICAL SPECIALISTS OF THE PALM BEACHES, INC. Chronic Care Management (CCM) Program Training Manual September 2017 Table of Contents CCM PROGRAM OVERVIEW... 4 3 STEPS TO BEGIN CCM:... 5 Identify the Patient...
MEDICAL SPECIALISTS OF THE PALM BEACHES, INC. Chronic Care Management (CCM) Program Training Manual September 2017 Table of Contents CCM PROGRAM OVERVIEW... 4 3 STEPS TO BEGIN CCM:... 5 Identify the Patient...
Meaningful Use Stage 1 Guide for 2013
 Meaningful Use Stage 1 Guide for 2013 Aprima PRM 2011 December 20, 2013 2013 Aprima Medical Software. All rights reserved. Aprima is a registered trademark of Aprima Medical Software. All other trademarks
INTERGY MEANINGFUL USE 2014 STAGE 1 USER GUIDE Spring 2014
 INTERGY MEANINGFUL USE 2014 STAGE 1 USER GUIDE Spring 2014 Intergy Meaningful Use 2014 User Guide 2 Copyright 2014 Greenway Health, LLC. All rights reserved. This document and the information it contains
Office of Clinical Research. CTMS Reference Guide Patient Entry & Visit Tracking
 Se Office of Clinical Research CTMS Reference Guide Patient Entry & Visit Tracking Table of Contents Logging into CTMS... 3 Search and Recruitment / Quick Search... 4 How to Configure Quick Search Fields...
Table 1: Limited Access Summary of Capabilities
 What is the Practice Fusion Limited Access EHR product? The Practice Fusion Limited Access EHR product will be provided to current Practice Fusion customers who have not purchased an EHR subscription plan
HELLO HEALTH TRAINING MANUAL
 HELLO HEALTH TRAINING MANUAL Please note: As with all training materials, the names and data used in this training manual are purely fictitious and for information and training purposes only Login/What
User Manual. MDAnalyze A Reference Guide
 User Manual MDAnalyze A Reference Guide Document Status The controlled master of this document is available on-line. Hard copies of this document are for information only and are not subject to document
Sevocity v.12 Patient Reminders User Reference Guide
 Sevocity v.12 Patient Reminders User Reference Guide 1 877 877-2298 support@sevocity.com Table of Contents Product Support Services... 2 About Sevocity v.12... 2 Icons Used... 2 About Patient Reminders...
MEANINGFUL USE TRAINING SCENARIOS GUIDE
 MEANINGFUL USE TRAINING SCENARIOS GUIDE A guide to the most common scenarios in becoming a Meaningful User with eclinicalworks Version 9.0. eclinicalworks, Rev D, April 2011. All rights reserved Contents
Care Management Policies
 POLICY: Category: Care Management Policies Care Management 2.1 Patient Tracking and Registry Functions Effective Date: Est. 12/1/2010 Revised Date: Purpose: To ensure management and monitoring of patient
MODULE ELEVEN. Getting Credit for the Work You Do: Entering Units of Service
 MODULE ELEVE Getting Credit for the Work ou Do: Entering Units of Service 1 2 Policy In order to effectively evaluate and remain competitive for funding, all service providers and medical case managers
New Problem List Dictionary (IMO) Workflow Recommendations
 Workflow Recommendations") Catherine Hill, RN May 15, 2014 The Problem List Overview What is SNOMED-CT? Mapping ICD SNOMED One-to-one (Bulk mapping) One-to-many (Manual mapping) Mapping Required Basic Navigation Data Display Grid
Catherine Hill, RN May 15, 2014 The Problem List Overview What is SNOMED-CT? Mapping ICD SNOMED One-to-one (Bulk mapping) One-to-many (Manual mapping) Mapping Required Basic Navigation Data Display Grid
User Guide on Jobs Bank Portal (Employers)
") User Guide on Jobs Bank Portal (Employers) Table of Contents 1 INTRODUCTION... 4 2 Employer Dashboard... 5 2.1 Logging In... 5 2.2 First Time Registration... 7 2.2.1 Organisation Information Registration...
User Guide on Jobs Bank Portal (Employers) Table of Contents 1 INTRODUCTION... 4 2 Employer Dashboard... 5 2.1 Logging In... 5 2.2 First Time Registration... 7 2.2.1 Organisation Information Registration...
Meaningful Use Roadmap
 Meaningful Use Roadmap Copyright SOAPware, Inc. 2011 1 Introduction 1.1 2 3 Introduction 6 Registration and Attestation 2.1 1. Request the "CMS EHR Certification ID" for SOAPware 9 2.2 2. Register for
Vanderbilt Outpatient Order Management Accessing the Staff Worklist
 Vanderbilt Outpatient Order Management Accessing the Staff Worklist Getting Started Setting Up Clinics/Providers Selection Launching from WhiteBoard Staff Worklist Overview Layout Setting Up Label Printer
PPC2: Patient Tracking and Registry Functions
 PPC2: Patient Tracking and Registry Functions Element F: Use of System for Population Management At we use our EMR, clinical event manager, and the ad hoc reporting system (Business Objects) for a multi-pronged
PowerChart Maternity COLUMNs and ICONs- OB Beds Tab
 PowerChart Maternity COLUMNs and ICONs- OB Beds Tab The tracking shell provides an overview of patient location, status, and workflow. Patient names will display after registration via STAR. The columns
Choose one of 4 reception forms based on how they present to the Emergency Department
 EDM Reception/Triage Assessment and Allergies Training Reception Reception Routines Click on the button to proceed to the Patient Reception screen Choose one of 4 reception forms based on how they present
NextGen Preventative Exam Template
 NextGen Preventative Exam Template Summary This guide describes the use of the Preventive Exam HPI template to document both the initial Welcome to Medicare Exam and subsequent Annual Wellness Visits.
NextGen Meaningful Use Crystal Reports Guide
 NextGen Meaningful Use Crystal Reports Guide Version 5.6 SP1 NextGen Healthcare Information Systems, Inc. Copyright 1994-2011 NextGen Healthcare Information Systems, Inc. All Rights Reserved. NextGen is
Note: Every encounter type must have at least one value designated under the MU Details frame.
 Meaningful Use Eligible Professionals Eligible Providers (EPs) who are participating in the EHR Incentive Program either under Medicare or Medicaid must complete at least 2 years under Stage 1 before they
Capture and Record Vital Signs Configuration Guide
 Enterprise EHR Meaningful Use - Core Measure 4 Capture and Record Vital Signs Configuration Guide Last Updated: February 27, 2014 Copyright 2013 Allscripts Healthcare, LLC. www.allscripts.com MU Core 4
Site Manager Guide CMTS. Care Management Tracking System. University of Washington aims.uw.edu
 Site Manager Guide CMTS Care Management Tracking System University of Washington aims.uw.edu rev. 8/13/2018 Table of Contents INTRODUCTION... 1 SITE MANAGER ACCOUNT ROLE... 1 ACCESSING CMTS... 2 SITE NAVIGATION
PATIENT PORTAL USERS GUIDE
 PATIENT PORTAL USERS GUIDE V 5.0 December 2012 eclinicalworks, 2012. All rights reserved Login and Pre-Registration Patients enter a valid Username and secure Password, then click the Sign In button to
Vanderbilt University Medical Center
 Vanderbilt University Medical Center Credentials Application Tracking System User s Guide Table of Contents Table of Contents... 2 Document Change History... 2 How to Use this Guide... 3 Need Help?...
VISIT NOTES QUIZ. C. Individually select each system, then select the negative box for each item
 VISIT NOTES QUIZ 1. In the Examination section of the visit note template, how would you quickly mark all sections of the exam as normal? A. Select (-) at the top of the template B. Select the negative
User Guide on Jobs Bank Portal (Employers)
") User Guide on Jobs Bank Portal (Employers) Table of Contents 4 Manage Job Postings... 3 4.1 Create Job Posting... 3 4.1.1 Publish Job Posting... 10 4.2 Create Job Posting As Third Party Employer... 11
User Guide on Jobs Bank Portal (Employers) Table of Contents 4 Manage Job Postings... 3 4.1 Create Job Posting... 3 4.1.1 Publish Job Posting... 10 4.2 Create Job Posting As Third Party Employer... 11
einteract User Guide July 07, 2017
 einteract User Guide July 07, 2017 This document covers the use of the einteract features in PointClickCare. Table of Contents einteract... 3 einteract Quick Reference Guide... 3 Overview of einteract...
Kansas University Medical Center ecrt Department Administrator Training. June 2008
 Kansas University Medical Center ecrt Department Administrator Training June 2008 KUMC Process Timeline Effort Reporting Period 3 Week Pre-Review Period 3 Week Certification Period Post Certification Period
Psychiatric Consultant Guide CMTS. Care Management Tracking System. University of Washington aims.uw.edu
 Psychiatric Consultant Guide CMTS Care Management Tracking System University of Washington aims.uw.edu rev. 8/13/2018 Table of Contents TOP TIPS & TRICKS... 1 INTRODUCTION... 2 PSYCHIATRIC CONSULTANT ACCOUNT
Calibrating your tablet allows you to ensure accuracy as you handwrite on the screen and/or select items on the screen. Prime Clinical Systems, Inc 1
 Calibrating your tablet allows you to ensure accuracy as you handwrite on the screen and/or select items on the screen. 1 Every user has the capability to set various defaults for themselves. 2 You can
An Introduction to FirstNet for Nurses
 V3 : 17-01-2017 An Introduction to FirstNet for Nurses Nursing Staff Induction Program The Townsville Hospital June 2017 1. Log into FirstNet 1. Double click on iemr icon form desktop screen 2. Enter user
HELP - MMH Plus (WellPoint Member Medical History Plus System) 04/12/2014
 04/12/2014") MMH Plus Help Topics Home/Communications Eligibility Facility Report Lab Results Report Care Alerts Report Search Professional Report Pharmacy Report Medical Management Report Patient Summary Report Basics
MMH Plus Help Topics Home/Communications Eligibility Facility Report Lab Results Report Care Alerts Report Search Professional Report Pharmacy Report Medical Management Report Patient Summary Report Basics
INTERGY MEANINGFUL USE 2014 STAGE 2 USER GUIDE Spring 2014
 INTERGY MEANINGFUL USE 2014 STAGE 2 USER GUIDE Spring 2014 Intergy Meaningful Use 2014 User Guide 2 Copyright 2014 Greenway Health, LLC. All rights reserved. This document and the information it contains
Get Started with Health Cloud
 Get Started with Health Salesforce, Winter 19 @salesforcedocs Last updated: September 12, 2018 Copyright 2000 2018 salesforce.com, inc. All rights reserved. Salesforce is a registered trademark of salesforce.com,
Website: Tel: , Topaz Medical EMR. Official Users Guide
 Release1.1b Christopher Christie, Systems Architect Website: www.topazemr.com, Tel: 876-384-0343, Email: c_christie2000@yahoo.com Topaz Medical EMR Official Users Guide Introduction Topaz EMR [Electronic
Overview What is effort? What is effort reporting? Why is Effort Reporting necessary?... 2
 Effort Certification Training Guide Contents Overview... 2 What is effort?... 2 What is effort reporting?... 2 Why is Effort Reporting necessary?... 2 Effort Certification Process: More than just Certification...
Executive Summary: Davies Ambulatory Award Community Health Organization (CHO)
") Davies Ambulatory Award Community Health Organization (CHO) Name of Applicant Organization: Community Health Centers, Inc. Organization s Address: 110 S. Woodland St. Winter Garden, Florida 34787 Submitter
Davies Ambulatory Award Community Health Organization (CHO) Name of Applicant Organization: Community Health Centers, Inc. Organization s Address: 110 S. Woodland St. Winter Garden, Florida 34787 Submitter
Soarian Clinicals View Only
 Soarian Clinicals View Only Participant Guide Table of Contents 1. Welcome!... 5 Course Description... 5 Learning Objectives... 5 What to Expect... 5 Evaluation... 5 Agenda... 5 2. Getting Started... 6
System Performance Measures:
 April 2017 Version 2.0 System Performance Measures: FY 2016 (10/1/2015-9/30/2016) Data Submission Guidance CONTENTS 1. Purpose of this Guidance... 3 2. The HUD Homelessness Data Exchange (HDX)... 5 Create
Care360 EHR Frequently Asked Questions
 Care360 EHR Frequently Asked Questions Table of Contents Care360 EHR... 4 What is Care360 EHR?... 4 What are the current capabilities of Care 360 EHR?... 4 Is Care 360 EHR an EMR?... 5 Can I have Care360
Atlas LabWorks User Guide Table of Contents
 http://lab.parkview.com Atlas LabWorks User Guide Table of Contents Technical Support 2 Online Directory of Services.......3 Log into Connect.Parkview.com Account... 4 Log into Atlas Account....6 Patient
Psychiatric Consultant Guide SPIRIT CMTS. Care Management Tracking System. University of Washington aims.uw.edu
 Psychiatric Consultant Guide SPIRIT CMTS Care Management Tracking System University of Washington aims.uw.edu rev. 9/20/2016 Table of Contents TOP TIPS & TRICKS... 1 INTRODUCTION... 2 PSYCHIATRIC CONSULTANT
CPOM TRAINING. Page 1
 CPOM TRAINING Page 1 Physician Training For CPOM Patient list columns, Flag Management, Icons Icons added for CPOM: Columns added: Flags New Orders: GREEN - are general orders. RED means STAT orders included
Introduction to the Parking Lot
 Introduction to the Parking Lot In ARK Epic training sessions, The Parking Lot" is used to capture all questions for which your trainer may not have an immediate answer during session. Your ARK Epic Training
Meaningful Use Measures: Quick Reference Guide Stage 2 (2014 and Beyond)
") Meaningful Use Measures: Quick Reference Guide Stage 2 (2014 and Beyond) Core Measures Required: All 17 objectives Objective: Requirement: Exclusions: Accomplish in Clinical 1. Computerized - Documenting
Meaningful Use Measures: Quick Reference Guide Stage 2 (2014 and Beyond) Core Measures Required: All 17 objectives Objective: Requirement: Exclusions: Accomplish in Clinical 1. Computerized - Documenting
The Military Health Service Population Health Portal (MHSPHP) 4G Training: Session 2 Patient Details and User Entered Data
 4G Training: Session 2 Patient Details and User Entered Data") Defense Health Agency Prepared by: Judy Rosen, MSN, CTR DHA/IDD The Military Health Service Population Health Portal (MHSPHP) 4G Training: Session 2 Patient Details and User Entered Data 1 Overview CarePoint
Defense Health Agency Prepared by: Judy Rosen, MSN, CTR DHA/IDD The Military Health Service Population Health Portal (MHSPHP) 4G Training: Session 2 Patient Details and User Entered Data 1 Overview CarePoint
Quanum Electronic Health Record Frequently Asked Questions
 Quanum Electronic Health Record Frequently Asked Questions Table of Contents... 4 What is Quanum EHR?... 4 What are the current capabilities of Quanum EHR?... 4 Is Quanum EHR an EMR?... 5 Can I have Quanum
PharmaClik Rx 1.4. Quick Guide
 PharmaClik Rx 1.4 Quick Guide Table of Contents PharmaClik Rx Enhancements... 4 Patient Profile Image... 4 Enabling Patient Profile Image Feature... 4 Adding/Changing Patient Profile Image... 5 Editing
Child Immunization Assessment MIIC User Guidance
 Minnesota Immunization Information Connection (MIIC) PO Box 64975 St. Paul, MN 55164-0975 Web: www.health.state.mn.us/miic MIIC User Guidance The Reports in MIIC indicate the up-to-date immunization status
Creating a patient list for GSK vaccines in e-mds EHR
 Patient lists for series completion Helping ensure patients receive all doses in a vaccine series When providers have patients who have been prescribed a vaccine with multiple doses in a series, they may
Paragon Clinician Hub for Physicians (PCH) Reference
 Reference") Paragon Clinician Hub for Physicians (PCH) Reference Logging in to the Clinician Hub Paragon Clinician Hub (PCH) is available on any Carroll Hospital Network. VMWare View must be utilized to open the application.
Paragon Clinician Hub for Physicians (PCH) Reference Logging in to the Clinician Hub Paragon Clinician Hub (PCH) is available on any Carroll Hospital Network. VMWare View must be utilized to open the application.
Stage 1. Meaningful Use 2014 Edition User Manual
 Stage 1 Meaningful Use 2014 Edition User Manual This document, as well as the software described in it, is provided under a software license agreement with STI Computer Services, Inc. Use of this software
Optima 101: PARTICIPANT GUIDE
 Optima 101: Introduction to Care Operations Management (COM) PARTICIPANT GUIDE 2017 Optima Healthcare Solutions Page 1 CONTENTS CONTENTS... 2 ABOUT THIS GUIDE... 3 LEARNING OUTCOMES... 4 1. LOGGING INTO
Quick Reference. Virtual OneStop (VOS) Individual User Logging In. My Workspace* (My Dashboard ) Settings and Themes. Quick Menu*
 Individual User Logging In. My Workspace* (My Dashboard ) Settings and Themes. Quick Menu*") Virtual OneStop (VOS) Individual User Logging In If you don t have an account: Click the link Not Registered? on the Home page, near the Sign In button, (name may vary, but will include Register in the
Virtual OneStop (VOS) Individual User Logging In If you don t have an account: Click the link Not Registered? on the Home page, near the Sign In button, (name may vary, but will include Register in the
Bar Code Medication Administration and MAR Resource Manual
 Bar Code Medication Administration and MAR Resource Manual Creating Orders Creating an Order in CareMobile (Ad Hoc Order Entry)...2 Creating an Order for med that is already ordered with a different dose/frequency....4
Introduction to the Provider Care Management Solutions Web Interface
 Introduction to the Provider Care Management Solutions Web Interface Release 0.2 Introduction to the Provider Care Management Solutions Web Interface Purpose Provider Care Management Solutions (PCMS) is
Reference Guide for Applicants
 Grants Ontario System Reference Guide for Applicants Please inform us if you need a different format or other accommodation to access this information. Version Date: July 2017 Table of Contents Introduction...
Stage 2 Eligible Professional Meaningful Use Core and Menu Measures. User Manual/Guide for Attestation using encompass 3.0
 Stage 2 Eligible Professional Meaningful Use Core and Menu Measures User Manual/Guide for Attestation using encompass 3.0 Prepared By: Arête Healthcare Services, LLC Document Version: V1.0 9/02/2015 Eligible
The 10 Building Blocks of Primary Care Building Blocks of Primary Care Assessment (BBPCA)
") The 10 Building Blocks of Primary Care Building Blocks of Primary Care Assessment (BBPCA) Background and Description The Building Blocks of Primary Care Assessment is designed to assess the organizational
The 10 Building Blocks of Primary Care Building Blocks of Primary Care Assessment (BBPCA) Background and Description The Building Blocks of Primary Care Assessment is designed to assess the organizational
Appendix 3 Record Review Workbook Instructions
 Appendix 3 Record Review Workbook Instructions NCQA PCMH Standards and Guidelines (2017 Edition, Version 2) September 30, 2017 Appendix 3 PCMH Record Review Workbook General Instructions 3-1 APPENDIX 3
Welcome to ECW Version 10
 Welcome to ECW Version 10 You will continue to document in the same manner as you currently do. Although there are new features that will be turned on down the road, the changes you will see immediately
Presentation Transcript
 Presentation Transcript Maintenance of Financial Support (MFS) Toolkit: How to use the Data Collection Reporting Tool (DCRT) Introduction 0:00 Welcome. The Center for IDEA Fiscal Reporting, or CIFR, created
Teacher Guide to the Florida Department of Education Roster Verification Tool
 Teacher Guide to the 2016-17 Florida Department of Education Roster Verification Tool Table of Contents Overview... 1 Timeline... 1 Contact and Help Desk... 1 Teacher Login Instructions... 2 Teacher Review,
RETRIEVAL AND CRITICAL HEALTH INFORMATION SYSTEM
 RETRIEVAL AND CRITICAL HEALTH INFORMATION SYSTEM USER GUIDE May 2017 Contents Introduction... 3 Access to REACH... 3 Homepage... 3 Roles within REACH... 4 Hospital Administrator... 4 Hospital User... 4
Alberta Health Services. PCS 5.67 Care Planning
 Alberta Health Services PCS 5.67 Care Planning 3/11/2015 Contents Care Planning in Central Zone... 5 Developing the Plan of Care... 7 Accessing the RAP Analysis Assessments... 8 Completing the RAP Analysis
NCQA s Patient-Centered Medical Home (PCMH) 2011 Standards 11/21/11
 2011 Standards 11/21/11") NCQA s Patient-Centered Medical Home (PCMH) 2011 Standards 11/21/11 28 PCMH 1: Enhance Access and Continuity PCMH 1: Enhance Access and Continuity 20 points provides access to culturally and linguistically
NCQA s Patient-Centered Medical Home (PCMH) 2011 Standards 11/21/11 28 PCMH 1: Enhance Access and Continuity PCMH 1: Enhance Access and Continuity 20 points provides access to culturally and linguistically
Chapter 4. Disbursements
 Chapter 4 Disbursements This Page Left Blank Intentionally CTAS User Manual 4-1 Disbursements: Introduction The Claims Module in CTAS allows you to post approved claims into disbursements. If you use a
CareLink Mobile Practice Manager
 CareLink Mobile Practice Manager SCHEDULING QUICK START GUIDE www.mymobilepracticemanager.com CareLink Scheduling Quick Start Portal Areas and Functions Menu Bar and User Roles Scheduling Module Practitioner
Menu Item: Population Management
 Cover Page Menu Item: Population Management Name of Applicant Organization: Fremont Family Care Organization s Address: 2540 N Healthy Way, Fremont, NE 68025 Submitter s Name: Elizabeth Belmont Submitter
Falcon Quality Payment Program Checklist- 2017
 Falcon Quality Payment Program Checklist- 2017 DISCLAIMER: This material is provided for informational purposes only and should not be relied upon as legal or compliance advice. If legal advice or other
Mobile App Process Guide
 Mobile App Process Guide Agency Setup and Management Copyright 2018 Homecare Software Solutions, LLC One Court Square 44th Floor Long Island City, NY 11101 Phone: (718) 407-4633 Fax: (718) 679-9273 Document
Wolf EMR. Enhanced Patient Care with Electronic Medical Record.
 Wolf EMR Enhanced Patient Care with Electronic Medical Record. Better Information. Better Decisions. Better Outcomes. Wolf EMR: Strength in Numbers. Since 2010 Your practice runs on decisions. In fact,
in partnership with EHR Meaningful Use Guide for HITECH Attestation
 in partnership with EHR Meaningful Use Guide for HITECH Attestation Getting Started This guide will help ensure that you meet or exceed the core and menu objectives required for HITECH Meaningful Use.
PATIENT ACCESS LIST (PAL)
") PATIENT ACCESS LIST (PAL) The Patient Access List (PAL) helps clinicians work effectively and efficiently by providing key patient and workflow information in an easy-to-access format. The PAL is built
PATIENT ACCESS LIST (PAL) The Patient Access List (PAL) helps clinicians work effectively and efficiently by providing key patient and workflow information in an easy-to-access format. The PAL is built
RETRIEVAL AND CRITICAL HEALTH INFORMATION SYSTEM
 RETRIEVAL AND CRITICAL HEALTH INFORMATION SYSTEM USER GUIDE November 2014 Contents Introduction... 4 Access to REACH... 4 Homepage... 4 Roles within REACH... 5 Hospital Administrator... 5 Hospital User...
Chapter 8: Managing Incentive Programs
 Chapter 8: Managing Incentive Programs 8-1 Chapter 8: Managing Incentive Programs What Are Incentive Programs and Rewards? Configuring Rewards Managing Rewards View rewards Edit a reward description Increase
ACADEMIC ASSOCIATE COMPUTER MANUAL
 1 ACADEMIC ASSOCIATE COMPUTER MANUAL St. Luke s/roosevelt Academic Associate Program -NEW YORK CITY - 2010-2011 1 2 Contents Introduction 3 Computer Basics 4 Logging In 4 Accessing the P:Drive 5 Checking
Goals & Challenges for Outpatient Quality Directors. Quality HealthCare Consulting, LLC CEO: Jennifer O'Donnell, MHA, PCMH-CCE
 Goals & Challenges for Outpatient Quality Directors Quality HealthCare Consulting, LLC CEO: Jennifer O'Donnell, MHA, PCMH-CCE Objectives Learn a practical way for Quality Directors to align Quality Measures
Back Office-General Quick Reference Guide. Enter a Home Health Referral
 Back Office-General Quick Reference Guide Enter a Home Health Referral Table of Contents Enter a Referral... 3 Common Buttons & Icons... 3 Enter a New Referral... 4 Document Basic Info... 5 Document Demographics...
PMP & ChiroWrite Integration
 ONTARIO CHIROPRACTIC ASSOCIATION PATIENT MANAGEMENT PROGRAM PUTTING EXPERIENCE INTO PRACTICE PMP & ChiroWrite Integration ChiroWrite and PMP have integration features that simplify procedures and reduce
ED Disposition Diagnosis. Training Manual for. ED Physicians
 ED Disposition Diagnosis Training Manual for ED Physicians Warning: In Post Train do not select the Display Board button as it will freeze your window and you will not be able to close out of the window.
e-sdrt User Guide, Update April 2014 First Nations and Inuit Home and Community Care Program: e-sdrt User Guide
 e-sdrt User Guide, Update April 2014 First Nations and Inuit Home and Community Care Program: e-sdrt User Guide 1 e-sdrt User Guide, Update April 2014 2 e-sdrt User Guide, Update April 2014 TABLE OF CONTENTS
Practice Director Modified Stage MU Guide 03/17/2016
 Table of Contents General Info & Meaningful Use Report....4-7 Measures..........8-62 Objective 1: Protect Electronic Health Information 8 Conduct or Review a security risk analysis Objective 2: Clinical
Care Manager Guide SPIRIT CMTS. Care Management Tracking System. University of Washington aims.uw.edu
 Care Manager Guide SPIRIT CMTS Care Management Tracking System University of Washington aims.uw.edu rev. 12/4/2017 Table of Contents TOP TIPS & TRICKS... 1 INTRODUCTION... 2 CARE MANAGER ACCOUNT ROLE...
Downtime Viewer User Guide for All Users
 Downtime Viewer User Guide for All Users Overview... 1 Logging into Downtime Viewer... 1 Opening a Patient Chart in Downtime Viewer... 2 Patient Lists... 2 Clinics... 4 Navigating in the Patient s Chart...
Hi Tech Software Solutions Are You Still Handwriting Care Plans?
 Are You Still Handwriting Care Plans? Care Plans/Service Plans... 2 Overview... 2 Edit Care Plan Edit Service Plan... 4 Auto RAP/CAA Driven (for Nursing Care)... 5 Auto RAP/CAA Driven: Edit Resident Care
CLINICAL PRACTICE EVALUATION II: CLINICAL SYSTEMS REVIEW
 Diplomate: CLINICAL PRACTICE EVALUATION II: CLINICAL SYSTEMS REVIEW A. INFORMATION MANAGEMENT 1. Does your practice currently use an electronic medical record system? Yes No 2. If Yes, how long has the
Wellness Guide for LCRA Retirees
 2016 Wellness Guide for LCRA Retirees Contents 2 How the EmPOWER program works 3 How to register 3 Text message reminders 4 Member health assessment 4 Biometric screening 5 Earning points and saving money
Effort Coordinator Training. University of Kansas Summer 2016
 Effort Coordinator Training University of Kansas Summer 2016 Agenda 1. Effort Reporting Overview 2. Effort Workflow and Basic Information 3. Effort Coordinator: Pre-Review 4. PI/Self-Certifier: Certification
Patient Electronic Access Modified Stage 2: Objective 8
 Objective: Provide patients the ability to view online, download, and transmit their health information within 4 business days of the information being available to the EP. CMS Documentation: Date updated: