Feldzeugmeister. A supplement for converting Polemos Kommandant der Armee FPW rules to the Italian Wars of Unification.
|
|
|
- Gavin Hoover
- 6 years ago
- Views:
Transcription


1 Feldzeugmeister A supplement for converting Polemos Kommandant der Armee FPW rules to the Italian Wars of Unification Peter Riley

2 Feldzeugmeister A supplement for converting Polemos Kommandant der Armee FPW rules for use in the Italian Wars of Unification Published in pdf format by: Baccus 6mm Ltd, Text Copyright: Peter Riley Layout and Design: Baccus 6mm Ltd Photography: Peter Berry Maps: Sven Lugar Buildings and Scenics: Timecast Baccus 6mm figures painted by Peter Berry All rights reserved. No part of this work may be reproduced or used in any form or by any means without the express written consent of the authors. For more information about the figures and models used in this catalogue, extra sections and add-ons to these rules, as well as the other rules sets in the Polemos series visit: A Yahoo group has been set up to allow for discussion of all aspects of playing games using Polemos rules. If you have any questions, are looking for tips and advice or just want to talk to other gamers, you can join by logging on to
3 Introduction Fedlzeugmeister Introduction ii Part One Setting up the Game Troop Types 4 Part Two Playing the Game Tempo Bidding 5 Bombardment Tables 5 Tempo Point Cost 6 Ranged Attacks 6 Combat 7 Army Morale 8 Part Three Orders of Battle Piedmont & French Army Commands 9 Austrian Army Commands 10 French Army of Italy - OOB 11 Piedmont Army - OOB 12 Austrian Second Army - OOB 13,14 Part Four Army Generators Army Generators 15 French Army 16,17 Piedmont Army 18 Austrian Army 19 Part Five Scenario The Battle of Magenta ,21 i Polemos Risorgimento Feldzeugmeister

4 Introduction The Risorgimento of 1859 began a year earlier, in July 1858, during a conference held at Plombières in France. At the conference it was agreed, between Emperor Napoleon III and Camillo Benso, Conte di Cavour, that the French would aid Piedmont in the face of any Austrian moves against them. So in 1859, the Italians, having secured the support of Napoleon III of France, began provoking Austria into war it was not prepared for. The Austrians reacted as planned the Emperor Francis Joseph declared war. By April 23rd 1859 an ultimatum was delivered wanting the complete demobilization of Piedmontese troops. This was rejected and Austria declared war three days later, and as a result France, as a part of the secret agreement, was asked to come to the aid of the Piedmontese army, this small request led to the War of Italian Unification. Although in terms of numbers and time it is considered a small war, the battle of Solferino was at the time the largest single battle ever fought in Europe. The campaign is interesting as it was quite fluid and led to a number of battles of vary sizes and types, the encounter battle of Magenta is particularly interesting one. The protagonists were also interesting in the fact that France committed a large number of veteran troops in it Imperial Guard and its Experienced African Foreign Service Troops totaling to about 28% of it army. For the Austrians with their poor officer corps, using smoothbore artillery and lots of inexperienced troops was always in for a hard fight. And of the fledgling Piedmontese army with it compact size, belief and smoothbore muskets adding to a healthy mix of type and experience for some interesting games. Risorgiamento KDA allows players to fight the larger battle of the period. The three multi-corps armies that sprawled across the fields and hills of Solferino are modelled here, allowing the Battle of Solferino to be gamed very easily by using these additional rules. ii Polemos Risorgimento Feldzeugmeister

5 Polemos Risorgimento Feldzeugmeister


6 Troop Types Troop types (FPW KDA - Page 4) Infantry units in this era formed in increasingly more open formations with a skirmish line in advance and a formed reserve deeper in the rear of the formation. In attack however, columns were often used to deliver fast moving assaults. Infantry: Most infantry, known as Regulars, Garde Nationale, Imperial Guard, Imperial Infantry, Grenadiers, Foreign Legion or Turco s or any other name, are formed units and are armed with Muzzle Loading Smoothbores or Rifles and bayonet. They can deliver their fire by command or individual shots to break up attacks or rely on the charge to break the target. Artillery and Rockets units were mainly used to support defensive lines by breaking up attacking movements. They would also be used in suppressing enemy lines, counter battery fire and closely supporting attacks. The French with a mix of Smoothbore and Muzzle Loading Rifled artillery were used to engage targets at a mixture of ranges, where the fire of the Austrian and Piedmontese Smoothbores had expose themselves to move in closer to support attacking formations. Skirmishers: Jaegers, Kaiser Jaegers, Bersaglieri, Tirailleurs and Chasseurs etc. These are not generally depicted by distinct bases of their own, but by a skirmish capability factor which is assigned to standard infantry bases. This represents the infantry base s ability to skirmish. However they can also be represented as individual Infantry bases as well. Cavalry: The mounted arm did not generally fare well against the increased rate of Infantry and Artillery fire during the war and to compound matters was badly handled by both sides generals. The cavalry arm was mainly used in pre-battle scouting, harassing a retreating enemy or providing rearguard actions to delay the enemy. In some cases, shock action was employed by cavalry, such as the Piedmontese Aosta Light Horse at Montebello. Artillery: Divisional or Field Batteries were able to closely support infantry or cavalry attacks and unlimber close to the enemy line. The Heavier Corps or Reserve guns were usually placed in support of troops in defense, however they could also be deployed forward on the gun line.. Light cavalry: Hussars, Lancers, Chasseur d Afrique, Light Horse and Uhlans etc. Cavalry trained to scout, skirmish and screen in front of the army, but also capable of charging. Heavy cavalry: Dragoons, Cuirassiers, Heavy Horse & Carabiniers etc. These are cavalry trained to charge but, are also capable of scouting and screening. 4 Polemos Risorgimento Feldzeugmeister

7 Tempo & Bombardment Tempo bidding (CDB p.10) At the start of each move the CinC throws 1D6 and gets this number of tempo points (TPs) plus: French & Piedmontese CinC s: 4 TPs for an Energetic CinC. 3 TPs for an Experienced CinC. 1 TPs for a Listless CinC. French Subordinates: 4 TPs for each Imposing officer. 3 TPs for each Competent officer. 1 TP for each Confused officer. Piedmontese Subordinates: 3 TPs for each Imposing officer. 2 TPs for each Competent officer. 0 TP for each Confused officer. Austrian CinC s: 3 TPs for an Energetic CinC. 2 TPs for an Experienced CinC. 1 TPs for a Listless CinC. Austrian Subordinates: 3 TPs for each Imposing officer. 2 TPs for each Competent officer. 0 TP for each Confused officer. Bombardment Phase (FPW KDA - Page 13) For Field Artillery, the maximum range is 4BW. For Reserve Artillery, the maximum range is 6BW. Bombardment Phase (FPW KDA - Page 14) If an unmodified dice roll of, 1 occurs for any artillery firing the artillery must recoil immediately. Otherwise add or subtract the following factors: Each further base in line of sight and in base contact behind target (up to 2) Artillery Firing into Flank +1 Firer is French Field or Reserve Artillery +1 Firer is Austrian or Piedmontese Field or Reserve Artillery Artillery standing on rough ground or marsh Outcome of Bombardment Table If the bombarding base s modified result exceeds that of the target by 3 or more, target is shaken and goes to ground. If the bombarding base s modified result exceeds that of the target by 4 or more, target recoils and is shaken. If the target base s score exceeds the artillery s by 3 or more, the artillery recoils. If the target base s score exceeds the artillery s by 5 or more, the artillery recoils and becomes shaken Any other score has no effect. Polemos Risorgimento Feldzeugmeister5
8 Tempo and Ranged Attacks Tempo Point Cost (FPW KDA - Page 15) TPs required Action To instigate a movement for a single unit 2 To instigate a movement for a corps or 4 formation To instigate a movement for a corps or 5 formation for Austrian Armies only To instigate a movement for a single unit, 2 corps or formation that maintains a 7BW or over distance from any enemy formations during its whole move. To redeploy formation or corps 2 To have a force continue a movement 1 once started For each extra unit within a formation 1 after the first To rally shaken or tired unit 1 To steal tempo with one unit, corps or 5 formation To steal tempo with a corps or formation 6 for Austrian Armies only To instigate any non-bombardment 2 ranged attack for a single unit, corps or formation To commence engineer task 3 Ranges (FPW KDA - Page 16) Note: Austrian & Piedmontese troops do not have a close range,. The majority are armed with smoothbore muskets and anything from 1BW up to 1.5BW is classed as long range fire. Units Contact Close Range French Under 1BW must go to Contact Phase Austrian & Piedmontese Under 1BW must go to Contact Phase From 1BW up to 1.5BW Long Range Over 1.5BW up to 2BW - From 1BW up to 1.5BW Ranged Attack Procedure (FPW KDA - Page 17) Ranged Attack Modifiers Firer behind target s flank +2 Veteran troops +1 Close Range +1 to firer Supporting Bases +1 Gone to Ground -1 Raw troops -1 Each shaken level -1 Long range -1 (-2 if Austrian & Piedmontese) Relevant Terrain Modifiers See Terrain chart Ranged Attack Outcome (FPW KDA - Page 17) (There is no change to this chart I have included it for completeness.) Outcome of Ranged Attacks If the attacking base s modified result exceeds that of the target by 5 or more, target recoils and is shaken. If the attacking base s score exceeds that of the target by 3 or more, target recoils and goes to ground. Differences of less than 3 mean that neither side is winning the fire-fight. Both sides go to ground. They are not driving off the enemy and all bases stay in position. If the target base s score exceeds that of the attacker by 3 or more, the attacker recoils and goes to ground. If the target base s score exceeds that of the attacker by 5 or more, the attacker recoils and becomes shaken. 6 Polemos Risorgimento Feldzeugmeister

9 Combat Modifiers (FPW KDA - Page 20) Modifiers + / - If two infantry bases in combat with +0,1 or 2 each other, each side add skirmish capability. Uphill of enemy if steep slope +2 Attacking or following up recoiling enemy +1 Each Artillery, Infantry or Cavalry base +1 giving support Elite +1 Veteran +1 Imposing or Competent General leading +1 the attack Heavier cavalry attacking lighter cavalry +1 Uphill of enemy if gentle slope +1 Shaken troops in combat -1 Enemy unit following up friendly base -1 and is within 1BW Each supporting base that is shaken -1 Raw troops -1 Cavalry attacking shaken infantry -1 Cavalry on soft ground -2 Contacted by, or contacting, previously -2 unseen enemy Cavalry attacking unshaken infantry -3 Terrain modifiers where applicable See table P.18 Combat Following up (FPW KDA - Page 21) Following up Modifiers: Elite Troops +2 2 nd Round or -1 more of pursuit Light Cavalry +2 Tired -2 Heavy Cavalry +1 Cavalry following up unshaken infantry -2 French Infantry +1 following modifiers are at the player s discretion Shaken Troops -1 Veteran + or -1 Troops Raw Troops -1 Imposing or + or -1 Competent General within 1BW Austrian Infantry -1 Energetic or Experienced CinC within 1BW + or -1 Combat results (FPW KDA - Page 20) (There is no change to this chart I have included it for completeness.) Difference Result in scores 0-1 No effect, both units remain in position and go to ground. 2-4 Loser recoils 5 Loser recoils and is shaken 6 Loser breaks Polemos Risorgimento Feldzeugmeister 7

10 Morale Force Morale (FPW KDA - Page 23) Morale is taken per force, i.e. corps or formation, under the direct command of the CinC and may be diced for after every game turn in which they have been in contact with the enemy. Add: 1 point per base which is shaken 2 points per base which has broken 1 For Forces with a Listless Corps commander Plus D6 scoring: Allied Modifiers Austrian Modifiers or If the result is equal or greater than the number of bases in the force at the start of the game, the whole force is adjudged to be spent and returns immediately to their army s base line. It will take no further part in the fighting. Army Morale (FPW KDA - Page 23) At the start of the game, multiply the number of subordinate officers under the direct command of the CinC by: 2 - For Austrian and Piedmontese army s critical morale factor For the French army s critical morale Factor. Add the CinC s grade level: Energetic +2 Experienced +1 Listless +0 The result is the army s critical morale factor. Round up any fractions in the final total. Each time a subordinate officer s force becomes spent, throw a D6 and deduct the result from the army s critical morale. Once the factor falls below 0, the army is broken in defeat. 8 Polemos Risorgimento Feldzeugmeister

11 Polemos Risorgimento KDA Orders of Battle The Orders of Battle for Risorgimento KDA are presented here for players to use as a resource. They can be used for playing large battles, for use in quick games as the formations are already set out and provided or changing as they fit. The Allied, French & Piedmontese, army had a fairly static order of battle for the campaign and is set out below: Piedmontese Army May 1859 Army Commander Reserve Artillery 1st Division 2nd Division 3rd Division 4th Division 5th Division Cacciatori delle Alpi Cavalry Division CinC Victor Emmanuelle Gen Durando Gen Fanti Gen Mollard Gen Cialdini Gen Cucchiari Gen Garibaldi Gen Sambuy Orders of Battle French Army May 1859 Army Commander CinC Napoleon III Reserve Artillery Imperial Guard Corps Gen St Jean-d Angely 1st Corps Gen Baraguay D Hilliers 2 nd Corps Gen MacMahon 3 rd Corps Gen Canrobert 4 th Corps Gen Niel 5 th Corps Gen Prince Napoleon Polemos Risorgimento Feldzeugmeister9

12 Orders of Battle The Austrian Army had quite a few additions and changes over May and June. I have only really detailed any quite substantial changes to the OOB s, due to the scale. I have not detailed all of minute changes that occurred throughout the army and movements between organisations. Austrian 1 st Army June CinC Kaiser Franz Josef Mid/Late of June: 1 st Army Army Commander CinC Wimpffen 2 nd Corps Gen Liechtenstein 3 rd Corps Gen Schwarzenberg 9 th Corps Gen Schaffgotsche 10 th Corps Gen Wernhardt 11 th Corps Gen Veigl Reserve Artillery Cavalry Division Gen Zedtwitz Austrian 2 nd Army June 1859 Mid/Late of June: 1 st Army Army Commander CinC Schlick 1 st Corps Gen Clam-Gallas 5 th Corps Gen Stadion 7 th Corps Gen Zobel 8 th Corps Gen Benedek Reserve Artillery Cavalry Division Gen Mensdorff 10 Polemos Risorgimento Feldzeugmeister
13 Army of Italy - CinC Napoleon III Reserve Artillery 1 Base Reserve Artillery - Veteran Guard Corps - Gen St Jean-d Angely 1st Brigade - 1 Base Veteran, SK2 2nd Brigade - 2 Bases Veteran, SK1 1st Brigade - 2 Bases Veteran, SK2 2nd Brigade - 2 Bases Veteran, SK2 Guard Corps Cavalry Division 1st Brigade - 1 Base Veteran, Elite, Heavy Cav 2nd Brigade - 1 Base Veteran, Heavy Cav 3rd Brigade - 1 Base Veteran, Light Cavalry Divisional Artillery - 1 Base Field Artillery 1 st Corps - Gen Baraguay D Hilliers 1st Brigade - 2 Bases - Trained, SK1 2nd Brigade - 2 Bases Trained, SK0 1st Brigade - 2 Bases Trained, SK1 2nd Brigade - 2 Bases Trained, SK0 3 rd Division 1st Brigade - 2 Bases Trained, SK1 2nd Brigade - 2 Bases Trained, SK0 Corps Cavalry Division 1st Brigade - 1 Base Veteran, Light Cavalry 2nd Brigade - 1 Base Veteran, Light Cavalry Divisional Artillery - 2 Bases Field Artillery 2 nd Corps - Gen MacMahon 1st Brigade - 2 Bases Veteran, SK1 2nd Brigade - 2 Bases Trained, SK1 1st Brigade - 2 Bases Trained, SK1 2nd Brigade - 3 Bases Veteran, SK1 Corps Cavalry Brigade 1 st Brigade - 1 Base Trained, Light Cavalry Divisional Artillery - 1 Base Field Artillery Orders of Battle French Army of Italy CinC - Napoleon III 3 rd Corps - Gen Canrobert 1st Brigade - 2 Bases Trained, SK1 2nd Brigade - 2 Bases Raw, SK1 1st Brigade - 2 Bases Trained, SK1 2nd Brigade - 2 Bases Raw, SK0 3 rd Division 1st Brigade - 2 Bases Trained, SK2 2nd Brigade - 2 Bases Raw, SK1 Corps Cavalry Division 1st Brigade - 1 Base Trained, Light Cavalry 2nd Brigade - 1 Base Trained, Light Cavalry Divisional Artillery - 2 Bases Field Artillery 5th Corps - Gen Prince Napoleon 1st Brigade - 1 Base Veteran, SK2-2 Bases Trained, SK1 2nd Brigade - 2 Bases Raw, SK0 1st Brigade - 2 Bases Trained, SK2 2nd Brigade - 2 Bases Trained, SK0 Corps Cavalry Brigade 1st Brigade - 1 Base Trained, Light Cavalry Divisional Artillery - 1 Base Field Artillery 4th Corps - Gen Niel 1st Brigade - 2 Bases Trained, SK2 2nd Brigade - 2 Bases Trained, SK1 1st Brigade - 2 Bases Trained, SK2 2nd Brigade - 2 Bases Trained, SK1 3 rd Division 1st Brigade - 2 Bases Trained, SK2 2nd Brigade - 2 Bases Trained, SK0 Corps Cavalry Brigade 1st Brigade - 1 Base Trained, Light Cavalry Divisional Artillery - 2 Bases Field Artillery Polemos Risorgimento Feldzeugmeister 11
 - 2 Bases Veteran, SK2 - Gen Fanti 1st Brigade (Piemonte) - 2 Bases Trained, SK1 2nd Brigade (Aosta) - 2 Bases Trained, SK0 3 rd Division - Gen Mollard 1st Brigade")
14 Orders of Battle The Piedmontese Army CinC - Victor Emmanuel II CinC - Victor Emmanuel II Reserve Artillery 2 Bases Reserve Artillery - Gen Durando 1st Brigade (Grantieri di Sardegna) - 2 Bases Veteran, SK2 2nd Brigade (Savoia) - 2 Bases Veteran, SK2 - Gen Fanti 1st Brigade (Piemonte) - 2 Bases Trained, SK1 2nd Brigade (Aosta) - 2 Bases Trained, SK0 3 rd Division - Gen Mollard 1st Brigade (Cuneo) - 2 Bases Trained, SK2 2nd Brigade (Pinerolo) - 2 Bases Trained, SK0 4 th Division - Gen Cialdini 1st Brigade (Regina) - 2 Bases Trained, SK1 2nd Brigade (Savona) - 2 Bases - Raw, SK0 5 th Division - Gen Cucchiari 1st Brigade (Casale) - 2 Bases Trained, SK0 2nd Brigade (Acqui) - 2 Bases Trained, SK1 Cacciatori delle Alpi - Gen Garibaldi 1 Base Trained, SK2 1 Base Trained, SK0 1 Base Raw, SK0 Cavalry Division - Gen Sambuy Combined Light Brigade - 2 Bases Light Horse - Trained 1st Brigade - 1 Base Heavy Horse - Trained 2nd Brigade - 1 Base Heavy Horse - Trained Artillery Assets 3 Bases Field Artillery 2 Bases Reserve Artillery Note: Each Piedmontese army will have a CinC and One nominated General. If more than 2 divisions are present it will be Two nominated Generals 12 Polemos Risorgimento Feldzeugmeister
15 Austrian 2 nd Army - CinC FZM Gyuali Reserve Artillery 2 Bases Reserve Artillery 2 nd Corps - Gen Leichtenstein 1st Brigade - 2 Bases Veteran, SK1 2nd Brigade - 2 Bases Trained, SK0 1st Brigade - 1 Base Veteran, SK1-1 Base Trained, SK0 2nd Brigade - 1 Base Trained, SK2-1 Base Raw, SK0 Divisional Artillery - 1 Base Field Artillery 3 rd Corps - Gen Schwarzenberg 1 st Brigade - 1 Base Veteran, SK2-1 Base Trained, SK0 2 nd Brigade - 2 Bases Trained, SK1 1 st Brigade - 2 Bases Trained, SK2 2 nd Brigade - 2 Bases Trained, SK0 Corp Cavalry - 1 Base Trained, Light Cavalry Divisional Artillery - 1 Base Field Artillery Orders of Battle Austrian Second Army CinC - FZM Gyuali 7 th Corps - Gen Zobel 1 st Brigade - 2 Bases Trained, SK0 2 nd Brigade - 2 Bases Trained, SK1 1 st Brigade - 2 Bases Trained, SK0 2 nd Brigade - 2 Bases Trained, Elite, SK1 Corp Cavalry - 1 Base Trained, Light Cavalry Divisional Artillery - 1 Base Field Artillery 8 th Corps - Gen Benedek 1 st Brigade - 2 Bases Trained, SK0 2 nd Brigade - 1 Base Trained, SK2-1 Base Raw, SK0 - Gen Lang 1 st Brigade - 2 Bases Trained, SK2 2 nd Brigade - 2 Bases Trained, Elite, SK1 Corp Cavalry - 1 Base Trained, Light Cavalry Divisional Artillery - 1 Base Field Artillery Reserve Division - Gen Urban 1 st Brigade - 2 Bases Trained, SK0 2 nd Brigade - 2 Bases Trained, Elite, SK1 3 rd Brigade - 1 Base Trained, SK1-1 Base Trained, Light Cav - 1 Base Field Artillery 5 th Corps - Gen Stadion 1 st Brigade - 2 Bases Trained, SK0 2 nd Brigade - 1 Base Trained, SK2-1 Base Trained, SK0 3 rd Brigade - 2 Bases Trained, SK1 Cavalry Division - Gen Mensdorff 1st Brigade - 1 Base Trained, Light Cav 2nd Brigade - 1 Base Trained, Heavy Cav Cavalry Artillery - 1 Base Field Artillery 1 st Brigade - 2 Bases Trained, SK0 2 nd Brigade - 1 Base Trained, SK2-1 Base Raw, SK0 Corp Cavalry - 1 Base Trained, Light Cavalry Divisional Artillery - 2 Base Field Artillery Polemos Risorgimento Feldzeugmeister 13
16 Orders of Battle Changes to the Order of Battle from the end of May 1859 May end - Additional Corps to 2 nd Army: 9 th Corps - Gen Schaffgotsche 1 st Brigade - 2 Bases Trained, SK1 2 nd Brigade - 1 Base Trained, Elite, SK2-1 Base Trained, SK1 3 rd Brigade - 2 Bases Trained, SK0 1 st Brigade - 2 Bases Trained, SK1 2 nd Brigade - 1 Base Trained, Elite, SK2-1 Base Trained, SK1 Corp Cavalry - 1 Base Trained, Light Cavalry Divisional Artillery - 2 Base Field Artillery Beginning June - Additional Corps to 2 nd Army: 1 st Corps - Gen Clam-Gallas 1 st Brigade - 2 Bases Trained, Elite, SK1 2 nd Brigade - 1 Base Trained, Elite, SK2-1 Base Raw, SK0 3 rd Brigade - 2 Bases Trained, SK1 1 st Brigade - 2 Bases Trained, SK1 2 nd Brigade - 1 Base Trained, SK0-1 Base Raw, SK0 Austrian Second Army Corp Cavalry - 1 Base Trained, Light Cavalry Divisional Artillery - 2 Base Field Artillery CinC - FZM Gyuali Changes to the Order of Battle from June 1859 At this point the Austrians became 2 forces: 1 st Army under Wimpffen 2 nd Army under Schlick Additional Corps/Units to the 1 st Army above: Reserve Artillery 2 Bases Reserve Artillery 10 th Corps - Gen Wernhardt 1 st Brigade - 2 Bases Trained, Elite, SK1 2 nd Brigade - 1 Base Trained, SK2-1 Base Trained, SK1 3 rd Brigade - 2 Bases Raw, SK0 1 st Brigade - 2 Bases Trained, SK1 2 nd Brigade - 1 Base Trained, SK1-1 Base Trained, SK0 Corp Cavalry - 1 Base Trained, Light Cavalry Divisional Artillery - 2 Base Field Artillery Additional Corps to 1 st Army above: 11 th Corps - Gen Schwarzel 1 st Brigade - 2 Bases Trained, SK1 2 nd Brigade - 1 Base Trained, SK1-1 Base Raw, SK0 1 st Brigade - 2 Bases Trained, SK2 2 nd Brigade - 1 Base Trained, SK1-1 Base Raw, SK1 3 rd Brigade - 2 Bases Raw, SK0 Corp Cavalry - 1 Base Trained, Light Cavalry Divisional Artillery - 2 Base Field Artillery Cavalry Division 1st Brigade - 1 Base Trained, Light Cav 2nd Brigade - 1 Base Trained, Heavy Cav Cavalry Artillery - 1 Base Field Artillery 14 Polemos Risorgimento Feldzeugmeister
17 Army Generators When generating your army you must decide on the rough size of the forces that will be involved in the battle. First decide on the number of subordinate commanders you will have, the number must be within the range given at the start of each list. As a very rough guide the lower number will give you an army of about twenty four bases the higher number in excess of fifty. Roll for the Grading of the CinC and any attached Generals as detailed in the army list. For the Austrian Army you may treat the two army commanders under the CinC as wing commanders (Generals) with other Generals reporting to them. Once you have rolled for your subordinates, roll again on the tables below, following the sequence outlined to determine the composition of your Army. Austrian Forces Die Score Results 1 or 2 One of your Generals has decided to take a short cut using an unfamiliar map. Getting hopelessly lost, his command will not reach the battlefield. 3 or 4 Orders are muddled and two of your General s forces end up marching through each other. They will be late to the Battle. 5 One of your Generals gets a report of an intact wine cellar and diverts his force to investigate. 6 Your army arrives intact. No effect Deduct One Subordinate officer They will arrive at the battle when each rolls a 4, 5 or 6 He will arrive at the battle when a 3, 4, 5 or 6 is rolled Allied Forces Die Score Results 1 One of your Generals has decided to take a short cut using an unfamiliar map. Getting hopelessly lost, his command will not reach the battlefield. 2 or 3 Orders are muddled and two of your General s forces end up marching through each other. They will be late to the Battle. 4 One of your Generals gets a report of an intact wine cellar and diverts his force to investigate. 5 Your army arrives intact. No effect. 6 Reinforcements arrive! A General has arrived after getting separated form his army. Deduct One Subordinate officer They will arrive at the battle when each rolls a 4, 5 or 6 He will arrive at the battle when a 3, 4, 5 or 6 is rolled You get an allied General added to your army. If you are playing French use the Piedmontese table, if you are playing Piedmontese use the French table to generate this force. Polemos Risorgimento Feldzeugmeister 15
 for Engineers/Sappers 5 or 6 1 Base For Each Brigade Class (D6) 1-2 Raw 3-4 Trained 5-6 Veteran Throw (D6) for each Division if 5 or 6 add Elite status to one brigade.")
18 Army Generators The French Imperial Army of Italy 1859 Grade of CinC (D6) 1-3 Listless 4-5 Experienced 6 Energetic Generals - Choose - 2 to 5 Grades of General (D6) 1-2 Confused 3-5 Competent 6 Imposing For Each CinC (D6) for Engineers/Sappers 5 or 6 1 Base For Each Brigade Class (D6) 1-2 Raw 3-4 Trained 5-6 Veteran Throw (D6) for each Division if 5 or 6 add Elite status to one brigade. For each Infantry Corps, roll (D6) for (for Guard Corps Artillery +1 to roll) Reserve Artillery Base Reserve & 1 Field Artillery Base 6 1 Reserve & 2 Field Artillery Base Their Commands (D10) Cavalry Div Inf Div Corps Corps Corps Corps Corps Corps Imp Guard Corps Reserve Artillery Note: each option may only be assigned once. If the same number is rolled more than once roll again. Corps - Divisions in Corps (D6) 1 1 Infantry Division 2 2 Infantry Divisions 3 3 Infantry Divisions 4 1 Infantry & Corps Cavalry Division 5 2 Infantry & Corps Cavalry Division 6 3 Infantry & Corps Cavalry Division For each Infantry Division (D6) Brigade Brigades 6 3 Brigades For each Infantry Brigade (D6) Base Bases For each Infantry Brigade (D6) 1-2 SK SK 1 6 SK 2 Cavalry Division For each Division (D6) Brigade Brigades Each Brigade is 1 Base Light cavalry For Class (D6) 1 Raw 3-4 Trained 5-6 Veteran Throw (D6) for each Brigade if 6 add Elite status to one base. 16 Polemos Risorgimento Feldzeugmeister
 1 Base 3-6 2 Bases (All Guard Bases are, Veteran SK2) Throw (D6) for each Division if 5 or 6 add Elite status to one brigade.")
19 The French Imperial Army of Italy 1859 Army Generators Imperial Guard Corps Divisions in Guard Corps (D6) Divisions Divisions For Each Guard Infantry Division (D6) Brigade Brigades For Each Guard Infantry Brigade (D6) 1 Base Bases (All Guard Bases are, Veteran SK2) Throw (D6) for each Division if 5 or 6 add Elite status to one brigade. Throw (D6) for each Division if 5 to 6 downgrade one brigade to SK1. For the Guard Cavalry Division Roll (D6) Light Brigade Light & 1 Heavy Brigade Light & 1 Heavy Brigade Each Guard Cavalry Brigade is 1 Base of Cavalry and is Veteran Throw (D6) For each Guard Cavalry Division if 4-6 add Elite status to one brigade Reserve Artillery (D6) for each CinC if a 3 to 6 is rolled, roll (D6) for Artillery Bases x Field Artillery x Reserve Artillery x Reserve & 1 x Field Artillery Guard Cavalry (D6) if 4-6 Guard Cavalry Division is present Polemos Risorgimento Feldzeugmeister 17
 for Engineers/Sappers 5 or 6 1 Base Their Commands (D6) 1 2 3 4 5 6 Cavalry Div Div Div Note: each option may only be assigned once. If the same number is rolled more than once roll again.")
20 Army Generators The Piedmontese Army 1859 Grade of CinC (D6) 1-3 Listless 4-5 Experienced 6 Energetic Generals - Choose 2 or 4 Grades of General (D6) 1-3 Confused 4-5 Competent 6 Imposing For Each CinC (D6) for Engineers/Sappers 5 or 6 1 Base Their Commands (D6) Cavalry Div Div Div Note: each option may only be assigned once. If the same number is rolled more than once roll again. Throw (D6) for each Division if 3 to 6 make one division the Cacciatori delle Alpi and roll as per line div. Once successfully rolled this option may not be rolled for again. For Each Division (D6) Brigade Brigades Div Grena dier Div Reserve Art Throw (D6) for each Division if 5 or 6 add Elite status to one brigade. Throw (D6) for each Division if 4 to 6 add one Trained Light Cavalry Base Cavalry Division (D6) for Brigades Brigades Brigades Cavalry Brigade Type (D6) Light Cavalry Base Heavy Cavalry Bases Heavy & 1 Light Cavalry Base Throw D6 for class of Base 1-2 Raw 3-5 Trained 6 Veteran Throw (D6) for each Cavalry Division if 5 or 6 add Elite status to one Brigade Divisional Artillery (D6) for all Divisions x Field Artillery Base Reserve Artillery (D6) for Artillery x Field Artillery x Field & 1 x Reserve Artillery 6 2 x Reserve Artillery For Infantry per Brigade (D6) Base Bases For each Infantry Brigade (D6) (For the Cacciatori delle Alpi +2 to dice) 1-2 SK SK SK 2 For each Brigade Class (D6) (For the Grenadier Div +2 to dice, for the Cacciatori delle Alpi +1 to dice) 1-2 Raw 3-4 Trained 5-6 Veteran 18 Polemos Risorgimento Feldzeugmeister
21 Army Generators The Austrian Army May 1859 CinC Grade of CinC (D6) 1-3 Listless 4-6 Experienced Generals - Choose - 3 to 5 Grades of General (D6) 1-3 Confused 4-5 Confident 6 Imposing For CinC (D6) for Engineers/Sappers 5 or 6 1 Base Their Commands (D10) Cavalry Reserve Div Div Corps Corps Corps Corps Corps Corps Note: each option may only be assigned once. If the same number is rolled more than once roll again. Corps - Divisions in Corps (D6) Infantry Division Infantry Divisions 6 3 Infantry Divisions For each Infantry Division (D6) 1 1 Brigade Brigades 6 3 Brigades For each Infantry Brigade (D6) 1 1 Base Bases For each Infantry Brigade (D6) 1-2 SK SK 1 6 SK 2 Corps Reserve Artillery Throw (D6) for each Division if 5 or 6 add Elite status to one brigade. Throw (D6) for each Division if 4 or 6 add 1 Field Artillery Base (D6) for each Corps 1 No x Field Artillery Base x Reserve Artillery Base 6 1 x Reserve & 1 Field Artillery Bases Throw (D6) for each Corps if 4 to 6 add 1 Trained Light Cavalry Base to the Cavalry Division Type (D6) 1 1 Brigade Light Cavalry Brigade Heavy Cavalry Brigade Heavy & 1 Light Cavalry Cavalry Brigades Class All are bases are Trained Throw (D6) for each Cavalry Brigade if 6 add Elite status to one base Throw (D6) for each Cavalry Brigade if 5 or 6 add 1 x Field Artillery Base Reserve Division (D6) 1 2 Infantry Base 2 3 Infantry Bases 3 4 Infantry Bases 4 4 Inf & 1 Trained Lt Cav Base 5 3 Inf, 1 TrLt Cav & 1 Field Art Base 6 2 Inf, 1 TrLt Cav & 1 Field Art Base Reserve Artillery (D6) for each CinC if a 3 to 6 is rolled, roll (D6) for Artillery Bases. 1 1 x Field Artillery x Reserve Artillery x Reserve Artillery For Each Brigade Class (D6) 1-2 Raw 3-5 Trained 6 Veteran Polemos Risorgimento Feldzeugmeister 19
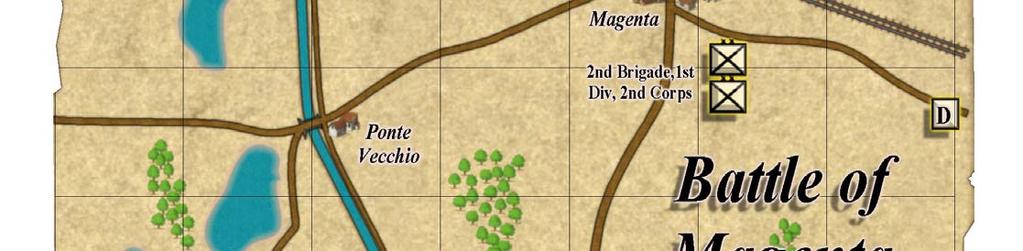
22 Scenario The Battle of Magenta, 1859 The Flank March Continues - The Battle of Magenta 4 th June, Historical Situation Neither commander, Napoleon the III or FZM Graf Gyulai, expected a battle to be fought on the day. Napoleon thought that the Austrians would not have sufficient troops in place to stop any Allied advance, so the Allies sole aim was to get troops across the Ticino by June 4 th and move closer to Milan. The French Imperial Guard, II and III corps with the Piedmontese following up closely positioned themselves on the east bank of the river facing south. This would be facing the direction the Austrians were expected to come from, if any. The two others, I and IV French corps were on the west bank facing south protecting the allies lines of communication. The Austrians were expecting a rest day to redeploy their forces and the allies were to settle into their new positions. Magenta therefore proved to be a battle of encounter; it was, as a matter of fact, a complete surprise to both commanders and only a small portion of each force took actually part. The Austrians faced the Allies with the II Corps, a large portion of the I Corps, part of VII Corps and a cavalry division. Other Austrian units were within the sound of the guns however FMZ Gyulai s army was so disorganised, that they just could not respond quickly enough. The Allies needed to take Magenta by the evening or face overwhelming odds the following day. Terrain The terrain is very flat and open with the area being covered by grassland, vineyards, crops and fruit trees. The woods were light with the main obstacle being the Naviglio Grande Canal that is deep and wide with steep overgrown banks and is impassable except at bridges. Terrain Effects Road Reduces very steep slope to steep. Steep slope to gentle. Ignore terrain effect of marsh, woods, enclosures if in formation 1BW wide. Towns & Villages: May only be negotiated by columns 1BW wide, moving at 1BW per turn. Counts as level 2 obstacle to units in combat. Obstacle level 2 to fire. Woods All movement reduced to 1BW. Infantry ignore +1 for attacking. Cavalry may not attack. Rivers, Lakes and Canals Impassable except by bridge or ford. One unit per game turn may negotiate a bridge or ford. All Troops count shaken if attacking across a bridge or ford. Magenta is 4 bases in size all others are 1 base in size. The map represents an approximate area of 7km by 9km and is about 14BW s across by 18BW s in depth Objectives The Allies have the tempo in the first turn this means that there will be no tempo bidding. The Allied, Piedmontese & French objective is to take and hold Magenta. The Austrian objective is to prevent the taking and holding Magenta. The game starts at 1:00pm and has turns of approx 20minutes and ends at 8:00pm. Arrivals All units not marked as on board arrive as stated. Historical Outcome During the battle the Austrians suffered over 5,000 killed or wounded in action, with the captured total reaching 4,500. The Allied total reached almost 5000 casualties in achieving the battle. The Battle of Magenta was being claimed as a great victory in France, so much so it even had a colour named after it. General MacMahon was made the Duke of Magenta and both he de Saint-Jean-d Angély of the Imperial Guard were both made marshals of France. Winning the Battle of Magenta had cleared road to Milan where the allies entered the city on the 8 th of June. 20 Polemos Risorgimento Feldzeugmeister
23 Scenario The Battle of Magenta, 1859 Army of Italy - CinC Napoleon III (On board - With 1 st Guard Division) Reserve Artillery (On board With 1 st Guard Division) 1 Base Reserve Artillery Guard Corps - Gen St Jean-d Angely (On board - With 1 st Guard Division) (On board - App Ponte Nuovo & Buffalora) 1st Brigade - 1 Base Veteran, SK2 2nd Brigade - 2 Bases Veteran, SK1 (Enters Point A - 13:20pm) 1st Brigade - 2 Bases Veteran, SK2 2nd Brigade - 2 Bases Veteran, SK2 Guard Cavalry Division (Enters Point A - 13:40pm) 1st Brigade - 1 Base Veteran, Elite, Hvy Cav 2nd Brigade - 1 Base Veteran, Heavy Cav 3rd Brigade - 1 Base Veteran, Light Cav (Enters Point A - 13:20pm) Division Artillery - 1 Base Field Artillery 2 nd Corps - Gen MacMahon (On Board - With 1 st Div) (On board - Approaching Casate) 1st Brigade - 2 Bases Veteran, SK1 2nd Brigade - 2 Bases Trained, SK1 (Enters Point C - 13:20pm) 1st Brigade - 2 Bases Trained, SK1 2nd Brigade - 3 Bases Veteran, SK1 Corps Cavalry Brigade (Enters Point B - 13:40pm) 1 st Brigade - 1 Base Trained, Light Cav (Enters Point C - 14:00pm) Division Artillery - 1 Base Field Artillery 3 rd Corps - Gen Canrobert (With 1 st Div) (Enters Point A - 1 st Bgde 14:00pm) (Enters Point A - 2 nd Bgde 16:40pm) 1st Brigade 2nd Brigade - 2 Bases Trained, SK1-2 Bases Raw, SK1 (Enters Point A - 2 nd Bgde 18:40pm) 1st Brigade - 2 Bases Trained, SK1 Attached Artillery - 1 Base Field Artillery 4th Corps - Gen Niel (With 2 nd Div) (Enters Point A - 1 st Bgde 14:40pm) 1st Brigade - 2 Bases Trained, SK2 2nd Brigade - 2 Bases Trained, SK1 Attached Art - 1 Base Field Artillery Piedmontese - Gen Fanti (With 2 nd Div) (Enters Point C - 1 st Bgde 18:20pm) Bgde Piemonte - 2 Bases Trained, SK1 Bgde Aosta - 2 Bases Trained, SK0 Attached Art - 1 Base Field Artillery Elements Austrian Second Army - CinC FZM Guyali (On board Magenta) 1 st Corps - Gen Clam-Gallas (On board Magenta) (On board Ponte Nuovo) 1 st Brigade - 2 Bases Trained, Elite, SK1-1 Base Reserve Artillery (On board Magenta) 2 nd Brigade - 1 Base Trained, Elite, SK2-1 Base Raw, SK0 2 nd Corps - Gen Leichtenstein (On board Magenta) (On board Magenta) 1st Brigade - 2 Bases Veteran, SK1 2nd Brigade - 2 Bases Trained, SK0 (On board 1 st Bgde - Buffalora) (On board 2 nd Bdge - Robecco) 1st Brigade - 1 Base Veteran, SK1-1 Base Trained, SK0 2nd Brigade - 1 Base Trained, SK1-1 Base Raw, SK0 (On board - Buffalora) Division Artillery - 1 Base Field Artillery 3 rd Corps - Gen Schwarzenberg (Enters Point F - 15:20pm - 1 Division per turn followed by ) 1 st Brigade - 1 Base Veteran, SK2-1 Base Trained, SK0 2 nd Brigade - 2 Bases Trained, SK1 1 st Brigade - 2 Bases Trained, SK2 2 nd Brigade - 2 Bases Trained, SK0-1 Base Trained, Lt Cav Division Artillery - 1 Base Field Artillery 5 th Corps - Gen Stadion (Enters Point F - 18:20pm) 1 st Brigade - 2 Bases Trained, SK0 7 th Corps - Gen Zobel (Enters Point E - 13:40pm) (Enters Point E - 13:40pm) 1 st Brigade - 2 Bases Trained, SK0 2 nd Brigade - 2 Bases Trained, SK1 (Enters Point D - 15:20pm) 1 st Brigade - 2 Bases Trained, SK0 2 nd Brigade - 2 Bases Trained, Elite, SK1 (Enters Point E - 13:40pm) Corp Cavalry - 1 Base Trained, Light Cavalry Division Artillery - 1 Base Field Artillery Polemos Risorgimento Feldzeugmeister 21


24 22 Polemos Risorgimento Feldzeugmeister
Huzzah! Glorious Empires
 Huzzah! Glorious Empires Version 6.3 Fast-play grand tactical rules for Napoleonic wargames. By Ian Marsh. With thanks to Mike Lewis, Andy Finkel and Nigel Davie. Eagle-eyed error spotters: John Mumby.
My, You Have Attractive Flanks. by Phil Johnston. Originally publishes in The Courier, February 1997.
 HisEntCo My, You Have Attractive Flanks Originally publishes in The Courier, February 1997. One of the perennial problems of miniature wargames is off-board movement: how can you accurately represent the
The American Civil War Campaign September 2014 Version (4.0)
") The American Civil War Campaign September 2014 Version (4.0) This campaign scenario has been developed by Greg Novak with revisions by Jeff Glasco Section 1: Goal: The following game is based on Frank
The American Civil War Campaign September 2014 Version (4.0) This campaign scenario has been developed by Greg Novak with revisions by Jeff Glasco Section 1: Goal: The following game is based on Frank
Counter-Attack at Villers-Bretonneux
 Counter-Attack at Villers-Bretonneux 13 th Australian Infantry Brigade vs 5 th German Guards Division Villers-Bretonneux, France Night of 24 th & 25 th April, 1918 The Battle The Second Battle of Villers-Bretonneux
Bathtub D-Day 6 th June, A Flames of War Grand Battle Scenario
 Bathtub D-Day 6 th June, 1944 A Flames of War Grand Battle Scenario Operation Overlord, the Anglo-American invasion of Hitler s Fortress Europe, was a pivotal event in the Second World War. This scenario
KEREN 1941, EAST AFRICA
 KEREN 1941, EAST AFRICA AAR of World at War 25 Keren, 1941: East Africa Orders to Sudan Based Forces January 30, 1941 From: Commander in Chief, Middle East Command, General Archibald Wavell To: Commander
U.S. HISTORY CIVIL WAR - SIMULATION TARGETS:
 TARGETS: U.S. HISTORY CIVIL WAR - SIMULATION 1. Identify and describe the political and military decisions made during the war and their consequences. 2. Evaluate the advantages and disadvantages for each
dust warfare: glossary
 In war-time, truth is so precious that she should always be attended by a bodyguard of lies. Winston Churchill This is the Dust Warfare glossary. This collection of terms serves as a quick reference guide
Bruderkrieg. Peter Riley. A supplement for converting Polemos Commandant de Bataille FPW rules for the Austro-Prussian War of 1866
 Bruderkrieg Peter Riley A supplement for converting Polemos Commandant de Bataille FPW rules for the Austro-Prussian War of 1866 Bruderkrieg A supplement for converting Polemos Commandant de Bataille FPW
Howlin Mobs Simple Rules for the American Civil War
 Howlin Mobs Simple Rules for the American Civil War These rules are a blatant copy of a set that appeared in an article by Brian DeWitt in Wargames Illustrated. I have expanded some areas in line with
Beyond Breaking 4 th August 1982
 Beyond Breaking 4 th August 1982 Last updated 22 nd January 2013 The scenario set in the Northern Germany during 1982. It is designed for use with the "Modern Spearhead" miniatures rule system. The table
Kharkov, A Flames of War Mega-Game Scenario
 Kharkov, 1942 A Flames of War Mega-Game Scenario After a very difficult winter of 1941, German forces on the eastern front spent the spring rebuilding and fending off ever weakening Soviet attacks, while
Gallic Wars Improvements
 Gallic Wars Improvements Version 1.11 Added LHI now added as Roman option. Added Heavy Chariots to Punic army unit mix. Corrected SHC can not follow-up attack into impassable terrain. Scenario Editor Adjusted
BEFORE NAPOLEON: FRENCH AND INDIAN WAR CAMPAIGN
 1 BEFORE NAPOLEON: FRENCH AND INDIAN WAR CAMPAIGN Contents Land Forces... 2 Naval Groups... 2 Leaders... 2 Sequence of Play... 3 Initiative... 3 Land Movement... 3 River & Lake Movement... 4 Sea Zones...
Counter Attack! Introduction
 Counter Attack! Introduction After the surprise Combine attack depicted in the scenario The Great Patriotic War, the front stabilized with marginal Combine gains. The battle may well have been forgotten,
An Historical Simulation Game-System Series Rules
 Rules Version 7.0 An Historical Simulation Game-System Series Rules 1.0 INTRODUCTION This game is a two-player simulation of Napoleonic battles at the Grand Tactical level. You can play each game as an
FLASHPOINT : CENTRAL FRONT
 VII Corps Defense of Hof Gap Situation: The deteriorating economic situation and political unrest in the Warsaw pact countries created a time of tension between NATO and the Soviet Union and its allies.
St. Mihiel Offensive: An Overview
 St. Mihiel Offensive: An Overview Threatening the eastern flank of Verdun, the St. Mihiel salient existed since Germany occupied the territory in late 1914. The French tried to eliminate the salient in
Chapter FM 3-19
 Chapter 5 N B C R e c o n i n t h e C o m b a t A r e a During combat operations, NBC recon units operate throughout the framework of the battlefield. In the forward combat area, NBC recon elements are
The battle of Bir Bagahr A Western Desert WWII scenario by Bart Vetters for the Schild en Vriend Gentlemen s wargames society
 The battle of Bir Bagahr A Western Desert WWII scenario by Bart Vetters for the Schild en Vriend Gentlemen s wargames society Introduction This scenario is one representing a staple military operation:
The Battle Of Talavera. 28 July, 1809
 The Battle Of Talavera 28 July, 1809 In April 1809. a year after his small but morale-boosting victory at Vimiero, Sir Arthur Wellesley returned to Portugal. Thus far he was one of the few British commanders
Chapter II SECESSION AND WAR
 Chapter II SECESSION AND WAR 1860-1861 A. Starting the Secession: South Carolina - December 20, 1860 South Carolina votes to secede - Major Robert Anderson US Army Commander at Charleston, South Carolina
FLASHPOINT : CENTRAL FRONT
 VII Corps Defense of Hof Gap Situation: The deteriorating economic situation and political unrest in the Warsaw pact countries created a time of tension between NATO and the Soviet Union and its allies.
Axis & Allies Anniversary Edition Rules Changes
 The following chart contains a list of rules changes between Axis & Allies Anniversary Edition and Axis & Allies Revised. The Larry Harris Tournament Rules (LHTR) are also referenced, both to allow comparison
Section III. Delay Against Mechanized Forces
 Section III. Delay Against Mechanized Forces A delaying operation is an operation in which a force under pressure trades space for time by slowing down the enemy's momentum and inflicting maximum damage
American War of Independence
 American War of Independence Version 0.1 2012 Dadi&Piombo compiled by David Jezequel This set includes lists and additional rules that allow you to play The American War of Independence using. You can
Introduction. Contents
 Introduction This set of rules (adapted from my main set) was for our big game fought by Ayr and Sheffield wargamers on the 29 th and 30 th of October 2011. The battle that year was a what if centred on
Infantry Battalion Operations
 .3 Section II Infantry Battalion Operations MCWP 3-35 2201. Overview. This section addresses some of the operations that a task-organized and/or reinforced infantry battalion could conduct in MOUT. These
SkirmishCampaigns: Russia 41-Drive on Minsk Armor Clash. western board edge.
 AFTERMATH The advance of the 22 nd Tank Division was poorly coordinated and poorly supported. While temporarily slowing the advance of the 3 rd Panzer Division, it did little to disrupt the German attack.
Dead of Winter Errata & Clarifications Updated & Augmented 3/16/16
 Dead of Winter Errata & Clarifications Updated & Augmented 3/16/16 Charts: -- Orchards cost 2 movement points for arty, not 1. -- Cedars are blocking terrain -- The counter for Gen. Crittenden gives him
Red Devils and Panzers, 1944 A Flames of War Mega-Game Scenario
 Red Devils and Panzers, 1944 A Flames of War Mega-Game Scenario The crucial left flank of the Allied D-Day landings was manned by the British 6 th Airborne Division, tasked with taking the critical Pegasus
A. The United States Economic output during WWII helped turn the tide in the war.
 I. Converting the Economy A. The United States Economic output during WWII helped turn the tide in the war. 1. US was twice as productive as Germany and five times as that of Japan. 2. Success was due
Fort Sumter-Confederate Victory
 Fort Sumter-Confederate Victory First Battle of the Civil War There was not one human death (a Confederate horse was killed) from enemy fire. A death occurred after the fighting, from friendly fire. Significance:
Nouvelle Guerre (c) 2004 Alexander J. Hay III
 2004 Alexander J. Hay III") Nouvelle Guerre (c) 2004 Alexander J. Hay III Notice of License for Use 1. This material is being distributed free of charge in exchange for you the User agreeing to abide by the terms of this license.
Nouvelle Guerre (c) 2004 Alexander J. Hay III Notice of License for Use 1. This material is being distributed free of charge in exchange for you the User agreeing to abide by the terms of this license.
I. Operational Maneuver Chart: The campaign consist of a series of Combat Columns containing 1-5 Engagement Areas. The Engagement Areas are made up
 I. Operational Maneuver Chart: The campaign consist of a series of Combat Columns containing 1-5 Engagement Areas. The Engagement Areas are made up of 2-3 Assault maps (any scale map may be used). Players
Spring Offensives in 1918:
 Spring Offensives in 1918: Key words: Spring Offensive, The second Battle of Marne, Hundred Days of Offensive, The Battle of Amiens, Ferdinand Foch, 11.11.1918, casualties Spring Offensive, 1918: was a
Blade Force Scenario
 Background Blade Force Scenario The ships carrying Blade Force left the River Clyde on 2nd November 1942 along with the follow up troops of 78 th Battleaxe Division. The two leading brigades of 78 th Division
MECHANIZED INFANTRY PLATOON AND SQUAD (BRADLEY)
") (FM 7-7J) MECHANIZED INFANTRY PLATOON AND SQUAD (BRADLEY) AUGUST 2002 HEADQUARTERS DEPARTMENT OF THE ARMY DISTRIBUTION RESTRICTION: Approved for public release; distribution is unlimited. *FM 3-21.71(FM
(FM 7-7J) MECHANIZED INFANTRY PLATOON AND SQUAD (BRADLEY) AUGUST 2002 HEADQUARTERS DEPARTMENT OF THE ARMY DISTRIBUTION RESTRICTION: Approved for public release; distribution is unlimited. *FM 3-21.71(FM
Battle of Falling Waters 1863 Custer, Pettigrew and the End of the Gettysburg Campaign
 George F. Franks, III battleoffallingwaters1863foundation.wordpress.com fallingwatersmd1863@gmail.com Which Falling Waters? July 4 12: Retreat and Pursuit July 13: Eve of Battle July 14: The Battle of
Arracourt, 1944 A Flames of War Mega-Game Scenario
 Arracourt, 1944 A Flames of War Mega-Game Scenario After a breakneck advance across France, George Patton s 3 rd Army pushed into Lorraine. As the Americans outran their supplies and resistance stiffened,
AAR Curiosity Killed the?
 Bridge and Stream Viewed From the West This past Saturday, our gaming group play-tested a new four-player Micro Melee scenario entitled Curiosity Killed the? in 6mm scale that we will be running at Cold
The Battle of SHILOH PITTSBURG LANDING ATTACKED! FREE SCENARIO SAMPLE from ALTAR of FREEDOM Scenario
 The Battle of SHILOH An ALTAR of FREEDOM Scenario VOL. II--No.3 SUNDAY, APRIL 6, 1862 PRICE ONE DOLLAR PITTSBURG LANDING ATTACKED! "Tonight we will water our horses in the Tennessee River!" --General Albert
First Day In Hell - Kursk 5 July 1943
 First Day In Hell - Kursk 5 July 1943 In early July 1943, Hitler launched his Operation Zitadelle to pinch off the Kursk salient in 1944. This salient had been created in the fluid situation of early 1943
Bolt Action v2 Unofficial World War One Modifications March 30, 2017
 Bolt Action v2 Unofficial World War One Modifications March 30, 2017 Offered by GAJO Games gajominis@aol.com http://www.gajominis.com 9420 S. Union Square Sandy, UT 84070 801-563-5956 Bolt Action GAJO
Climax at Nijmegen Bridge 2012
 After Action Report "Nijmegen, Holland, 20 September 1944: Operation Market Garden was to be characterized by intense fighting for the control of a number of vital bridges. Each was a vital link in the
Israeli Defence Force: The Mechanised Rifle Company
 Israeli Defence Force: The Mechanised Rifle Company Infantry squads are armed with FN FAL assault rifles, some of which are the heavy barrelled (HB) version allowing use as a quasi-squad support weapon.
SECTION 1: BASIC RULES SECTION 4: AFV SECTION 5: OBSTACLES SECTION 2: WEAPON UNITS & TRANSPORTS SECTION 6: AIR SUPPORT & BATTALIONS SECTION 3: ASSAULT
 STANDARD 1 SECTION 1: BASIC RULES 1. Introduction... 3 2. Game components... 3 3. Platoon... 3 3.1 Troop platoon... 4 3.2 Officers... 4 3.3 Stacking... 4 4. Sequence of play... 4 4.1 Command phase... 4
The Bear Marches West
 The Bear Marches West 12 SCENARIOS FOR 1980S NATO VS WARSAW PACT WARGAMES Russell Phillips Cover illustration and maps by Aoife Brown Shilka Publishing www.shilka.co.uk Copyright 2012, 2013 by Russell
The Battle of Poore s Ridge The Kaladan Valley, Burma 11th March 1944
 The Battle of Poore s Ridge The Kaladan Valley, Burma 11th March 1944 Poore managed to get onto the telephone line from the mortar OP; he buzzed, and got what sounded to him like a disrespectful reply
THE INFANTRY PLATOON IN THE ATTACK
 In the years before the World War II most of Finland s higher officer cadre had been trained in the military academies of Imperial Russia, Germany and Sweden. However, they soon started to see Finlands
Intelligence Preparation of the Battlefield Cpt.instr. Ovidiu SIMULEAC
 Intelligence Preparation of the Battlefield Cpt.instr. Ovidiu SIMULEAC Intelligence Preparation of Battlefield or IPB as it is more commonly known is a Command and staff tool that allows systematic, continuous
Guadalcanal Campaign Objective: Henderson Airfield
 Henderson Airfield Guadalcanal Campaign Objective: Henderson Airfield Location: Solomon Islands, Guadalcanal Commanders: Lt. Gen. Harukichi Hyakutake Gen. Alexander Vandegrift Historical Background After
Cowpens, South Carolina January 17, 1781 Johnny Reb/AWI by Jeff Glasco
 Cowpens, South Carolina January 17, 1781 Johnny Reb/AWI by Jeff Glasco Revised: February 2, 2015 While small in size, the Battle of Cowpens helped end the British control over the backwoods of South Carolina
US 5th Army 9 April 1945
 US 5th Army 9 April 1945 8th Army: Army Troops 56th Division: 169th (London) Infantry Brigade 2/5th Queens 2/6th Queens 2/7th Queens 24th (Guards) Infantry Brigade 1st Scots Guards 3rd Coldstream Guards
Chapter 20 Section 1 Mobilizing for War. Click on a hyperlink to view the corresponding slides.
 Chapter 20 Section 1 Mobilizing for War Click on a hyperlink to view the corresponding slides. Click the Speaker button to listen to the audio again. Chapter Objectives Section 1: Mobilizing for War Explain
Axis and Allies Revised: Historical Edition (AARHE)
") 1 version: exerperimental Axis and Allies Revised: Historical Edition (AARHE) Introduction AARHE is intended to provide historical realism to the board game Axis and Allies Revised and is designed to work
1 version: exerperimental Axis and Allies Revised: Historical Edition (AARHE) Introduction AARHE is intended to provide historical realism to the board game Axis and Allies Revised and is designed to work
After-Action Report: SPI s Alma Dav Vandenbroucke April 7, 2018
 After-Action Report: SPI s Alma Dav Vandenbroucke davanden@cox.net April 7, 2018 Introduction This is an after-action report of a solitaire play-through of the Alma scenario from SPI s Crimean War quad
Vimy Ridge and Passchendaele. Birth of a Nation
 Vimy Ridge and Passchendaele Birth of a Nation First... http://www.bbc.co.uk/schools/worldwarone/hq/trenchwarfare.shtml The Battle of Vimy Ridge, April 9-12th 1917 Many historians and writers consider
LAST UPDATED JANUARY
 Federated States of America (FSA) LAST UPDATED JANUARY 11 2016 FIRE TEAMS IN LEGIONS As a matter of expediency certain infantry sections often find themselves separating into distinct Fire Teams to allow
3/8/2011. Most of the world wasn t surprised when the war broke out, but some countries were better prepared than others.
 Most of the world wasn t surprised when the war broke out, but some countries were better prepared than others. Pre-war Canada had a regular army of only 3000 men; we did, however, have 60,000 militia
Affectations BR : Corps : I, VIII, XII, XXX, IICAN jour jour jour Valeur. jour. Dates. jour
 TLD 2nde édition Dates Unités 1 Airborne 6 Airborne GD Blindée 7 Blindée 11 Blindée 3 Inf 15 Inf 43 Inf 49 Inf 50 Inf 51 Inf 53 Inf 59 Inf 1 POL Bl. 2 CAN Inf 3 CAN Inf 4 CAN Bl. Affectations BR : Corps
The Russian Army, Narva (1700)
") The Russian Army, Narva (1700) This list is based on the army at the Battle of Narva, 1700. In the early stages of the war the Russians besieged the Swedish fortress of Narva. Charles XII landed nearby
The Russian Army, Narva (1700) This list is based on the army at the Battle of Narva, 1700. In the early stages of the war the Russians besieged the Swedish fortress of Narva. Charles XII landed nearby
Birth of the Wisconsin Field Artillery
 Birth of the Wisconsin Field Artillery 1885-1919 57th FA Brigade 120 th FA Regiment (157 th MEB) 121 th FA Regiment 1885-1916 11 May 1885-1 st Wisconsin Battery formed in Milwaukee, 65 Pax, Commander is
World War One Definition of War/Countries Involved Background Information WWI 4 Causes of World War I (p. 275) Declaring War (p.
 Declaring War (p.") World War One 1914-1918 Definition of War/Countries Involved Background Information WWI 4 Causes of World War I (p. 275) Declaring War (p. 276) Canada & Newfoundland Join In (p 277) Regiments and Battles
World War One 1914-1918 Definition of War/Countries Involved Background Information WWI 4 Causes of World War I (p. 275) Declaring War (p. 276) Canada & Newfoundland Join In (p 277) Regiments and Battles
World War I. Part 3 Over There
 World War I Part 3 Over There After war was declared, the War Department asked the Senate for $3 billion in arms and other supplies. It took some time to also recruit and train the troops. More than 2
NAVAL MODULE Draft Rules Design by Vance von Borries Copyright 2018, Vance von Borries
 NAVAL MODULE Draft Rules 4-7-18 Design by Vance von Borries Copyright 2018, Vance von Borries 25.0 Naval Units Naval units are found in only certain games in this series. Naval units are not combat units,
3/29/2011. The battle of Vimy Ridge is one of the greatest battles in Canada s history.
 7 miles long High hill combined with elaborate trenches. New style of warfare for Canadians. The battle of Vimy Ridge is one of the greatest battles in Canada s history. For the first time in the Great
Table of Contents. Introduction Glossary
 1 Table of Contents Introduction ----------------------------------------------- 4 Glossary ---------------------------------------------------- 4 1.0 THE GAME UNITS -----------------------------------
ORGANIZATION AND FUNDAMENTALS
 Chapter 1 ORGANIZATION AND FUNDAMENTALS The nature of modern warfare demands that we fight as a team... Effectively integrated joint forces expose no weak points or seams to enemy action, while they rapidly
Chapter 17. The Civil War. The Start of the Civil War. West Virginia/Virginia. Everyone thought that it would be a short & quick war
 Slide 1 Chapter 17 The Civil War Slide 2 The Start of the Civil War Everyone thought that it would be a short & quick war At first, 8 slave states stayed in the Union By the end, only 4 slave states stayed
Imperial Guard Steel Legion SPECIAL RULE
 Imperial Guard Steel Legion 2017-01-10 ARMAGEDDON STEEL LEGION IMPERIAL GUARD ARMY LIST Strike fast and suddenly. Attack without warning. Secure victory before the foe is aware of his danger. Remember
ADVANCED RULES AND PLAY BOOK
 18.0 Regions 18.1 Movement and Regions 18.2 Control of Regions 18.3 Combat and Regions 18.4 Regions and Terrain 18.5 Regions and Retreat 18.6 Regions and Advance After Combat 18.7 Regions and Supply 19.0
DIEPPE - BASIC FACTS. Canadians in Battle - Dieppe
 DIEPPE - BASIC FACTS To defeat the Axis powers, the Allies knew they had to fight in Western Europe. Even though they were inexperienced, the Second Canadian Division was selected to attack the French
FRENCH Sets Up First GERMAN Moves First
 FRANCE, MAY 1940 HANNUT, BELGIUM, 12 May 1940: General Hoepner, commander of the German 6th Army, ordered the 3rd, and the 4th Panzer Divisions to secure Hannut to protect the Sixth Army s flank. The 4th
Tactical Employment of Mortars
 MCWP 3-15.2 FM 7-90 Tactical Employment of Mortars U.S. Marine Corps PCN 143 000092 00 *FM 7-90 Field Manual NO. 7-90 FM 7-90 MCWP 3-15.2 TACTICAL EMPLOYMENT OF MORTARS HEADQUARTERS DEPARTMENT OF THE
NATURE OF THE ASSAULT
 Chapter 5 Assault Breach The assault breach allows a force to penetrate an enemy s protective obstacles and destroy the defender in detail. It provides a force with the mobility it needs to gain a foothold
2 nd Division: 5 th & 6 th Canadian Field Artillery Brigades. 3 rd Division: 9 th & 10 th Bde. 4 th Division: 3 rd & 4 th
 2 nd Division: 5 th & 6 th Canadian Field Artillery Brigades 3 rd Division: 9 th & 10 th Bde 4 th Division: 3 rd & 4 th 1 st Division first CO: Sept 1914 2 nd Division first CO: May 1915 3 rd Division
United States 3rd Infantry Division Modern Spearhead list
 United States 3rd Infantry Division Modern Spearhead list 1972-1982 Compiled by L. D. Ueda-Sarson; version 1.42: 22 October 2013 General notes: This list covers the 3rd Infantry Division (Mechanized) of
RECRUIT SUSTAINMENT PROGRAM SOLDIER TRAINING READINESS MODULES Conduct Squad Attack 17 June 2011
 RECRUIT SUSTAINMENT PROGRAM SOLDIER TRAINING READINESS MODULES Conduct Squad Attack 17 June 2011 SECTION I. Lesson Plan Series Task(s) Taught Academic Hours References Student Study Assignments Instructor
The SADF/UNITA commanders that can be played as are: Commandant Les Rudman (SADF) Major Pierre Franken (SADF) Lieutenant Oranje* (UNITA)
 Major Pierre Franken (SADF) Lieutenant Oranje* (UNITA)") Scenarios: Scenario 1: First Contact 6 September 1987 Umpire notes: (for his eyes only) Players may not view an opponent s Order of Battle for this scenario. Each player is allocated to a side (either
Scenarios: Scenario 1: First Contact 6 September 1987 Umpire notes: (for his eyes only) Players may not view an opponent s Order of Battle for this scenario. Each player is allocated to a side (either
Deepening of new lines and communication trenches in hand. One man wounded by sniper.
 War Diary 7th Battalion North Staffordshire Regiment Private Albert Amos Hill 25th January 1917 The war diary for the days leading up to the 25th January reports the preparation work prior to an assault
Robert George Cordery has asserted his right under the Copyright, Designs and Patents Act 1988 to be identified as the author of this work.
 ARMY LISTS Robert George Cordery has asserted his right under the Copyright, Designs and Patents Act 1988 to be identified as the author of this work. Robert George Cordery (2009) 3 CONTENTS 3 GENERAL
Battlefront:WWII Scenario Jupiter-Les Duanes Scenario Overview By Ken Natt Operation Jupiter
 Battlefront:WWII Scenario Jupiter-Les Duanes Scenario Overview By Ken Natt "He who controls Hill 112 controls Normandy" Operation Jupiter Hill 112 was a prominent terrain feature that dominated much of
GOLAN: THE SYRIAN OFFENSIVE
 GOLAN: THE SYRIAN OFFENSIVE by E.R. Bickford Production: Callie Cummins 2011 Decision Games Bakersfield, CA. As the rules state, this is the opening phase of the Yom Kippur War and the Syrian invasion
TACTICAL EMPLOYMENT OF ANTIARMOR PLATOONS AND COMPANIES
 (FM 7-91) TACTICAL EMPLOYMENT OF ANTIARMOR PLATOONS AND COMPANIES HEADQUARTERS DEPARTMENT OF THE ARMY DECEMBER 2002 DISTRIBUTION RESTRICTION: Approved for public release; distribution is unlimited. (FM
Camden, South Carolina, August 16, 1780 Piquet/Cartouche By Jeff Glasco
 Camden, South Carolina, August 16, 1780 Piquet/Cartouche By Jeff Glasco Revised August 8, 2016 Camden is an interesting battle given the disparity in quality of troops and leaders. The British have an
Waxtsov s 4th Peoples Army
 Russian Civil War 1918-1922 The Army Name Russian Civil War forces tended to be named after their commanders. In order to name your force, there are three columns, use the first three letters in your last
Joseph Grimm. Musician. Researched by Wickman Historical Consultants. 100 th Ohio Volunteer Infantry, Company B.
 Joseph Grimm Musician 100 th Ohio Volunteer Infantry, Company B Researched by Wickman Historical Consultants www.wickmanhistorical.com Background and Rank Born in October 1842, Joseph Grimm enlisted as
Struggles for Liberty
 Struggles for Liberty Finding Troops Was Difficult Typical solder: was very young (many under 16) had little money Army offered harsh conditions low pay a big chance of death Yet people still fought!!!
1) INTRODUCTION. Version 4.1 April 2008
 INTRODUCTION. Version 4.1 April 2008") By Igor with input from various associates, rake hells, cut-purses and ne er do wells, going by the names of Messrs Armstrong, Berry, Heading, Johnson and Smelchak. 1) INTRODUCTION COMMAND HORIZON is a
By Igor with input from various associates, rake hells, cut-purses and ne er do wells, going by the names of Messrs Armstrong, Berry, Heading, Johnson and Smelchak. 1) INTRODUCTION COMMAND HORIZON is a
Errata Setup: United States: ANZAC: The Map: Page 8, The Political Situation: Japan The United Kingdom and ANZAC
 Errata Setup: The following errors exist in the setup cards: United States: Add an airbase and a naval base to the Philippines. ANZAC: Remove the minor industrial complex from New Zealand, and change the
A Guide to the Microfilm Edition of. The American Expeditionary Forces during World War I, Journals of Operations
 A Guide to the Microfilm Edition of The American Expeditionary Forces during World War I, Journals of Operations Cover: American soldiers throwing hand grenades during World War I. Courtesy of the National
The Austrian Army
 ISTVÁN NAGY-L. The Austrian Army 1765-1815 The history of organisation and strength THESIS Subject and its importance In the long, united history of the Habsburg Empire and Hungary, there was only one
CHAPTER 5 SECURITY OPERATIONS
 CHAPTER 5 SECURITY OPERATIONS The reconnaissance platoon conducts security operations to protect the main body from enemy observation and surprise attack. These operations give the main body commander
Headquarters, Department of the Army
 FM 3-21.12 The Infantry Weapons Company July 2008 Distribution Restriction: Approved for public release; distribution is unlimited. Headquarters, Department of the Army This page intentionally left blank.
Bell Quiz: Pages
 Bell Quiz: Pages 569 577 1. What did Hitler do to the U.S. three days after Pearl Harbor? 2. What system did the U.S. employ to successfully attack German U-boats? 3. Which country in the axis powers did
French Forces at Verdun 21 February-4 March Commanding Officer: General Pétain
 French Forces at Verdun 21 February-4 March 1916 Commanding Officer: General Pétain I Army Corps General Guillaumat 1st Infantry Division: General de Riols de Fonclare 1st Infantry Brigade: 43rd Infantry
The. Most Devastating War Battles
 The 7 Most Devastating War Battles Prepared By: Kalon Jonasson, Ashley Rechik, April Spring, Trisha Marteinsson, Yasmin Busuttil, Laura Oddleifsson, Alicia Vernaus The Vietnam War took place from 1957
OF THE DEFENSE FUNDAMENTALS CHAPTER 9
 CHAPTER 9 FUNDAMENTALS OF THE DEFENSE The immediate purpose of defensive operations is to defeat an enemy attack. Army forces conduct defensive operations as part of major operations and campaigns, in
Colonel Kiyono Ichiki The Battle of the Tenaru
 Colonel Kiyono Ichiki The Battle of the Tenaru Micro Melee Scenario: The Battle of Tenaru Page 1 Historical Background "On 13 August 1942, the Japanese High Command ordered Lieutenant General Haruyoshi